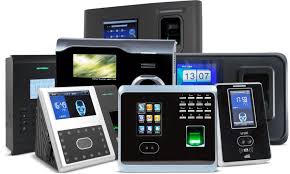
Answers to Your Biometric Access Control Questions

Answers to Your Biometric Access Control Questions

Biometric access control

When security is your primary concern, biometric access control might be the ideal solution. Biometric access is a form of security used by banks, government organizations, and other high-security industries and is considered one of the most reliable types of access control available.

Defining biometric access control

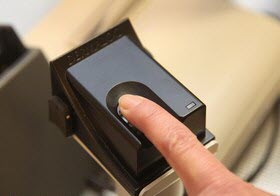
Simply put, biometric identification refers to the use of fingerprints, facial recognition, retinal scanning, iris scanning, or most other biological identification methods as security measures. Rather than using an access code or key card, each person granted access to a specific area must present a part of his or her body for scanning prior to gaining entry.

For example, there might be a room in an office where sensitive information is stored. By deploying a biometric access control solution, one might enjoy greater security while not hampering those who need access to the information stored there. It is much easier to steal a key card or guess a PIN number than to manipulate a retinal or fingerprint scan.

As technology has become more accessible, hacking personal identification numbers (PINs) and access codes is even easier for those wishing to gain unauthorized access to information and facilities. PINs and passwords are used on almost every personal account, such as an ATM or for a computer login. Users are encouraged never to write down a password or reuse it for multiple security purposes, but more often than not, a password is passed along from person to person, making a security breach inevitable.

Because of the risks associated with PINs, many businesses rely on biometric authentication to differentiate individual physical characteristics that can’t be replicated from one person to another. While a password can be corrupted or copied, biometric access is user-friendly yet stringent in its security protection.

How biometric access control works

There are several different ways biometric access control systems can be used for security purposes. In its most basic form, a software program can store biological data, which is then compared to the scan employed when an individual presents that same data for access. This data could be anything from a retinal scan to a fingerprint. Of course, more sophisticated technology is also available. For example, the U.S. government can use holographic images for facial recognition when government employees need to gain access to secure areas. Since different employees have varying access levels, biometrics is the easiest way to ensure that only approved workers enter restricted areas.

The features to look for

When you decide to use a biometric security solution for your business, it is important to consider features that will be available to you and price. Ideally, the biometric security system you choose should fit within your budget and provide sufficient security to ensure limited access areas cannot be accessed by unauthorized individuals.

Size is an important consideration when reviewing biometric access control products. Some biometric security equipment is no larger than a doorknob and can be used on any access point. Other pieces of equipment are much larger and require a security attendant to assist with operation.

One of the most common forms of biometric security devices in use today is the biometric door lock. This device uses fingerprint scanning to permit or deny access to restricted areas. When using this type of system, industry experts recommend purchasing a product that is reversible so it can be fitted to any door. You may also prefer additional features, such as a system that allows executives to manually override the biometric identification in case of emergency. A system with a high reliability rating is recommended, but will still not preclude the need for some sort of manual bypass.

Cost

When purchasing a biometric system, make sure to obtain several price quotes to compare prices and product lines. A single fingerprint reader can cost as little as $50 if one chooses to install it themselves. While most shops and offices need never use more than fingerprint readers, other options are available.

Full service installation of a single biometric hand reader with locking system for the average office or shop (1-25 employees and 2 doors) can cost upwards of $5,000 when installed by a professional. Research and consultation will clue you in on your security needs and help better define your budget.

Start your search today with Kadis’s free request for access control price quotes – we’ll provide the best biometric security system for your requirements

Contact KADIS.COM.NG on 08061379390 or 08024207231 for sales, installation and consultancy services.

Definition and Commercial Uses of Biometric Access Control
Biometric access control: definition and commercial uses
Can you imagine a future where your identity is the key to unlocking doors? In this article, we will answer this question through biometric access control. This secure and effective technology uses a combination of unique features of each person to authenticate and authorize access to various places and systems.

What is biometric access?

Biometric access is an advanced access control method that captures and analyses physical or behavioural attributes intrinsic to each individual to authenticate and authorise entry to a facility or system. Rather than relying on keycards, passwords or PINs, this system leverages biological characteristics such as fingerprints, facial recognition, iris, voice or even vein patterns to ensure accurate and secure identification.

Biometric access is not just a technology but also a proof of human nature’s complexity and uniqueness. This concept is based on the idea that each of us has a biological signature that is virtually impossible to replicate. 

Types of biometric technologies for access control

Several biometric technologies redefine the way we access critical areas. These include:

  • Facial recognition: uses artificial intelligence algorithms to analyze and compare a person’s unique facial features for biometric authentication.
  • Fingerprint: is a type of biometrics widely used in mobile devices. In this case, unique fingerprint patterns are captured and compared.
  • Iris recognition: This system, considered one of the pioneers in access control, evaluates the unique and complex pattern of the iris for identification. To do so, it captures the pattern of the eye iris through optical systems or sensors and contrasts it by algorithms with existing records of that person. This pattern is unique to each person and virtually unalterable over time.
  • Voice recognition: analyses vocal characteristics for authentication, such as tone and rhythm.
  • Vein recognition: check out vein patterns under the skin for authentication.

How biometric access control systems work

The way of working of a biometric access control system generally involves connected steps that are performed to authenticate an individual’s identity. The steps that are common to any system are:

  1. User enrolment: users register in the system by providing their biometric data. During this process, their unique biometric characteristics are captured and recorded.
  2. Storage: the biometric data is securely stored in the database.
  3. Scanning or access request: when the user attempts to enter an area through an access point or device, the system scans their biometric features.
  4. FExtraction: the features are extracted and turned into actionable data. Biometric algorithms parse and convert the captured features into a format that can be compared.
  5. Comparison: the extracted biometric data is compared with the stored templates.
  6. Authorisation: the system generates an authentication result based on the similarity between the captured and stored features. If the similarity exceeds a threshold, access is given.

For biometric access control to operate effectively, it is crucial to have a reading or scanning device that captures the biometric factor used in biometric authentication. Furthermore, software is required to transform the captured biometric data into a standard digital format, which verifies the captured data with the stored biometric pattern.

Advantages of biometric access control

Biometric access control presents several advantages, including:

  • A very high degree of security: biometric features are unique and challenging to replicate, which increases security.
  • Getting rid of passwords: users do not need to remember passwords, reducing access issues.
  • Boosting efficiency: authentication processes are fast and frictionless.
  • Preventing identity theft: biometric authentication significantly reduces the risk of impersonation.
  • Compliance: In some industries, such as healthcare or banking, biometric authentication can help comply with strict security and privacy regulations.

Sustainable biometrics and access control

Another benefit of controlling door, turnstile and barrier access with biometrics is reducing the use of conventional keycards. This innovative approach not only simplifies and secures identification processes but also addresses the concerns inherent in the production and management of plastic cards.

Traditional access card systems often used in enterprise and security environments have a notable environmental impact. Their production requires a combination of natural resources, energy and chemical processes that produce polluting emissions. By eliminating the need for physical cards, the demand for plastic and the processes related to their manufacture are drastically reduced.

It is important to note that sustainability lies not only in reducing plastic production but also in biometric access control’s efficiencies. The verification and entry process means less congestion in access areas and reduced energy consumption.

CCTV, Security Cameras, Access Control, Video Door Phones, Biometric Devices, Bio-metrics Attendance, Spy Gadgets, Automatic Gate, Electric Gate, Intercom, PABX, Burglary alarm systems, Fire Alarm Systems, Perimeter Intrusion Alarm, System, Electric Fence, Automobile/Car Tracker, DSTV, Free-To-Air, Satellite Systems, Gotv, Abuja, Apo, kabusa, galadimawa, gudu, lokogoma
CCTV, Security Cameras, Access Control, Video Door Phones, Biometric Devices, Bio-metrics Attendance, Spy Gadgets, Automatic Gate, Electric Gate, Intercom, PABX, Burglary alarm systems, Fire Alarm Systems, Perimeter Intrusion Alarm, System, Electric Fence, Automobile/Car Tracker, DSTV, Free-To-Air, Satellite Systems

Biometric access control use cases 

The versatility of biometric access control makes it suitable for various applications and industries. These include:

Companies

This type of access control has revolutionised entry and exit management in the corporate environment. Fingerprint-based identification or facial biometrics automates check-in and check-out, eliminates the need for manual records and saves time in HR. Furthermore, it provides records of employees working in production plants, prevents unauthorised personnel from entering warehouses, and controls access to car parks.

Government

Many government facilities store sensitive national security, diplomacy and justice information. Access control ensures that only authorised personnel and visitors have access to these areas and reduces the risk of unauthorised intrusions, leaks of confidential information and acts of terrorism.

Healthcare

Hospitals are crowded spaces, increasing the risk of strangers or emergencies. Access control helps prevent unauthorised entry to critical areas such as operating theatres, intensive care units, oncology, maternity wards and hospital pharmacies. Controlling the flow of people with biometrics decreases the spread of infection and the risk of contamination.

Education

Access control in educational institutions ensures that only authorised persons, such as students and teachers, can enter school facilities while protecting equipment, resources and data for research and student projects. Linked to this is its use for security and order at events and extracurricular activities.

Financial

Banks and other financial institutions have embraced biometric access control to strengthen the security of their facilities and protect assets. In this sense, it is a security measure for transactions and accessing vaults.

Airports

Airports are busy places, so border and access control are vital to maintaining public safety, ensuring citizens’ movement and safe and smooth operations running without incident. Furthermore, it provides that only passengers with valid tickets and permits, such as visas, can take a cross-border flight. It also ensures aviation security and the security of specific areas, such as runways.

Entry-Exit System (EES): document verification and biometrics

Europe is leading the way in biometric border access control with its Entry/Exit System. The main goal of this system is to speed up the entry and exit of individuals and to verify the identity of passengers arriving from outside the Schengen area or passengers expecting to travel to non-EU countries.

This control system at airports and other migration control areas uses a totem that integrates biometric software and devices that efficiently verify identity documents. The process is based on comparing the face of the ID holder with the photo stored in the MRZ and the visual inspection zone of passports.

Is the biometric access control system secure?

The biometric access system is generally considered secure due to the unique and distinctive nature of the biological attributes used for authentication. Nevertheless, like any technology, it may face challenges such as impersonation attacks, which is why security considerations must be addressed to ensure its effectiveness and protect users’ privacy.

Some additional security measures that can ensure maximum protection include data encryption, multi-factor authentication and liveness detection.

Data encryption

Biometric data, such as fingerprints or facial biometric templates, must be encrypted. The encryption process involves transforming biometric data into an unreadable and secure format using mathematical algorithms. It ensures that even if someone accesses the encrypted data, they will only see characters with no helpful information. The only way to make this data readable is by using the corresponding decryption key, which will only be known to people with legitimate access.

Biometric multi-factor authentication

Another critical security layer is multi-factor authentication (MFA). Combining biometric authentication with another method, such as a password or security token, creates a more robust system. While a criminal could spoof one factor, they are much less likely to be able to bypass multiple layers of authentication.

The idea behind two-factor biometric authentication is to add a layer of protection by combining unique and hard-to-replicate elements. While biometric features are inherently secure due to their uniqueness, implementing multi-factor authentication further enhances the system’s security by requiring users to provide multiple types of evidence to verify their identity.

A typical example of multi-factor biometric authentication is facial recognition, together with fingerprint recognition. In this scenario, a user would have to place their face in front of a facial recognition sensor and put their fingerprint on a fingerprint sensor to be authenticated. The above is a typical example of passenger identification at border checkpoints or crossings. 

Liveness detection

Attack detection is also an important measure. Biometric systems must be able to identify fraud attempts, such as using photographs instead of real faces at access with facial biometrics. Measures such as liveness detection allow the user’s authenticity to be verified in real time.

Privacy and ethical concerns in access control

Implementing biometric access control raises fundamental privacy and ethical concerns by using personal biometric data for authentication. These matters are crucial due to the unique nature of biometric data, which can reveal highly personal aspects of individuals.

In this sense, data protection regulations, such as the European Union’s General Data Protection Regulation (GDPR) and similar laws in other third countries, are essential to ensure that biometric data collection, storage and processing is done lawfully.

Importance of informed consent

The key focus in the implementation of such systems is informed consent. Users must be informed about what data will be collected, how it will be used and what their rights are about that data.

The storage and processing of biometric data must be safe and secure. As commented in the previous point, security measures should include data encryption and the implementation of cutting-edge security protocols to prevent unauthorised access and data breaches. Furthermore, data storage should be time-limited and justified for legitimate purposes.

Therefore, biometric access control systems should be implemented to ensure authentication and balance innovation and privacy protection.

What is the best biometric access control solution for your company?

The biometric access control solution choice depends on several factors, such as the environment, the level of security required and the budget. Working with providers with a customized approach and expertise in biometric security, such as kadis.com.ng, is essential to identify the best solution for your business.

Contact KADIS.COM.NG on 08061379390 or 08024207231 for sales, installation and consultancy services

Biometric Access Control Systems and Door Locks Complete Guide

Takeaways:

  • Biometric Access Control: This technology uses unique biological traits like fingerprints, faces, or irises to identify individuals and grant access.
  • System Functionality: Biometric systems rely on sensors, matching engines, and secure databases to verify identities and log every access event.
  • Advantages and Considerations: While they offer strong authentication and convenience, biometric systems must be implemented with care to address privacy, integration, and compatibility challenges.

No longer do locks rely on a simple metal key that can be easily duplicated. With advancements in commercially available biometric technology, access control systems can now use parts of the human body as a key!

CCTV, Security Cameras, Access Control, Video Door Phones, Biometric Devices, Bio-metrics Attendance, Spy Gadgets, Automatic Gate, Electric Gate, Intercom, PABX, Burglary alarm systems, Fire Alarm Systems, Perimeter Intrusion Alarm, System, Electric Fence, Automobile/Car Tracker, DSTV, Free-To-Air, Satellite Systems, Gotv, Abuja, Apo, kabusa, galadimawa, gudu, lokogoma
CCTV, Security Cameras, Access Control, Video Door Phones, Biometric Devices, Bio-metrics Attendance, Spy Gadgets, Automatic Gate, Electric Gate, Intercom, PABX, Burglary alarm systems, Fire Alarm Systems, Perimeter Intrusion Alarm, System, Electric Fence, Automobile/Car Tracker, DSTV, Free-To-Air, Satellite Systems

It’s not just a tech seen in spy movies and science fiction books anymore. Modern devices can now use the uniqueness of fingerprints, facial mapping, and eye scanning to manage access and improve security.

How Biometric Access Control Systems Work

The term biometric means using unique body characteristics as a method of identification. Since each human body is amazingly complex and distinctive, it works great as a hard-to-copy key. How does technology take that seemingly complicated data and make it an accessible medium?

Core Components: Sensors, Databases, and Matching Engines

In its simplest form, a digital access control system is a series of checks. The different components work together to cross-reference data to ensure a match.

First, the sensors input the initial data with a scan, whether tactile (fingerprint scanners) or visual (facial recognition systems or iris scans).

That recorded information is sent to a matching engine, which compares incoming data to a database that houses all the permissions for that particular system.

If a positive match is made between the input and stored data, access is granted and a log entry is recorded.

In the event that there is a mismatch, a log entry will be made for the failed attempt, and access will be denied.

Note: The templates that are stored in the system are actually made up of mathematical code and not actual images. That way, potential hackers can’t actually steal any useful data from the systems to copy the credentials, as the mathematical code is unique to the system and not standalone information!

Authentication Process: Enrollment and Verification

In order for the access control system to work effectively, it needs to be programmed with a record of permitted values. This step usually happens when the access equipment is installed. Professional installers can educate staff on how to input the information as new needs arise.

Biometric Types

Any part of a human body that works as a key is a biometric. The term comes from the two root words, “bio” meaning living, and “metric” meaning measure.

Fingerprint Recognition

The most commonly used method is fingerprints. The unique whorls and ridges of each person’s finger are specific to them and have been used as a way of identity verification long before the machine scanners were invented. Now, biometric door locks and fingerprint access control systems exist as a means of modern security!

Facial Recognition

Many higher-end phone brands actually implement biometric controls like facial recognition systems to gain access. The camera compares the physical characteristics of the face in front of the lens against the template stored in the phone, assuming it is programmed with this functionality.

Iris Scanning

More expensive biometric access control systems use the human eye to serve as a key. These devices emit a near-infrared light (NIR) to map even dark colored eyes. The scanner measures critical data points against stored templates to determine access permissions.

Voice Authentication

With the dawn of AI, voice recognition software for security has declined in popularity. Although voice authentication is better than no security, with voice modulators and replicators, these devices are highly susceptible to spoofing and can pose a security risk.

Note: Spoofing is the act of using computerized means to mimic a voice or identification credential.

Advantages of Biometric Systems

The reason that biometrics have become a popular option is because of the difficulty of tricking the systems.

Enhanced Security and Authentication

Biometric systems enhance security and authentication by relying on unique biological traits, such as fingerprints or facial features, that are extremely difficult to replicate or steal. This significantly reduces the risk of unauthorized access compared to traditional methods like PINs or keycards. Many biometric devices also include anti-spoofing technologies such as liveness detection and AI-based analysis, making it even harder for attackers to bypass the system. Additionally, each access event is tied to a specific individual, creating clear and accurate audit trails for accountability.

Efficiency and Convenience

One of the major perks of biometric access control solutions is the seamless experience they provide. Users do not need to carry cards, remember passwords, or worry about lost keys. Access is granted in seconds with just a glance or a touch, which keeps people moving and operations flowing smoothly.

For businesses managing high foot traffic or multiple access levels, this speed adds up to major time savings while improving workplace efficiency.

Elimination of Keys and Passwords

Keys can be lost, stolen, or copied. Passwords can be forgotten or shared. Biometrics removes those risks from the equation. Since biometric credentials are part of a person, they cannot be misplaced or handed off. This reduces the chances of unauthorized entry through shared logins or borrowed identifiers and makes managing access far easier for administrators.

Challenges in Implementing Biometric Systems

As with any advanced technology, biometric systems come with considerations that need to be carefully planned for. These challenges do not necessarily outweigh the benefits, but understanding them upfront helps with successful adoption.

Technical Compatibility Issues

Not every biometric system plays well with existing infrastructure. Integrating with older access panels, third-party security platforms, or outdated databases can require custom solutions or hardware upgrades. This is especially true in multi-site operations or buildings with legacy systems. Working with experienced security professionals can help streamline integration and avoid compatibility surprises.

Privacy and Data Protection Concerns

Because biometric systems collect sensitive biological data, implementing security measures to protect that information is essential. Privacy regulations such as GDPR and various state laws in the U.S. require clear policies around how biometric data is stored, processed, and shared. Biometric templates must be encrypted and stored securely, with limited access to authorized personnel only. Transparency with users about how their data is used and protected helps build trust and supports compliance.

Cost and Budget Considerations

While biometric systems offer clear advantages, they also come with upfront costs that need to be weighed against long-term value. Advanced sensors, secure databases, and integration services can require more investment than traditional locks or keycard systems. That said, many organizations find the long-term savings in reduced administrative workload, lower key replacement expenses, and minimized security breaches to be well worth it!

It’s also helpful to think about biometric access control as a scalable solution. Systems can often be installed in phases, starting with the most sensitive entry points and expanding as needs evolve.

Integration with Existing Security Systems

Biometric access control is most effective when it works in tandem with other security layers. Integrating it into a commercial security system, such as intercoms, surveillance cameras, or visitor management systems, can create a more complete picture of access events and potential threats. Coordination between systems also allows for faster response times when anomalies occur. When checking for compatibility with existing access control systems, work with a security expert to ensure proper functionality.

Conclusion

From fingerprints to facial recognition, biometric entry systems are transforming the way organizations manage secure entry. It blends high-tech innovation with practical benefits, offering both better authentication and a smoother user experience. While every facility is different, businesses looking to tighten security and streamline operations will likely find biometrics a powerful upgrade to their existing systems.

Not sure where to begin? Connect with the friendly experts at KADIS.COM.NG Security on 08061379390 or 08024207231 for a free onsite consultation and find the right biometric solution for your unique security needs!

Key Questions and Answers on Access control systems

Throughout history, humans have always found ways to secure access to areas—from wooden locks in Assyria to Tutankhamun’s tomb locked with a rope system. Around 200 years ago, Linus Yale patented the modern lock in 1848, and it has been the core of building security ever since. However, we now rely on cloud-based technology in many areas of our lives, and security is no exception.

There are many different physical access control systems, but before you decide which one is right for you, here are the answers to frequently asked questions. And remember, whichever one you choose, access control is designed to make your building a safer place.

1. How does access control work?

Access control provides physical security that restricts who can enter a specific area at any time. Technologically-advanced access control systems allow entry only to authorised users and verify everyone who enters and exits a monitored area.

These systems use different methods of controlling access, including Radio Frequency Identification lock systems, biometrics, electromagnetic mechanisms, keycards, and smartphones.

When someone tries to access an area, their credential is authenticated. The user’s information or credential—anything from a fingerprint to a security card—is sent to an Access Control Unit. This then establishes if the user should be granted access to the area.

Next, the Access Control Unit verifies if the valid user has permission to access the specific area. The user’s credentials will have to pass a series of digital tests such as:

  • Using the correct type of credentials for that particular area
  • Gaining access during a permitted timeframe
  • Using one of the correct trigger types

When the user passes all of these tests, they can gain access as the security device will be unlocked. This works differently depending on the type of security device in operation. For example, the power supply is momentarily stopped for an electromagnetic lock; however, the opposite happens for door strikes as a power supply unlocks the door for a few seconds.

For wireless locks the latch is engaged with the presentation of an approved credential but remains disengaged at all other times – preventing access but allowing free egress from the room or area under control.

2. What are the benefits of access control?

Keeping your business safe with the least amount of hassle is your prime concern. Opening and closing your business at the right time is a serious logistical challenge. Giving keys to every staff member is a risk—and there is the added problem of restricting access to certain areas for certain employees.

An access control system can provide answers to all of these problems. It takes away the need for one person to be in charge of maintaining lock systems, distributing keys to the right people at the right time, and the need to keep the whole system secure. Instead, it allows you to take control of your building’s security, modify it, and choose the best method for your requirements.

3. Is it easy to manage my access control system?

Administering a system is relatively simple, especially with the newer cloud-based access control systems as they integrate with much of your existing software, such as Google Workspace and Active Directory. In addition, these new systems are more flexible for service enhancements. They can be managed using administrative software that syncs automatically with Internet-connected Access Control Units—this means you can add or remove entries, schedules, alerts, and users.

Moreover, administrators can audit access control systems by generating reports for access logs. This may include user and entry activity and is helpful for security reasons. First, it ensures your system is working correctly without problems. And second, it is useful for adhering to compliance standards that are an essential component of your insurance requirements.

4. How do access control systems improve security?

This is generally the most widely asked question—and the reason businesses decide to make the switch from traditional lock to intelligent systems. Access control systems are more effective at prohibiting access for unauthorised personnel. The systems are harder to compromise, and they add an extra level of security for buildings of all sizes with different requirements.

Keys can be lost and copied, which can compromise your building’s security. There is no other option other than changing every lock in the building and issuing new keys, which is time-consuming and costly. However, access control systems use safer methods that are easy to disable quickly. For example, employees could be given pin codes, which are easy to block at any time. Or they could be given an access card, which can be cancelled instantaneously or programmed to expire at a given date or period after their initial issue. They could even use their own biometric information, which is not possible to replicate.

Companies use technology to record everyone who enters and exits your building. Records are kept of how long they stayed and which areas they accessed—useful for both employees and visitors. If there is a security breach in your building, getting to the bottom of the issue is more straightforward as everyone is tracked and verified.

5. Which industries could benefit from an access control system?

Security is paramount for everyone, so we can all benefit from an access control system—from large corporations to small businesses owners and everyone in between. The following three industries commonly adopt access control technologies:

Financial institutions

Banks are constantly under threat, and they need to manage security without employing physical security. An IoT access control system, for example, can lock doors and offices remotely without the need for physical intervention.

Multi-site businesses

Businesses with multiple sites have particular challenges when it comes to security. Traditional locks are not secure, and legacy access control systems present logistical challenges as each site requires its own individual server. A high level of support is also be required to make sure employees visiting multiple sites have the access they need.

However, the new cloud-based systems allow businesses the flexibility to scale up and provide security at multiple locations without each site needing an individual server. Remote access allows a single interface located anywhere globally to give and restrict access and permissions for all employees. This removes the administrative responsibility from the company’s own IT department.

Education providers

Providing security for students and teaching staff must be every institution’s top priority. Parents and students want to be sure that only people who have legitimate access to the facilities are onsite. Access control systems allow institutions to set parameters for specific individuals, including delivery drivers. Time restrictions can also be set for contractors who can only be on-site during particular hours.

Healthcare services

The logistics behind hospitals are complex. For example, many restricted access areas constantly change depending on the time of day. Shift patterns also pose challenges; individuals need access to places only when they are officially working. Moreover, healthcare facilities need to ensure that people with the correct permissions can access drugs, equipment, and sensitive records whilst allowing the free movement of people around public access areas.

6. How do I plan for access control installation?

Every building is different, so you must plan for its unique features before installing an access control system. Below are some key points to consider, but an expert security company will be able to work closely with you to understand your building’s specific requirements and make sure you are compliant with building regulations.

  • Check site drawings of your building to understand what components you need and where you should install them.
  • Ensure you get permission from the authorities to guarantee your access control design complies with regulations – always check with the fire office
  • Confirm in writing your plan for the system with the installation company and ensure you are entirely sure about the scope and cost of the project

7. How will access control make things easier?

Cloud-based access control systems allow virtually unlimited permissions and rules. They give you enormous scope to control your building and customise your security needs—which makes your life easier. You can:

  • Limit specific employees access to particular areas at certain times
  • Establish multiple authentication factors for certain employees
  • Restrict access to certain areas
  • Deactivate an employee’s access code or revoke their access card without changing the whole system
  • Sync your system directly with your HR database

Conclusion

Installing an access control system involves an initial cost, but this will also be an investment. New cloud-based systems will not only save you time (as well as the associated administrative overheads), they will also save you thousands of pounds preventing security breaches.

Not sure where to begin? Connect with the friendly experts at KADIS.COM.NG Security on 08061379390 or 08024207231 for a free onsite consultation and find the right biometric solution for your unique security needs!

Common PBX Phone System Issues & Troubleshooting Solutions

Common PBX Phone System Issues & Troubleshooting Solutions

When a PBX phone system is experiencing issues, it’s important to know how to troubleshoot them!

Every business relies heavily upon their telecommunications strategies, because your customers and clients need convenient ways to reach your team and ask important questions about your products and services. Telecom strategies are also crucial in terms of helping employees be more efficient task-solvers.

PBX phone system, which stands for private branch exchange, is a low-maintenance and user-friendly telecom solution that’s adaptable for all of today’s tech-savvy necessities. But it’s important to remember that even the high-quality PBX systems can sometimes experience issues, and business teams need to be prepared to address these issues in order to maintain their overall efficiency.

So below we’ll be delving deeper into some of the most common issues connected to PBX phone systems, as well as some troubleshooting tips to help you address any minor bugs!

Common PBX Phone System Issues & Troubleshooting Solutions

PBX phone systems are typically very reliable and experience little to no problems, but some issues occur every now and again. Below are some of the common issues that business owners should be aware of:

Jitter

One issue that PBX phone systems sometimes experience is referred to as jitter, and this means the call’s data might be temporarily disrupted and subsequently result in call quality issues. This is particularly an issue with PBX systems operating via the Internet, but the good news is that there’s a device called a jitter buffer that makes sure to maintain call quality and eliminate the risks of jitter.

So if your company’s PBX phone system doesn’t currently have a jitter buffer and is experiencing jitter symptoms, you’ll want to install one to fix these problems!

Inadvertent Busy Signals

No one wants to turn customers off by accidentally having a busy signal up, but some PBX phone systems will have wiring problems that then lead to inadvertent busy signals.

This is why it’s so important to make sure your system is correctly wired up, and that all of your devices are properly connected to your building’s electrical system. You may also want to consider a system reboot to troubleshoot this issue.

Bandwidth Troubles

Sometimes businesses will still experience call quality problems even when they have a jitter buffer, and these business phone system problems are often connected to bandwidth dilemmas. This is particularly an issue with VoIP phone systems, because these systems require top-notch Web connections.

When your business has low bandwidth, it means you can only send out a limited amount of data via the Internet. This typically leads to call quality problems. You should have at least 100Kbps with your Web connection’s bandwidth, and you may also need to upgrade your router to prioritize your website’s traffic and maintain top-quality calls.

Call Placement Issues

When your company’s calls aren’t being connected to the correct employees or departments, it’s an easy issue to resolve.

The main thing you’ll need to do is reconfigure your system’s Interactive Voice Response (IVR). This can be done by using your PBX phone system’s administration panel to reset your IVR settings and redirect your calls to where they’re supposed to go.

Latency

If you can hear your voice while you’re talking to someone on the phone, that’s referred to as latency. It technically is the term for any delay between the things you say and when the other line hears your voice.

There are three main types of latency, including:

  • Queue delays
  • Handling delays
  • Propagation delays

Here are some troubleshooting tips for these types of latency problems:

  • Ensure a bandwidth reservation
  • Utilize a multi-protocol label switching (MPLS)
  • Create a policy-based network management

Outdated Network Router

As mentioned above, outdated routers can also negatively impact a phone system’s call quality. This type of problem can even happen when your system has an adequate bandwidth.

So when your PBX system has decreased its latency issues and increased its bandwidth, ongoing call quality issues are likely connected to your router. These days, businesses need top-quality routers to avoid all sorts of issues related to the Internet.

Not sure where to begin? Connect with the friendly experts at KADIS.COM.NG Security on 08061379390 or 08024207231 for a free onsite consultation and find the right biometric solution for your unique security needs!

CCTV, Security Cameras, Access Control, Video Door Phones, Biometric Devices, Bio-metrics Attendance, Spy Gadgets, Automatic Gate, Electric Gate, Intercom, PABX, Burglary alarm systems, Fire Alarm Systems, Perimeter Intrusion Alarm, System, Electric Fence, Automobile/Car Tracker, DSTV, Free-To-Air, Satellite Systems, Gotv, Abuja, Apo, kabusa, galadimawa, gudu, lokogoma
CCTV, Security Cameras, Access Control, Video Door Phones, Biometric Devices, Bio-metrics Attendance, Spy Gadgets, Automatic Gate, Electric Gate, Intercom, PABX, Burglary alarm systems, Fire Alarm Systems, Perimeter Intrusion Alarm, System, Electric Fence, Automobile/Car Tracker, DSTV, Free-To-Air, Satellite Systems
What is PABX System? A Comprehensive Guide

What is PABX System? A Comprehensive Guide

Time and technology have significantly changed the consumer telephony landscape, especially with the latest innovation being the VoIP (Voice Over Internet Protocol) business phone system.

Now, business communication has become easy and cost-effective. The “IP” in VoIP marks the beginning of a new era of business communication, with the internet being the underlying transport technology and not cables.

Telephony technology like PABX systems generally uses Voice Over Internet Protocol to offer businesses enhanced global communication experiences.

What is PABX System?
PABX stands for Private Automatic Branch Exchange System. It is a business telephony system used for internal and external communication at a business. This is done through channels like analog, ISDN, or VoIP.

PABX allows businesses multiple extensions with a single extension number. This mitigates the need to use multiple landlines linked to the public network, which is a costlier alternative.

A Private Automated Branch Exchange system can be connected to several devices in an organization. And each of these devices have a designated extension number.

PABX phone systems are available as virtual or hosted solutions and as on-premise solutions to be run on your hardware. They are generally owned and administered by the hosting company.

They are the preferred choice of telephony for many call centers, SMBs, startups, and large enterprises.

PABX vs PBX: What are the differences?
Many people are often unclear about what a PABX system actually means, as the term is relatively new and often used interchangeably with PBX. Both PBX and PABX are types of private telephone switching systems, but they aren’t the same.

The following table breaks down the key differences between PBX and PABX, highlighting how PABX offers enhanced capabilities compared to its predecessor.

How does a PABX system work?
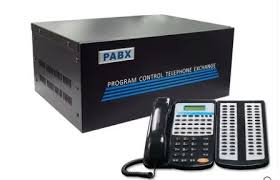
PABX helps optimize how a business communicates internally, with external stakeholders, and with customers.

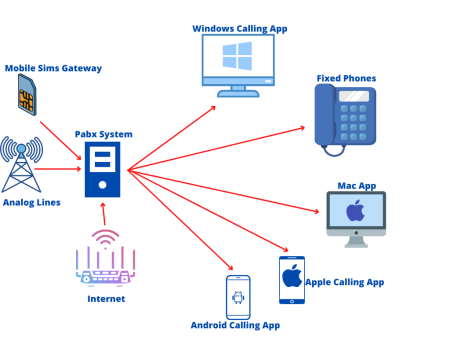
A PABX works as a personal, internal phone network that houses modems, adapters, routers, telephone handsets, and even fax machines.

how does PABX works

This mitigates the need to access any external public network when making calls inside the organization.

The caller dials a relevant extension number, taking them to a particular receiving line.
An Interactive Voice Response (IVR) system now plays pre-recorded options and prompts the caller to either speak or press a button to respond. It will analyze the response and automatically route it to the relevant department.
The outgoing calls will, however, need to connect to the public network through trunk lines. These trunk lines are shared by staff members across extensions and handsets. This might cause quality issues during high-frequency call times.
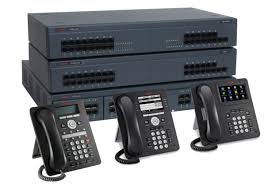
To tackle this, business phone systems are now rapidly moving toward the cloud. This internet-based infrastructure mitigates the need for heavy copper wiring and junction connections apart from offering a seamless calling experience.

Moreover, cloud systems auto-update and manage networks directly from a remote computer terminal or a smartphone. This helps the extension lines to operate optimally.

Cloud-based PBAX also connects to a shared team list rather than one handset. So, in case of an agent’s unavailability, the next available agent can fill in.

Additionally, businesses can make and receive calls globally at a cost-effective rate. VoIP calls help companies cater to international audiences, effectively collaborate with offshore stakeholders and manage remote teams.

Benefits of PABX
The PABX (Private Automatic Branch Exchange) phone system provides several advantages that boost communication efficiency and streamline business operations. Here are the key benefits of using a PABX phone system:

1. Centralized Management: PABX systems offer centralized control over telecommunication activities, enabling administrators to manage settings and configurations from a single interface.

2. Cost Savings: With a PABX phone system, businesses save on costs by reducing the need for multiple phone lines and lowering maintenance expenses due to centralized infrastructure.

3. Advanced Features: PABX systems offer advanced features like voicemail, call forwarding, IVR, conferencing, and call recording, enhancing communication capabilities beyond basic phone systems.

4. Remote Accessibility: Users can access the PABX phone system remotely, allowing teams to make and receive calls from any location, which supports flexible and hybrid work environments.

5. Scalability: Easily scale the PABX system as your business grows. Add or modify extensions without major hardware upgrades, making it ideal for growing teams.

6. Improved Internal Communication: A PABX phone system enables seamless internal communication with direct extension dialing, increasing productivity and team collaboration.

Essential Features of a PABX System
Before you invest in a PABX system, you need to ensure that the system has these main features.

Essential business phone system features

Auto Attendant: Aka digital receptionist connects callers to the desired extension number automatically.
Automatic Ring Back: Enables agents to pre-dial an active phone line and get a call back whenever the line goes free.
Call Parking: Allows staff to hold an outgoing call in a specific telephone unit and then continue the conversation on a different device.
Call Barging: Enables a supervisor to monitor and enter the conference bridge silently.
Call Pick-up: Allows any staff to pick up the call and answer on behalf of a different recipient.
Call Recording: Recording feature for documentation, legal, monitoring, training, or other purposes.
Call Waiting: Enables admin to handle multiple ongoing calls at once.
Do Not Disturb (DND): To block unnecessary calls at any specific time point.
Gamification: Give your sales reps the much-needed recognition and rewards to motivate them to do more.
IVR (Interactive Voice Response): A smarter auto attendant where callers can self-serve for common queries.
Post-Call Surveys: To measure client satisfaction and optimize your agents’ performance.
Ring Groups: Group multiple extension numbers into one. It enables multiple phones to ring simultaneously or in a sequence.
Shared inbox: To increase visibility into all customer-agent communication.
Smart Switch: Get different telephony service providers to mitigate all your call connectivity issues.
Speed Dialing: Using shortcuts for extension numbers to easily remember the contact details of departments or staff members.
Voicemail: So you never miss out on a question or a complaint

Evolution of PABX
The evolution of the PABX (Private Automatic Branch Exchange) phone system reflects the significant advancements in business communication technology over time, moving from manual switchboards to automated and internet-connected systems.

Evolution of pabx

1. The Manual PBX Era (Early 20th Century)
PBX systems originated as manual exchanges, requiring operators to physically connect calls by plugging wires into switchboards. This setup helped businesses manage internal calls and connect with outside lines efficiently, though it demanded extensive labor and expertise.

2. Analog PABX – The First Step in Automation (Mid 20th Century)
As technology progressed, businesses adopted Analog PABX systems, which automated some switching functions but still relied on analog circuits and signals. Analog PABX systems could route calls within a private network and connect to external lines more efficiently, though their capacity was limited, and audio quality could be inconsistent.

3. Digital PABX – Advancing with Computer Technology (Late 20th Century)
The shift from analog to digital technology marked a significant leap in PABX capabilities. Digital PABX systems converted voice signals into digital data, enhancing call quality and enabling advanced features like voicemail, call forwarding, and conferencing. Digital systems allowed for more reliable performance and opened the door to seamless integration with other digital business tools.

4. IP-PABX – Internet Protocol Integration (Early 21st Century)
IP-PABX brought another level of innovation by leveraging Internet Protocol (IP) to route calls over the Internet. This integration allowed PABX systems to support Voice over IP (VoIP), enabling remote accessibility and easier scalability. Employees could now make and receive calls from any internet-enabled device, supporting modern work-from-anywhere models.

5. Cloud PABX – The Modern Solution (2010s-present)
Cloud PABX, or Cloud PBX, represents the latest stage in PABX evolution, offering all the functionality of traditional PABX with the added benefits of cloud computing. By hosting the PABX infrastructure in the cloud, businesses avoid the cost and complexity of on-site hardware, while gaining greater flexibility, automatic updates, and accessibility from any location.

6. Future Trends in PABX Technology
Looking forward, PABX systems are likely to integrate AI, omnichannel capabilities, and advanced analytics. AI could automate customer interactions, provide predictive insights, and optimize call routing. Future PABX systems may unify voice, messaging, email, and social media, creating a seamless communication platform for businesses.

Pros and Cons of PBX and PABX
Private Branch Exchange Systems (PBX) and Private Automatic Branch Exchange Systems (PABX) are two commonly interchanged terms. Rightly so because the only difference between the two is automated switching.

Let’s understand the main pros and cons of PBX and PABX:

Private Branch Exchange (PBX)
The PBX system is the “legacy” system that was found in all workspaces after 1950, making POTS altogether oblivious. PBX fundamentally works on a landline network and uses manual switchboard operators to connect calls in an organization – internally and externally.

Why do SMEs Need to Adopt Cloud PBX Phone Systems?

Pros
Houses more features than the plain old telephone system
Mitigated the need for installing multiple phone lines.
Cons
Efficiency decreases in manual operations.
Long holds.
No special features.
Reliant on the landline telephone network.
Private Automatic Branch Exchange (PABX)
As technology progressed, business communications developed. First-generation PABX phones allowed users to connect by merely pressing extension codes on their phones.

Business telephone technologies

After the advent of the internet, VoIP PABX systems became the first choice of all. They offered revolutionary features and benefits.

Pros
No need to install complex copper wiring.
Enjoy almost instant connections.
One PABX system suffices for all branches of a business, even globally.
Softphones or VoIP software can be installed on personal computers and mobile devices.
Extra efficiency-improving features.
Automatic upgrades.
Low-cost hardware.
Cons
Requires constant internet connection stability
What Does PABX Have To Do With IP Communications?
PABX (Private Automatic Branch Exchange) systems are essential tools for managing business phone networks. Traditionally, PABX systems connected internal phone lines within a company to external telephone networks.

However, as communication technology evolved, so did the way PABX systems operated. This is where IP communications come into play.

1. The Role of IP in PABX Systems
IP communications refer to transmitting voice, video, and data over the Internet Protocol (IP), primarily through VoIP (Voice over Internet Protocol).

IP-based communication systems use the Internet instead of traditional telephone lines to send and receive data. This is where IP-PABX comes in—integrating PABX systems with IP technology to route calls over the internet rather than conventional phone lines.

2. IP-PABX: The Bridge Between PABX and IP Communications
An IP-PABX, also known as a VoIP-based PABX, combines the traditional PABX functionality with the power of IP communications.

In an IP-PABX system, calls are transmitted over the internet, significantly reducing the cost of long-distance communication and enabling features like video conferencing and more advanced call routing.

3. IP-PABX and Cloud-Based Solutions
With Cloud PBX, businesses can access their phone system from anywhere, anytime, with no need for on-site hardware or infrastructure.

This system is managed and maintained by third-party cloud providers, who handle all the updates and technical support.

How to choose the right PABX System for your small business?
If you are a small business and are interested in choosing the right PABX system for you, here are the things you should consider beforehand:

A. Which type of PABX system are you going to choose?
There are many types of PABX systems you can choose from depending on your particular business needs:

1. Traditional PABX phone system
Landline-based and depends on a physical hardware box.
A Low-grade PBX system which is sufficient for small businesses only if they operate from one location.
The hardware of this PBX requires more space and regular maintenance.
Considering the hardware costs, they are extremely expensive.
2. Digital PABX
Can deploy both a traditional analog PABX system and IP phones.
Better sound quality than traditional PABX.
3. On-site IP PABX
Uses ethernet cables to connect the telephones offering a hassle-free experience if you move your office.
Equipped with advanced functionalities like call stability, voicemail to email, video calling, mobile integration, call accounting, disaster recovery, and others.
Unsuitable for startups and SMBs due to high installation and hardware charges.
4. Cloud-based/Hosted PABX
Supports both inbound and outbound calls.
Offers virtual international phone numbers, the best option if your business is global.
No hardware purchase or set up fee. Only a low monthly fee makes it an extremely viable option for all businesses.
5. Virtual PABX
A lighter version of the cloud-based PABX phone systems.
Would not have some non-essential features.
The most cost-effective option for small- and- mid-sized businesses, even if they are global.
B. Are you getting a unified communications framework?
Employees now need a flexible and agile work environment. It is only wise to deploy cross-channel telephone systems that employees can access from anywhere. All they need is a high-speed internet connection.

Reporting capability and analytical tools are also important features of an SMB’s phone service. Managers can key metrics such as average call duration, call wait time, and agent performance. This promotes visibility and facilitates better strategic decisions.

C. Do you need third-party integrations?
If you do, then you will likely need integrations between those tools and your phone system.

Look for a PABX system that offers easy multiple third-party integrations with tools like Microsoft 365, Google Workspace, Salesforce, Zendesk, Intercom, and more.

Third-party integrations allow you to automatically sync data from your communication tool to other systems. This increases productivity reduces human error and ensures compliance.

For instance, post a customer interaction, customers’ details, their queries, and who supported them will be automatically stored in the CRM. These insights can be later on used to offer tailored experiences.

D. Is it scalable?
It is known how important scalability is for growing businesses. You might have to scale your operations or workforce up or down, and your technology must support that. IP PABX offers significantly more scalability than cloud PABX systems because physical systems require adding more hardware as businesses grow.

E. What’s the quality of customer support?
While discussing features and technology, it is common to miss out on considering the quality of customer support. Regardless of the PABX system you choose, you will need support. So, ensure that your service provider is easily approachable and that they have good customer success measures in place.

F. Speak to your staff
It is vital to speak with staff to understand their needs and expectations from the new phone system – layout the features and benefits to them.

Suppose you may require them to use their phones to stay online on the go. Ensure you have their buy-in.

Changing the phone system is a simple yet disruptive long-term change. Having everyone on the same page is essential for success.

Conclusion
We hope you will now understand the basics of a PABX system, its types, how it differs from a PBX system and how you can leverage it to boost efficiency at the workplace and in general. To book a demo for a VoIP PABX system, click here.

FAQs
1. Should You Setup Your Own PABX System or Opt for a Hosted One?
An on-cloud or hosted PABX system is today’s most sought-after business phone system. Since hosted PABX systems are on the cloud, they use ethernet and need no complicated wiring. You also don’t need to invest in hardware, as these systems can easily connect with yours.

2. What are the advantages of automating your PBX?
Automating your PBX business phone systems can help you save resources. For example, it can allow you to employ your staff in more complex tasks rather than working on a switchboard. In addition, you can mitigate problems that follow human error. You also save time as PABX systems have no long call wait times, and it connects to the receiving line instantly.

Everything You Need to Know About PABX or Intercomm System (Complete Guide)

PABXCommunication systems are essential for offices worldwide. Whether it’s a large corporation or a small business, having an internal phone network is vital. The arrival of PABX – the Private Automatic Branch Exchange method – has changed everything.

In the past, landline phones were the primary means of business communication, but they had limitations such as power outages and high costs from service providers. Most business communications capabilities are made possible by implementing private branch exchange (or PBX) systems, but they require operators to manage calls manually.

PABX system not only significantly reduces communication costs for businesses but also enhances the interconnectedness of systems and response times. In this article, we’ll explore the differences between PBX and PABX and how you can implement these solutions in your business.

What is PABX and what does it stand for?

We’ve already established that PABX stands for Private Automatic Branch Exchange. It is like a mini-telephone network within a company or organization.

Imagine you have a big office with many employees, and everyone needs to make calls to each other and to people outside the office. Instead of each person having a direct line to the outside world, everyone is connected to a central system—the PABX.

Before PABX came along, businesses had to use human operators to connect calls by hand. This process was time-consuming and lacked efficiency. PABX systems made this whole process automatic.

  • Private: This means it’s a system that is used by a specific group or organization, and not available to the public.
  • Automated: The system is computer-controlled, which means it can handle tasks like routing calls without the need for a human operator.
  • Branch Exchange: This is a term that comes from the days of manual telephone exchanges. In modern terms, it refers to the central point where calls are managed and distributed within the organization.

Originally, PABX systems were connected to the Public Switched Telephone Network (PSTN). This meant that all outgoing calls were routed through traditional telephone lines, which were managed by telecom companies. Over time, as technology evolved, many PABX systems started transitioning to Session Initiation Protocol (SIP).

PABX vs. PBX: What’s the Difference?

Nowadays, the terms Private Branch Exchange (PBX) and Private Automatic Branch Exchange (PABX) are used almost interchangeably. This is because in essence, they serve similar fundamental purposes, but the automation and advanced features of PABX systems represent a significant evolution from the older, manual PBX systems.

Initially, PBX telephone systems were manually operated, requiring human operators to connect calls. With technological advancements, PABX systems emerged, automating the call routing process and adding more sophisticated features. Today, many PABX systems have transitioned to IP-PBX, which uses internet protocols for communication, offering even more flexibility and cost savings.

Summary of Differences

  • Manual vs. Automatic: Traditional PBX systems require manual operation, while PABX systems automate call routing and management.
  • Features and Complexity: PABX systems typically offer more advanced features and capabilities compared to traditional PBX systems.
  • Technology Integration: PABX systems are more likely to integrate with modern digital communication technologies.


How Exactly Does a PABX System Work?

Private Automatic Branch Exchange (PABX) was made possible by the arrival of the capability to electronically switch between calls without the need for manual operators. This advancement was the key to developing a phone system that would completely do away with the need for hiring people to do the menial task of answering and transferring incoming calls.

Without getting too much into the technicalities, PABX systems, in their most basic version, make use of extension numbers, which are assigned to each VoIP phone and analog phone in a given office. For example, if you’d like to make a call to one of your co-workers who’s in his office next door, the only thing you’d have to do was type in the extension number on your PABX-enabled phone, and the call would directly go through to the receiver.

Private Automatic Branch Exchange (PABX) systems have fixed that by removing the middlemen (operators) while keeping the structure of PBX systems intact. Phone extension numbers remained, but the switchboard was replaced with buttons placed directly on the telephones themselves, allowing any employee to carry out internal phone calls without waiting in line for what sometimes felt like an eternity. Modern PABX systems make use of IP-based phones, and companies providing these services often base their entire functionality around internet connection, removing the need for installing phone lines altogether.

Evolution of PABX System

Private Automatic Branch Exchange (PABX) systems have undergone significant transformations since their inception, evolving from manual switchboard operations to sophisticated digital and cloud-based solutions. This evolution reflects advancements in telecommunications technology and changing business communication needs.

Early Beginnings: Analog PBX Systems

PBX systems started in the late 1800s when businesses used manual switchboards to handle internal calls. They relied on analog signals and copper wires to link phones to a central unit. Early PBX systems were big, costly, and needed operators to manually connect calls. Because of their high cost, only large organizations could afford to install and maintain them.

Transition to Automation: The Rise of PABX

By the 1960s, the need for more efficient communication led to the development of Private Automatic Branch Exchanges (PABX). These systems automated the call routing process, eliminating the need for human operators. Early PABX systems allowed businesses to place internal calls without occupying external phone lines, significantly reducing communication costs and increasing efficiency.

Technological Advancements: From Analog to Digital

The 1970s marked a pivotal shift with the introduction of digital PABX systems. Unlike their analog predecessors, digital systems utilized digital signals, enabling better call quality, more extensions, and advanced features such as call routing and voicemail. This transition also made it easier for businesses to scale their communication systems as needed.

The VoIP Revolution: Cloud-Based PABX

The advent of Voice over Internet Protocol (VoIP) in the late 1990s further transformed PABX technology. Cloud-based PABX solutions emerged, allowing businesses to operate without extensive on-premise hardware. These modern systems leverage internet protocols for voice communication, enabling limitless scalability and integration with various multimedia applications.

Summary of The Evolution:

Era Key Features Technology Used
Manual PBX Manual call routing by operators Analog switchboards
Early PABX Automated internal calling Early electronic switches
Digital PABX Enhanced call quality, advanced routing Digital signals
Cloud-based PABX Scalability, multimedia communication VoIP and internet protocols

Benefits of Using PABX Systems

  • Cost Efficiency: PABX systems reduce call and operational costs through automation and VoIP technology, making communication more affordable for businesses.
  • Scalability: Easily expandable, PABX systems allow businesses to add or remove lines and extensions as needed, supporting growth and changing requirements.
  • Advanced Features: PABX offers features like auto-attendant, call routing, conference calling, and voicemail, enhancing communication and customer service.
  • Improved Productivity: Integration with CRM and unified communications streamlines workflows, enhancing overall productivity and efficiency within the organization
  • Centralized Control: PABX systems provide a centralized point of control for managing all telecommunication activities, making it easier to oversee and adjust settings as needed.

PABX: Most Important Features

In our increasingly interconnected and interdependent world, the need for fast, reliable connectivity should be prioritized above anything else. This is especially important in business environments, where minutes (or even seconds) of hesitation or lengthy session initiation can end up costing thousands of dollars.

An increasing number of companies have been utilizing voice over IP (internet protocol) technology to achieve the best results possible. Small businesses are especially looking for cost-effective digital voice solutions. It may be difficult to decide on the right communication service for your business without understanding its main features.

Some of the main characteristics include:

  • Effortless call transferring
  • Constant connectivity independent from any phone service provider
  • Using VoIP (Voice over Internet Protocol) for the best call quality possible
  • Adjustable to the needs of your business

Some advanced features include:

  • Interactive Voice Response (IVR)
  • Auto Attendant
  • Call Recording
  • Conference Call
  • Voicemail
  • Call waiting
  • Call Center

How To Choose the Right PABX Systems

When selecting a Private Automatic Branch Exchange system, several key considerations must be taken into account to ensure it meets your business needs effectively. Here are the primary factors to consider:

  1. Business Requirements: This involves understanding your current size, the number of employees, and anticipated growth, ensuring the system you choose can scale accordingly. Additionally, estimating the average daily call volume will help determine the necessary capacity.
  2. Features and Functionality: Essential features include call forwarding, voicemail, call waiting, and caller ID. Advanced features such as auto-attendant, call recording, conferencing, and CRM integration can significantly enhance business operations. Ensure the system supports remote and mobile workers and is scalable to accommodate future growth.
  3. Budget and Cost: Evaluate the initial costs, including hardware, installation, and setup fees, as well as ongoing costs such as maintenance, upgrades, and monthly service charges. Conduct a cost-benefit analysis to ensure the investment is justified by the anticipated benefits and efficiencies.
  4. Reliability and Support: Research the reputation of potential vendors for reliability and customer service. Ensure that 24/7 technical support is available with quick response times, and understand the warranty and service level agreements (SLAs) to ensure comprehensive coverage for repairs and maintenance.
  5. Security: Ensure the PABX system has robust data protection measures to guard against breaches. Additionally, check for disaster recovery options and data backup solutions to safeguard your business communications in case of emergencies.
  6. User-friendliness: The system should have an intuitive interface that is easy for both administrators and employees to use. Ensure that training materials and resources are readily available to help users get up to speed quickly and efficiently.

KADIS.COM.NG Solutions for Your Unified Communication Needs

Private automatic branch exchange (PABX) systems, just like any other product or service, come in all sorts of shapes and sizes. Not all of them will perfectly align with your business needs.

KADIS.COM.NG solutions are incredibly versatile, making our PABX offer one of the broadest ones in the industry. You can choose between an on-premises VoIP PBX system, granting you the ultimate and complete control over the unified communications at your office. If you want an easy option, our cloud-based PBX system is great for businesses of any size. It offers a reliable UC service without the need for equipment maintenance.

Choose KADIS.COM.NG solutions for unified communications to improve and maintain seamless connectivity in your office. Regardless of the service you select. This choice will benefit your office for a long time.

CCTV, Security Cameras, Access Control, Video Door Phones, Biometric Devices, Bio-metrics Attendance, Spy Gadgets, Automatic Gate, Electric Gate, Intercom, PABX, Burglary alarm systems, Fire Alarm Systems, Perimeter Intrusion Alarm, System, Electric Fence, Automobile/Car Tracker, DSTV, Free-To-Air, Satellite Systems, Gotv, Abuja, Apo, kabusa, galadimawa, gudu, lokogoma
CCTV, Security Cameras, Access Control, Video Door Phones, Biometric Devices, Bio-metrics Attendance, Spy Gadgets, Automatic Gate, Electric Gate, Intercom, PABX, Burglary alarm systems, Fire Alarm Systems, Perimeter Intrusion Alarm, System, Electric Fence, Automobile/Car Tracker, DSTV, Free-To-Air, Satellite Systems

Take your business communications to the next level with KADIS.COM.NG

CALL OR WHATSAPP 08061379390 OR 08024207231

What is PABX System? A Comprehensive Guide and What you Must know About PABX/Intercom

What is PABX System? A Comprehensive Guide

Time and technology have significantly changed the consumer telephony landscape, especially with the latest innovation being the VoIP (Voice Over Internet Protocol) business phone system.

Now, business communication has become easy and cost-effective. The “IP” in VoIP marks the beginning of a new era of business communication, with the internet being the underlying transport technology and not cables.

Telephony technology like PABX systems generally uses Voice Over Internet Protocol to offer businesses enhanced global communication experiences.

What is PABX System?

PABX stands for Private Automatic Branch Exchange System. It is a business telephony system used for internal and external communication at a business. This is done through channels like analog, ISDN, or VoIP.

PABX allows businesses multiple extensions with a single extension number. This mitigates the need to use multiple landlines linked to the public network, which is a costlier alternative.

A Private Automated Branch Exchange system can be connected to several devices in an organization. And each of these devices have a designated extension number.

PABX phone systems are available as virtual or hosted solutions and as on-premise solutions to be run on your hardware. They are generally owned and administered by the hosting company.

They are the preferred choice of telephony for many call centers, SMBs, startups, and large enterprises.

CCTV, Security Cameras, Access Control, Video Door Phones, Biometric Devices, Bio-metrics Attendance, Spy Gadgets, Automatic Gate, Electric Gate, Intercom, PABX, Burglary alarm systems, Fire Alarm Systems, Perimeter Intrusion Alarm, System, Electric Fence, Automobile/Car Tracker, DSTV, Free-To-Air, Satellite Systems, Gotv, Abuja, Apo, kabusa, galadimawa, gudu, lokogoma
CCTV, Security Cameras, Access Control, Video Door Phones, Biometric Devices, Bio-metrics Attendance, Spy Gadgets, Automatic Gate, Electric Gate, Intercom, PABX, Burglary alarm systems, Fire Alarm Systems, Perimeter Intrusion Alarm, System, Electric Fence, Automobile/Car Tracker, DSTV, Free-To-Air, Satellite Systems

PABX vs PBX: What are the differences?

Many people are often unclear about what a PABX system actually means, as the term is relatively new and often used interchangeably with PBX. Both PBX and PABX are types of private telephone switching systems, but they aren’t the same.

The following table breaks down the key differences between PBX and PABX, highlighting how PABX offers enhanced capabilities compared to its predecessor.

Feature PBX (Private Branch Exchange) PABX (Private Automatic Branch Exchange)
Definition Private telephone network Private automated telephone network
Technology Uses analog technology Uses digital technology
Switching System Manual, using physical switchboards Electronic, automated switching
Automation Manual (originally required operators) Fully automated, and no operators are needed.
Setup & Maintenance Complex setup requires on-site maintenance Easy setup, with remote management capabilities
Cost Efficiency Higher operational costs due to maintenance and hardware upgrades Cost-effective with lower maintenance costs and automatic updates
Flexibility Hard to modify Supports integration with VoIP and cloud solutions
Ideal Use Cases Mostly outdated, mainly of historical interest Preferred for businesses of all sizes using modern phone systems
Remote Accessibility Limited to the physical location Accessible remotely from any internet-connected device

How does a PABX system work?

PABX helps optimize how a business communicates internally, with external stakeholders, and with customers.

A PABX works as a personal, internal phone network that houses modems, adapters, routers, telephone handsets, and even fax machines. 

how does PABX works

This mitigates the need to access any external public network when making calls inside the organization. 

  • The caller dials a relevant extension number, taking them to a particular receiving line.
  • An Interactive Voice Response (IVR) system now plays pre-recorded options and prompts the caller to either speak or press a button to respond. It will analyze the response and automatically route it to the relevant department. 

The outgoing calls will, however, need to connect to the public network through trunk lines. These trunk lines are shared by staff members across extensions and handsets. This might cause quality issues during high-frequency call times. 

To tackle this, business phone systems are now rapidly moving toward the cloud. This internet-based infrastructure mitigates the need for heavy copper wiring and junction connections apart from offering a seamless calling experience.

Moreover, cloud systems auto-update and manage networks directly from a remote computer terminal or a smartphone. This helps the extension lines to operate optimally.

Cloud-based PBAX also connects to a shared team list rather than one handset. So, in case of an agent’s unavailability, the next available agent can fill in.

Additionally, businesses can make and receive calls globally at a cost-effective rate. VoIP calls help companies cater to international audiences, effectively collaborate with offshore stakeholders and manage remote teams.

Benefits of PABX

The PABX (Private Automatic Branch Exchange) phone system provides several advantages that boost communication efficiency and streamline business operations. Here are the key benefits of using a PABX phone system:

1. Centralized Management: PABX systems offer centralized control over telecommunication activities, enabling administrators to manage settings and configurations from a single interface.

2. Cost Savings: With a PABX phone system, businesses save on costs by reducing the need for multiple phone lines and lowering maintenance expenses due to centralized infrastructure.

3. Advanced Features: PABX systems offer advanced features like voicemail, call forwarding, IVR, conferencing, and call recording, enhancing communication capabilities beyond basic phone systems.

4. Remote Accessibility: Users can access the PABX phone system remotely, allowing teams to make and receive calls from any location, which supports flexible and hybrid work environments.

5. Scalability: Easily scale the PABX system as your business grows. Add or modify extensions without major hardware upgrades, making it ideal for growing teams.

6. Improved Internal Communication: A PABX phone system enables seamless internal communication with direct extension dialing, increasing productivity and team collaboration.

Essential Features of a PABX System

Before you invest in a PABX system, you need to ensure that the system has these main features.

  • Auto Attendant: Aka digital receptionist connects callers to the desired extension number automatically.
  • Automatic Ring Back: Enables agents to pre-dial an active phone line and get a call back whenever the line goes free.
  • Call Parking: Allows staff to hold an outgoing call in a specific telephone unit and then continue the conversation on a different device.
  • Call Barging: Enables a supervisor to monitor and enter the conference bridge silently.
  • Call Pick-up: Allows any staff to pick up the call and answer on behalf of a different recipient.
  • Call Recording: Recording feature for documentation, legal, monitoring, training, or other purposes.
  • Call Waiting: Enables admin to handle multiple ongoing calls at once.
  • Do Not Disturb (DND): To block unnecessary calls at any specific time point.
  • Gamification: Give your sales reps the much-needed recognition and rewards to motivate them to do more.
  • IVR (Interactive Voice Response): A smarter auto attendant where callers can self-serve for common queries.
  • Post-Call Surveys: To measure client satisfaction and optimize your agents’ performance.
  • Ring Groups: Group multiple extension numbers into one. It enables multiple phones to ring simultaneously or in a sequence.
  • Shared inbox: To increase visibility into all customer-agent communication.
  • Smart Switch: Get different telephony service providers to mitigate all your call connectivity issues.
  • Speed Dialing: Using shortcuts for extension numbers to easily remember the contact details of departments or staff members.
  • Voicemail: So you never miss out on a question or a complaint

Evolution of PABX

The evolution of the PABX (Private Automatic Branch Exchange) phone system reflects the significant advancements in business communication technology over time, moving from manual switchboards to automated and internet-connected systems.

1. The Manual PBX Era (Early 20th Century)

PBX systems originated as manual exchanges, requiring operators to physically connect calls by plugging wires into switchboards. This setup helped businesses manage internal calls and connect with outside lines efficiently, though it demanded extensive labor and expertise.

2. Analog PABX – The First Step in Automation (Mid 20th Century)

As technology progressed, businesses adopted Analog PABX systems, which automated some switching functions but still relied on analog circuits and signals. Analog PABX systems could route calls within a private network and connect to external lines more efficiently, though their capacity was limited, and audio quality could be inconsistent.

3. Digital PABX – Advancing with Computer Technology (Late 20th Century)

The shift from analog to digital technology marked a significant leap in PABX capabilities. Digital PABX systems converted voice signals into digital data, enhancing call quality and enabling advanced features like voicemail, call forwarding, and conferencing. Digital systems allowed for more reliable performance and opened the door to seamless integration with other digital business tools.

4. IP-PABX – Internet Protocol Integration (Early 21st Century)

IP-PABX brought another level of innovation by leveraging Internet Protocol (IP) to route calls over the Internet. This integration allowed PABX systems to support Voice over IP (VoIP), enabling remote accessibility and easier scalability. Employees could now make and receive calls from any internet-enabled device, supporting modern work-from-anywhere models.

5. Cloud PABX – The Modern Solution (2010s-present)

Cloud PABX, or Cloud PBX, represents the latest stage in PABX evolution, offering all the functionality of traditional PABX with the added benefits of cloud computing. By hosting the PABX infrastructure in the cloud, businesses avoid the cost and complexity of on-site hardware, while gaining greater flexibility, automatic updates, and accessibility from any location.

6. Future Trends in PABX Technology

Looking forward, PABX systems are likely to integrate AI, omnichannel capabilities, and advanced analytics. AI could automate customer interactions, provide predictive insights, and optimize call routing. Future PABX systems may unify voice, messaging, email, and social media, creating a seamless communication platform for businesses.

Pros and Cons of PBX and PABX

Private Branch Exchange Systems (PBX) and Private Automatic Branch Exchange Systems (PABX) are two commonly interchanged terms. Rightly so because the only difference between the two is automated switching.

Let’s understand the main pros and cons of PBX and PABX:

Private Branch Exchange (PBX)

The PBX system is the “legacy” system that was found in all workspaces after 1950, making POTS altogether oblivious. PBX fundamentally works on a landline network and uses manual switchboard operators to connect calls in an organization – internally and externally.

Pros

  • Houses more features than the plain old telephone system
  • Mitigated the need for installing multiple phone lines.

Cons

  • Efficiency decreases in manual operations.
  • Long holds.
  • No special features.
  • Reliant on the landline telephone network.

Private Automatic Branch Exchange (PABX)

As technology progressed, business communications developed. First-generation PABX phones allowed users to connect by merely pressing extension codes on their phones.

After the advent of the internet, VoIP PABX systems became the first choice of all. They offered revolutionary features and benefits.

Pros

  • No need to install complex copper wiring.
  • Enjoy almost instant connections.
  • One PABX system suffices for all branches of a business, even globally.
  • Softphones or VoIP software can be installed on personal computers and mobile devices.
  • Extra efficiency-improving features.
  • Automatic upgrades.
  • Low-cost hardware.

Cons

  • Requires constant internet connection stability

What Does PABX Have To Do With IP Communications?

PABX (Private Automatic Branch Exchange) systems are essential tools for managing business phone networks. Traditionally, PABX systems connected internal phone lines within a company to external telephone networks.

However, as communication technology evolved, so did the way PABX systems operated. This is where IP communications come into play.

1. The Role of IP in PABX Systems 

IP communications refer to transmitting voice, video, and data over the Internet Protocol (IP), primarily through VoIP (Voice over Internet Protocol).

IP-based communication systems use the Internet instead of traditional telephone lines to send and receive data. This is where IP-PABX comes in—integrating PABX systems with IP technology to route calls over the internet rather than conventional phone lines.

2. IP-PABX: The Bridge Between PABX and IP Communications

An IP-PABX, also known as a VoIP-based PABX, combines the traditional PABX functionality with the power of IP communications.

In an IP-PABX system, calls are transmitted over the internet, significantly reducing the cost of long-distance communication and enabling features like video conferencing and more advanced call routing.

3.  IP-PABX and Cloud-Based Solutions

With Cloud PBX, businesses can access their phone system from anywhere, anytime, with no need for on-site hardware or infrastructure.

This system is managed and maintained by third-party cloud providers, who handle all the updates and technical support.

How to choose the right PABX System for your small business?

If you are a small business and are interested in choosing the right PABX system for you, here are the things you should consider beforehand:

A. Which type of PABX system are you going to choose?

There are many types of PABX systems you can choose from depending on your particular business needs:

1. Traditional PABX phone system

  • Landline-based and depends on a physical hardware box.
  • A Low-grade PBX system which is sufficient for small businesses only if they operate from one location.
  • The hardware of this PBX requires more space and regular maintenance.
  • Considering the hardware costs, they are extremely expensive.

2. Digital PABX

  • Can deploy both a traditional analog PABX system and IP phones.
  • Better sound quality than traditional PABX.

3. On-site IP PABX 

  • Uses ethernet cables to connect the telephones offering a hassle-free experience if you move your office.
  • Equipped with advanced functionalities like call stability, voicemail to email, video calling, mobile integration, call accounting, disaster recovery, and others.
  • Unsuitable for startups and SMBs due to high installation and hardware charges.

4. Cloud-based/Hosted PABX

  • Supports both inbound and outbound calls.
  • Offers virtual international phone numbers, the best option if your business is global.
  • No hardware purchase or set up fee. Only a low monthly fee makes it an extremely viable option for all businesses.

5. Virtual PABX

  • A lighter version of the cloud-based PABX phone systems.
  • Would not have some non-essential features.
  • The most cost-effective option for small- and- mid-sized businesses, even if they are global.

B. Are you getting a unified communications framework?

Employees now need a flexible and agile work environment. It is only wise to deploy cross-channel telephone systems that employees can access from anywhere. All they need is a high-speed internet connection.

Reporting capability and analytical tools are also important features of an SMB’s phone service. Managers can key metrics such as average call duration, call wait time, and agent performance. This promotes visibility and facilitates better strategic decisions.

C. Do you need third-party integrations?

If you do, then you will likely need integrations between those tools and your phone system.

Look for a PABX system that offers easy multiple third-party integrations with tools like Microsoft 365, Google Workspace, Salesforce, Zendesk, Intercom, and more.

Third-party integrations allow you to automatically sync data from your communication tool to other systems. This increases productivity reduces human error and ensures compliance.

For instance, post a customer interaction, customers’ details, their queries, and who supported them will be automatically stored in the CRM. These insights can be later on used to offer tailored experiences.

D. Is it scalable?

It is known how important scalability is for growing businesses. You might have to scale your operations or workforce up or down, and your technology must support that. IP PABX offers significantly more scalability than cloud PABX systems because physical systems require adding more hardware as businesses grow.

E. What’s the quality of customer support?

While discussing features and technology, it is common to miss out on considering the quality of customer support. Regardless of the PABX system you choose, you will need support. So, ensure that your service provider is easily approachable and that they have good customer success measures in place.

F. Speak to your staff

It is vital to speak with staff to understand their needs and expectations from the new phone system – layout the features and benefits to them.

Suppose you may require them to use their phones to stay online on the go. Ensure you have their buy-in.

Changing the phone system is a simple yet disruptive long-term change. Having everyone on the same page is essential for success.

Conclusion

We hope you will now understand the basics of a PABX system, its types, how it differs from a PBX system and how you can leverage it to boost efficiency at the workplace and in general. To book a demo for a VoIP PABX system, click here.

FAQs

1. Should You Setup Your Own PABX System or Opt for a Hosted One? 

An on-cloud or hosted PABX system is today’s most sought-after business phone system. Since hosted PABX systems are on the cloud, they use ethernet and need no complicated wiring. You also don’t need to invest in hardware, as these systems can easily connect with yours.

2. What are the advantages of automating your PBX?

Automating your PBX business phone systems can help you save resources. For example, it can allow you to employ your staff in more complex tasks rather than working on a switchboard. In addition, you can mitigate problems that follow human error. You also save time as PABX systems have no long call wait times, and it connects to the receiving line instantly.

Take your business communications to the next level with KADIS.COM.NG

CALL OR WHATSAPP 08061379390 OR 08024207231

Read More

5 Steps on How to Fix PBX System Issues

5 Steps on How to Fix PBX System Issues

PBX Troubleshooting Guide - Beginners to Advanced - Featured Image

PBX (Private Branch Exchange) is a business phone system that helps companies overcome the physical limitations of a traditional telephone system. Everyone from a small business to a large enterprise can benefit from it.

You no longer have to rely on copper wires or spend a fortune on your communications. Thanks to PBX, companies can expand to new locations easily and serve their customers well wherever they are.

When you can clearly communicate with your employees, customers, and partners, you set yourself up for success. A flexible phone system is essential to make it happen.

But what if you experience echoes, busy signals, dropped calls, or audio issues?

If you’ve experienced these issues with your PBX phone system, there’s one thing you should know: there’s no reason to panic!

The causes of these issues are usually easy to identify and solve. In this article, we’ll lay the foundations of PBX systems, take you through some common issues with call quality, and show you how to fix them.

  1. Jitter
  2. Slow internet connection
  3. Latency
  4. Bad or inadequate router
  5. Network interference
  6. 5 steps to fix your PBX phone system

Types of PBX Phone Systems

1) Analog (legacy) PBX phone system

Analog PBX pre-dates the internet. It connects externally to the Public Switched Telephone Network (PSTN) with wiring and internally by extending the calls in the same way through the office PBX equipment.

It’s quite limiting compared to its digital counterpart. It’s a good option if you’re only looking to hold, mute, redial, or speed dial your calls. If you want to have additional call features or connect your phone system to emails and a CRM, you may look further.

2) On-premises PBX phone system

On-premise PBX, also known as an IP PBX, means you have PBX equipment on-site. The main difference to the analog PBX system is that IP routing is done with more current technology. The signaling is done with an IP phone to the IP PBX server.

On-premise PBX gives you modern call features while making the most of the equipment you already own. It’s also extremely safe. The downside? Its deployment and maintenance come with a steep price tag.

3) Hosted PBX phone system

Hosted PBX is a phone system entirely based in the cloud. It doesn’t require you to have on-site equipment—your service provider runs everything. There are no extra training and maintenance costs.

It’s a great option if you’re looking to scale or have remote employees. Of all PBX phone systems, hosted PBX is the easiest to get started with.

What Can Go Wrong in a VoIP System?

Your PBX phone system is a feature-rich setup that powers your business communication. That includes everything from crisp audio and video to messaging and emails.

Because these communication channels use the same network, some call quality issues may come up. In the next sections, we’ll break down the common PBX issues you can troubleshoot, and a step-by-step process to do so.

Before we give you the steps to find what might be wrong with your PBX phone system, let’s quickly go over some common PBX issues and what causes them.

Problem #1: Jitter

Call quality issues related to jitter manifest as disarranged sound. These issues happen because of the way phone calls are transferred over the internet.

When you’re on a call, your voice is converted into data packets. They’re sent over the internet to their destination—the person you’re speaking with. When there’s a delay in transmission, these data packets can get jumbled or have gaps.

You can fix high jitter with a jitter buffer. A jitter buffer temporarily stores data packets in the right sequence and transmits them in intervals. As a result, clear audio reaches its recipient with minimum delay.

Problem #2: Slow internet connection

Have bandwidth issues after switching to VoIP phone systems? There’s a chance your current bandwidth can’t handle the amount of data that needs to be transferred for VoIP calls to work.

Bandwidth is like a pipe: the more of it you have, the more information can travel down the pipe at once. Most internet service providers (ISP) offer bandwidth that works well for regular internet surfing, but not for an entire phone system to work smoothly.

We recommend that you have at least 100kbps of bandwidth per phone—business internet service providers offer it. Keep in mind that your other devices, such as printers, computers, fax machines, and credit card machines also utilize your bandwidth.

Problem #3: Latency

Do you find that you and your caller are talking over each other, and you can hear your own voice on the call? Also known as latency or VoIP delay, it’s a delay between when one person says something and the other person hearing it.

There are a few types of latency that happen on VoIP calls: propagation delay, handling delay, and queuing delay.

Latency can be solved and prevented by prioritizing VoIP traffic. Here are several ways this can be done:

  • Bandwidth reservation
  • Policy-based network management
  • Multi-Protocol Label Switching (MPLS)

Prioritizing VoIP traffic over the network will improve both latency and jitter.

Problem #4: Bad or inadequate router

Your network is configured correctly, and your bandwidth is sufficient. Then, the issue might be in your router.

Your router must be fast, compatible with your hardware, and able to prioritize VoIP traffic. Specialized VoIP routers are a great, cost-effective way to ensure the best call quality.

If your router isn’t configured for packet prioritization, other activity on your network can lower your call quality. For example, if you’re on a call and someone else is watching a webinar or downloading a large file, your call quality could suffer.

Problem #5: Network interference

If you run your VoIP service concurrently with a data network over the same hardware, you may encounter bandwidth limitations. This is because both the data network and the voice network compete for resources.

These limitations can manifest as sound cutting in and out over the phone.

Two possible solutions include:

  • Configuring the network into separate VLANs so you can prioritize the data from the voice network over the data network
  • Utilizing a Quality of Service (QoS) feature of your business-class network to prioritize voice data

As a result, you’ll experience stable, quality phone calls every time.

Troubleshooting PBX Phone Systems in 5 Steps

With these common PBX issues in mind, here are the steps you can take to identify them. After that, you’ll know exactly what to do to fix your PBX system.

1) Check all device connections

First, make sure that your devices are connected to a power supply and the network. Check if all of your hardware, including phones, routers, and adapters, are plugged in correctly, including the power cords and network/telephone cords.

Remember also to check if all the lights on these devices are on. In case a device is plugged in, but isn’t receiving power (due to a faulty power socket, for example), this is how you’ll find it and know it needs to be fixed or replaced.

If all your devices are powered up, move onto the next step.

2) Reset your PBX and your hardware

Reset your PBX hardware. You can do this by unplugging the main cord for one minute.

Reset your equipment (phones and routers) as well by unplugging all power cords for 10 seconds.

Once you plug everything back in, wait for all the lights to turn back on. This will clear any fundamental issues that may have caused poor call quality. If any of your devices haven’t powered back up, flag it for repair or replacement.

If everything works fine, move onto the third step.

3) Run a bandwidth speed test

With a speed test, you’ll learn if your network is compatible with VoIP. Inadequate bandwidth and other connectivity issues limit the number of VoIP phones you can have. There may also be an issue with data packet transmission.

Nextiva has a simple and easy-to-use VoIP speed test. With it, you can uncover your:

  • Download and upload speed: Remember that you need around 100kbps of bandwidth for each phone you have
  • Ping: A packet loss test will shed light on potential network issues
  • Jitter: If it’s higher than 15-20ms, it can increase latency and result in packet loss

If you identify issues with any of the above, your solutions will include talking to your internet service provider (ISP) about increasing your bandwidth or getting a jitter buffer if you don’t have one.

No issues here? Jump to the next step.

4) Confirm your router has prioritized VoIP traffic

As we mentioned earlier, your router should be able to prioritize VoIP traffic, and your network configuration should be set up in the right way to enable it.

If your router has that option but isn’t set up correctly, start with this guide and your router’s manual to set it up.
If this isn’t an option with your existing router, it might be time to upgrade it to a quality VoIP router.

By this point, you’ve probably identified your PBX issues and the steps to fix them. If not, there’s one final step to take.

5) Use the logs in your PBX

Log into your PBX dashboard to view any errors that may have happened with your PBX.

In your PBX system, look for a section that shows you a log of events and messages about your PBX.

If you see any messages that indicate an error, open them to find dates, times, and details on that error, as well as the current status. You can then relay this message to your PBX administrator.

Gain Control Over Your Call Quality

Running your communications over the internet means you can grow and scale your business easily while serving your customers well.

If you come across some call quality issues, you now know they’re easy to identify as long as you follow our five simple steps to fix your PBX system. Even better, you can do most of the process on your own.

That means you can get back to running your business better than before.

Tired of your fixing an unreliable PBX? Upgrade to the cloud. We’ve got your back!

The best cloud PBX phone system for SMBs.

Get cloud-based VoIP, SMS messaging, and video conferencing in one solution. Take your business communications to the next level with KADIS.COM.NG

CALL OR WHATSAPP 08061379390 OR 08024207231

Troubleshooting PBX Phone System Issues Without Technical Assistance

Troubleshooting PBX Phone System Issues Without Technical Assistance

Phone communications are an integral part of every business, and PBX (Private Branch Exchange) makes it easier for you to interact with your customers over the call. Plus, it helps overcome the limitations of the traditional business phone system. 

Virtual PBX phone system offers advanced features and enables you to expand to new locations easily. Plus, they don’t typically require much maintenance after the initial investment.

However, no system is 100% foolproof, and issues do occur sometimes. And when that happens, you’ll need to troubleshoot them to ensure uninterrupted communications.

If you’ve experienced issues with your PBX phone system, this guide is for you. We will discuss the common hosted PBX issues, the reason behind them, and how to solve them (without any technical assistance). Let’s get started!

Different Types of PBX Phone Systems

As of now, there are three types of PBX phone systems for businesses. It includes:

1- Traditional PBX Phone System

Legacy PBX phone systems connect externally to the PSTN (Public Switched Telephone Network) with wiring. It also uses wires to extend the calls within the office. As a result, it is quite limited in terms of features, flexibility, and scalability. Traditional PBX phone systems are extremely expensive as compared to IP PBX phone systems to set up.

2- On-Premises PBX Phone System

Also known as IP PBX, on-premises PBX phone systems offer more features and flexibility than legacy PBX systems. Besides, when you get a PBX phone system, you can use the equipment you already own (i.e., telephone). Also, it uses the internet to route calls.

3- Hosted PBX Phone System

Also known as VoIP (Voice over Internet Protocol), hosted PBX runs through the internet. It doesn’t require you to purchase any equipment or hardware to manage phone communications.

Of all the PBX phone systems, hosted PBX is the best option as it allows you to get started right away and doesn’t require any special equipment.

Common Issues in PBX Systems

Since PBX phone systems run through the internet, some issues are unavoidable (though they don’t happen very often). That said, let’s look at the common problems in hosted small business phone systems.

1- Jitter

Call quality issues related to jitter can result in disarranged sound. Since the phone calls happen over the internet, your system sends voice signals as data packets to the recipient’s phone, which then converts the packets into voice again. When there’s a delay in transmitting these data packets, the voice sounds disarranged.

You can fix this issue with a jitter buffer. A jitter buffer stores data packets in the proper sequence and transmits them accordingly, ensuring clear audio with minimum delay.

2- Unwanted Busy Signals

You would not want your customers to hear a busy tone every time they call your company. However, many times PBX phone systems show busy signals deterring away customers and hurting their experience.

In most cases, the problem is linked with the system’s wiring. Make sure the devices are appropriately connected to a power supply. Consider restarting your telephone by unplugging the power cord for at least one minute.

3- Bandwidth Issues

Even though the cost of a PBX phone system isn’t much, you need to invest in a high-quality internet connection. If not, you’ll likely experience low bandwidth across all your VoIP lines.

Low bandwidth means less information will travel through the internet, negatively affecting your call quality. Most internet providers offer bandwidth that works well for regular internet activities but not for calling using a PBX system.

Contact your internet provider and ensure you have at least 100Kbps of bandwidth per phone (but the more, the better).

4- Incorrect Call Placement

Are calls not connecting to the right department or employee? Well, this is the easiest to fix. All you have to do is reconfigure your IVR (Interactive Voice Response) system. Visit your PBX system’s admin panel and reset the rules. Then, create new rules for redirecting the calls, and you’re good to go.

5- Latency

Do you ever hear your own voice when talking to someone? That’s latency. It refers to the delay between when you say something and the other person hears it.

In VoIP calls, there are three major types of latency:

  1. Propagation delay
  2. Handling delay
  3. Queueing delay

Here’s how you can solve these latency issues:

  • Implement policy-based network management
  • Leverage multi-protocol label switching (MPLS)
  • Ensure bandwidth reservation

6- Outdated Router

Last but not least, a bad or inadequate router can affect your call quality even if you have sufficient bandwidth.

If you face issues even after increasing bandwidth and decreasing latency, your router is probably at fault. Specialized VoIP routers can help solve these problems and ensure the best possible call quality.

Also, ensure your router is configured for packet prioritization. If not, it will affect your call quality. For example, if any of your employees are watching a webinar or downloading a large file, your call quality will suffer.

Steps to Troubleshoot PBX Phone System Issues

Now that you know the common issues, follow these steps to solve almost all these problems without technical assistance.

Step #1- Ensure Your Devices are Connected Properly

As mentioned above, in most cases, the issue is with the connection. Check if all your hardware (phones, routers, power cords, and adapters) is plugged in perfectly. Also, ensure you don’t have any loose connection, or it will affect your operations mid-way.

Step #2- Reset Your PBX Hardware

Resetting your PBX hardware will solve any fundamental issue that may have been affecting the call quality or connection problems. You can reset your PBX hardware by unplugging them for at least 15 seconds.

Once you plug everything back in, wait for the light to turn on. If any of your devices doesn’t turn back on, inform your provider and get it repaired or replaced.

Step #3- Test Your Bandwidth

A bandwidth test will help determine if your network is compatible with VoIP. Inadequate bandwidth will affect the call quality and limit the number of VoIP connections you can have.

Remember, you need at least 100Kbps of bandwidth for each phone. Also, if your ping is higher than 15-20ms, it can increase latency, resulting in packet loss.

If you have issues with bandwidth or ping, contact your internet service provider.

Step #4 – Prioritize VoIP Traffic

As mentioned above, if your router doesn’t prioritize VoIP traffic, all your resources (other tools that use the internet) will fight for resources. Therefore, set your network configuration to prioritize VoIP traffic. If your current router doesn’t allow you to do that, it’s time to upgrade it.

Step #5: Check Your Configurations

If any of the above solutions don’t work, log into your PBX system to check if there’s an issue with the configuration. You can even consider resetting your PBX system from the admin panel to solve any problems.

Wrapping Up

PBX systems give you the flexibility to grow and scale your business communications easily. It even offers advanced features to help you better serve your customers. When you invest in a hosted small business phone system, you eliminate all the hardware issues.

However, if you face any issues with your PBX phone system, follow the steps mentioned above to resolve them.

Did we miss any PBX phone system issues? Let us know in the comments, and we will provide a solution!

Take your business communications to the next level with KADIS.COM.NG

CALL OR WHATSAPP 08061379390 OR 08024207231

Common CCTV Problems and Solutions or How to Fix Them

Common CCTV Problems and Solutions or How to Fix Them

CCTV, Security Cameras, Access Control, Video Door Phones, Biometric Devices, Bio-metrics Attendance, Spy Gadgets, Automatic Gate, Electric Gate, Intercom, PABX, Burglary alarm systems, Fire Alarm Systems, Perimeter Intrusion Alarm, System, Electric Fence, Automobile/Car Tracker, DSTV, Free-To-Air, Satellite Systems, Gotv, Abuja, Apo, kabusa, galadimawa, gudu, lokogoma
CCTV, Security Cameras, Access Control, Video Door Phones, Biometric Devices, Bio-metrics Attendance, Spy Gadgets, Automatic Gate, Electric Gate, Intercom, PABX, Burglary alarm systems, Fire Alarm Systems, Perimeter Intrusion Alarm, System, Electric Fence, Automobile/Car Tracker, DSTV, Free-To-Air, Satellite Systems

It can be hard understanding the problems that occur with your CCTV, which is why our friendly team have put together a guide to help you to fix the issues.

1. Verify camera power and connection

Sometimes a problem can be as simple as a disconnected lead and it might even be that the network is currently down. Internet protocol (IP) cameras generally have LED indicators that are used for transmitting data across to the network but this might be hidden inside the camera.

If the LEDs on the camera are not lighting up, you should check to see if the camera is powered externally (plugged into the wall). Should your camera be powered via electricity and not battery, you will want to check that the camera is receiving the appropriate wattage as a complicated camera such as a pan-tilt-zoom, will require more watts that a normal plug will supply.

2. Discover and ping camera

Find out your camera’s IP address by checking the camera’s directory. Once you find your address you will be able to ping it using your laptop or smartphone to test the strength of the connection.

Type ‘cmd’ into windows search engine and this should open a DOS command prompt. When this pops up, you will be asked to type in ‘ping’ and your IP address.

You may see either’ Request Time Out’ or ‘Destination Host Unreachable’ appear on the screen. If it does, check to see if the device you are using is on the same network as your camera. If you do see the camera on the network, attempt to connect using your browser.

3. Know username / password

If you can ping the camera but find yourself unable to connect then it’s possible that you have typed in the wrong login or password. If this is the cause, you will want to refer to the manual.

4. Check ARP tables

Check Address Resolution Protocol (ARP) tables, usually located on the outside of the camera. It is possible to cross reference MAC and IP addresses using the ARP.

5. Confirm no IP conflict

If you have more than one camera you need to make sure that they have different IP addresses as this can stop you from accessing one or all cameras.

6. Upgrade firmware

See to it that your camera is up to date. You can do this by connecting to VMS and accessing the cameras web page.

7. Reboot camera

Sometimes its the first thing we do – turn the system off for 10-20 seconds and input your settings again.

8. Check cabling

Make sure that the cables are straight and firmly intact, because if there are knots or loose cables this could be the root of your problem.

9. Factory reset camera

This can be a drastic thing to do as you can lose all of your history but this process will help to troubleshoot any issues. A factory reset can be done simply by pushing a paperclip into the pinhole reset button located at the back.

10. Call manufacturer or remote monitoring provider for support

If you’re ever unsure, seek help from an expert who can help you every step of the way.

Take confidence in our team here at Caught On Camera – we’re here to provide you with experience, simple instruction and a helpful, friendly service.


We are the leading suppliers and installers throughout these areas and provide each and every customer with high quality CCTV security systems to cater to a range of budgets for domestic, commercial, industrial and retail customers. Give us a call today.

How to fix common CCTV camera problems

How to fix common CCTV camera problems

If you’re having problems with your Dahua CCTV cameras, this is a quick guide to common problems with Dahua cameras and how to fix. N.B. if you have continued problems with your Dahua CCTV system, get in touch with our team here (this is a paid service).

Cross stripe or diagonal stripe appears in the image of IPC.

  • Bad connection for the video cable. Check or test with a different cable, connection and port.

  • Strong current interference. Check if there are other devices causing this issue. It could be the cable too close to another device. Mounting the camera on a metal surface can cause current interference from bleeding electrical currents.

  • A ground loop can be causing the stripes. Ground loops occur for a few different reasons but this issue will always present itself in the form of horizontal lines running across your screen (hum bars).Faulty power supplies and/or faulty cable are frequent culprits but improper wiring in the home/building is much more common. If you discover that your image problems are related to the power supply or cable, you simply need to swap them out. However, if bad wiring in the structure is found to be the problem, locating it and then having someone fix it is not exactly a quick or cheap fix. This is where ground loop isolators come in. They’re simple plug-and-play adapters that attach to the back of your camera and then filter this electrical noise out of your video feed.

  • Power Supply. There are several things that can go wrong with a power supply but related problems will always appear in your video as “rolling lines.” These are horizontal lines across your screen that will normally move from bottom to top; lines moving in the opposite are not unheard of so don’t rule it out. The image from your camera will remain behind these lines and will not move with them. This can often be confused with the lines you can get from a ground loop problem, but the lines caused by a group loop will remain in a single static position.

I connect the general analog camera to the device, there is no video output.

There are following possibilities:

  • Check camera power supplying, data cable connection and etc. There might not be sufficient power from the power source. You can use a voltage tester if you have one on hand.

  • Check the length of cable run. Refer to the specifications for the limitations on the cable length.

  • This series device does not support the analog camera of all brands. Please make sure the device supports general standard definition analog camera.

  • If there is no video, check the coax connection. Unsecured faulty connections will result in no video or intermittent video.

SD card failed to store video.

  1. Check if the SD card status is set as read only status, if so; you need to change it to read/write status.

  2. Check if the SD card can be detected.

  3. Check if the SD card has been damaged.

  4. Check if the SD card is full, if it shows that the residual space is 0, you can format the SD card by WEB interface or check “Cover” in the “Storage management > Video control > hard disk full” of the WEB interface.

  5. Check if the model is compatible with an SD card. Though it might have an SD card slot there might not be SD card reader inside.

IP Camera failed to recognise SD card.

  • SD card might be loose. Which would case the IP camera not to read recognise the SD card. Check if the SD card is secure.

  • Check if there is SD card connection pins. Some models may have the slot with no connection pins. If this is the case please refer to the specifications and place of purchase.

  • Check if the SD card in the computer is recognisable and there is no abnormality.

  • It is possible the SD card is bad. Try the SD card in other devices to see if it is recognised. It is possible the connections of the SD card are damaged. If this is the case, refer to the place of purchase.

When IR light is on for the HD or SD IR dome, the image is abnormal, such as reflective image or white and unclear image.

Solution: Use the IR-blocking ring of the lens, or reinstall the light-blocking ring to a proper position.

Why is my camera damaged from leaking water?

  1. Users dismantled the front cover and rear cover by themselves, which were not installed properly.

  2. The front cover glass is strongly pressed or crashed.

  3. The waterproof plug of rear cover is loose

Still need help?

SmartCamera are specialists in AI CCTV, and provide a CCTV support service & install service for UK-based customers.

Get in touch with our team here if you need help >>

CCTV Image.png
Common CCTV Problems and How to Fix Them
Post Image

Common CCTV Problems and How to Fix Them

Closed-circuit television (CCTV) systems are essential for home and business security. However, like any other technology, they are prone to occasional issues that can compromise their effectiveness. Recognizing these problems and addressing them promptly can help maintain the system’s functionality and ensure safety. Here are some common CCTV problems and their solutions:

CCTV, Security Cameras, Access Control, Video Door Phones, Biometric Devices, Bio-metrics Attendance, Spy Gadgets, Automatic Gate, Electric Gate, Intercom, PABX, Burglary alarm systems, Fire Alarm Systems, Perimeter Intrusion Alarm, System, Electric Fence, Automobile/Car Tracker, DSTV, Free-To-Air, Satellite Systems, Gotv, Abuja, Apo, kabusa, galadimawa, gudu, lokogoma
CCTV, Security Cameras, Access Control, Video Door Phones, Biometric Devices, Bio-metrics Attendance, Spy Gadgets, Automatic Gate, Electric Gate, Intercom, PABX, Burglary alarm systems, Fire Alarm Systems, Perimeter Intrusion Alarm, System, Electric Fence, Automobile/Car Tracker, DSTV, Free-To-Air, Satellite Systems
  1. Blurry or Distorted Images

Cause:

  • Dirty or smudged camera lenses.
  • Improper focus or low-quality cameras.

Solution:

  • Regularly clean the lenses with a microfiber cloth and lens cleaner.
  • Adjust the focus settings.
  • Upgrade to higher-resolution cameras if image quality remains poor.


  1. No Video Signal

Cause:

  • Faulty cables or loose connections.
  • Damaged power supply or video output.

Solution:

  • Check all cable connections to ensure they are secure.
  • Replace damaged cables or connectors.
  • Test the power supply and replace it if needed.


  1. Night Vision Not Working Properly

Cause:

  • Infrared (IR) lights are obstructed or not functioning.
  • Camera placement causes reflections or insufficient IR range.

Solution:

  • Remove any obstructions blocking the IR lights.
  • Adjust the camera angle to reduce glare or reflection.
  • Ensure the IR LEDs are operational and replace them if necessary.


  1. Flickering Video or Screen

Cause:

  • Loose cables or electrical interference.
  • Power supply issues.

Solution:

  • Secure all cable connections and ensure no wires are frayed.
  • Use a regulated power supply.
  • Relocate cables away from other electronic devices to minimize interference.


  1. Hard Drive or DVR Not Recording

Cause:

  • Insufficient storage space or corrupted hard drive.
  • Incorrect recording settings.

Solution:

  • Clear old footage or upgrade to a larger hard drive.
  • Check the DVR/NVR settings to ensure continuous or motion-based recording is enabled.
See also  The Benefits of Cloud-Based CCTV Systems for Nigerian Businesses


  1. Camera Not Detecting Motion

Cause:

  • Sensitivity settings are too low.
  • The motion detection feature is disabled.

Solution:

  • Adjust the sensitivity settings in the system software.
  • Enable motion detection in the camera’s configuration menu.


  1. Unauthorized Access or Hacked System

Cause:

  • Weak passwords or outdated firmware.

Solution:

  • Use strong, unique passwords for your system.
  • Regularly update the firmware to patch vulnerabilities.
  • Secure your network with encryption and firewall settings.


  1. Water Damage to Outdoor Cameras

Cause:

  • Inadequate weatherproofing or exposure to extreme conditions.

Solution:

  • Install cameras with proper IP-rated weatherproof housing.
  • Use weatherproof seals and covers to protect connections.


  1. Time and Date Settings Are Incorrect

Cause:

  • Power outages or improper system configuration.

Solution:

  • Reset the time and date settings in the system menu.
  • Use the auto-sync feature to keep them updated.


  1. Poor Network Connectivity for IP Cameras

Cause:

  • Weak Wi-Fi signal or bandwidth limitations.

Solution:

  • Place cameras closer to the router or use Wi-Fi extenders.
  • Upgrade to a higher bandwidth internet plan if needed.


Conclusion

A properly functioning CCTV system is a cornerstone of security for homes and businesses. Addressing common issues promptly ensures uninterrupted surveillance and peace of mind. Regular maintenance, including cleaning, firmware updates, and system checks, can go a long way in preventing these problems.

If you’re facing persistent issues or need expert assistance, Core-Power Limited specializes in CCTV installation, repair, and maintenance. With a track record of quality service in Nigeria, we’re here to help you safeguard your property effectively. Contact us today to ensure your CCTV system operates at its best!

Phone no: 08061379390 or 08024207231

5 Diagnostic Tests for Electric Fence Troubleshooting

5 Diagnostic Tests for Electric Fence Troubleshooting


5 Diagnostic Tests for Electric Fence Troubleshooting

There’s a moment you have when you realize your cattle or other livestock have breached your electric fence. In that moment – the same moment you’re chasing after your animals as they fan out over the countryside – you wonder “What went wrong with the fence?”

FENCE NOT WORKING? KADIS IS HERE TO HELP

Zareba® Electric Fence Tester

Electric Fence Tester

You can save yourself these kind of headaches by regularly testing your fence and addressing issues as they arise. When you find your fence has lost power, is running low voltage or has dropped a charge somewhere along your fence line, you will need to find out what went wrong.

KADIS.COM.NG Systems has five helpful diagnostic tests to suggest for your electric fence troubleshooting. It’s best to test a system in the order presented here so that the issues that cause broad problems are checked first. We recommend having a fence tester ready so that you can properly test your fence. KADIS.COM.NG Systems offers a variety of fence testers for your needs.

TEST ONE – BATTERY/POWER CHECK

electric fence testing guide
Test 1 – Battery & Power Check

If your fence has completely depowered, your battery or power source may be at fault. Here is how to determine whether power is being delivered from your power sources.

  • Outlets – Your fence tester can’t be used on an outlet, but a simple test is to plug in another electrical device (such as a light) into the outlet and check if that works. If that item doesn’t power up properly, consult an electrician. The outlet should be delivering between 105 to 125 volts to the charger.
  • Solar – Use your voltage tester to measure your battery voltage. If it is underperforming, you may need to replace it. The batteries inside solar chargers are meant to last about 1,000 days (3 years), and after that point, it’s advised that you obtain a new one. Further, a solar battery could lose its charge after an extended time without sunlight or minimal sunlight. A 12-volt battery should test at 12 volts to properly energize a charger. A 6-volt or 6/12-volt battery should show a minimum of 6 volts in a test.
  • Battery – If you have a battery-operated, non-solar, DC fence charger, you should check your DC battery to see if it is delivering the appropriate charge. Your battery may have been drained by a short somewhere along the fence or if animals are frequently testing the fence, so check for shorts before reconnecting this battery.

TEST TWO — TERMINAL TEST

electric fence testing guide
Test 2 – Terminal Test

The terminals are the posts used to attach the hook-up wires to the energizer. Testing these posts can help determine if the energizer is properly outputting energy.

  • STEP 1 – Power: Turn off the power to the energizer.
  • STEP 2 – Disconnect: Disconnect both hook-up wires from the charger.
  • STEP 3 – Power On: Turn the power back on.
  • STEP 4 – Test: Check the voltage output with your voltage tester.
  • STEP 5 – Under 2,000 Volts: There is a fault in the energizer
  • STEP 6 – Over 2,000 Volts: The energizer is operating properly. Move on to Test Three.

TEST THREE — GROUND ROD TEST

electric fence testing guide
Test 3 – Ground Rod Test

A lot of poor-performing fence systems can be blamed on inadequate ground systems. Every system should have at least three ground rods to perform properly. More ground rods should be installed if your electric fence is installed in sandy, dry or rocky soil. Frozen soil will also hinder the operation of your fence.

To test your ground rod system:

  • STEP 1 – Power: Connect your fence and ground hook-up wires, then turn the power on.
  • STEP 2 – Check Voltage: Use your  Fence Doctor to read the voltage on the ground wire.
  • STEP 3 – Over 400 Volts: If over 400 volts, your ground rod is leaking too much voltage. Add extra ground rods or make them deeper. Test again after making these adjustments.
  • STEP 4 – Under 400 Volts: The system is sufficiently grounded. Move on to Test Four.

TEST FOUR — HOOK-UP WIRE TEST

electric fence testing guide
Test 4 – Hook-Up Wire Test

Your electric fence’s hook-up wire is the line that leads from your energizer’s positive terminal to your fence. A second hook-up wire runs from the negative terminal to your first ground rod. Both of these need to be securely connected to the charger and their final destination. Likewise, conductivity must be fully established.

To test these wires, follow these steps:

  • Step 1 – Power: Turn off your power to your charger.
  • Step 2 – Secure: Check both connections (positive-to-fence and negative-to-ground rod) and make sure they are securely attached. If one or more has come loose, reattach, turn your power back on and see if this resolves your issue. If not, continue to Step 3.
  • Step 3 – Disconnect: Keep the hook-up line connected to the terminal and disconnect it from the fence (leave the ground rod hook-up completely attached).
  • Step 4 – Test: Turn the power on. Then, using your voltage tester, check the output of the hook-up wire that is normally attached to the fence.
  • Step 5 – Less than 1,500 Volts: If the reading is less than 1,500 volts, your hook-up wire is accidentally grounding itself in some way. You should ensure that you are using a 20 KV insulated wire. Turn the power off, replace this wire and recheck your reading.
  • Step 6 – More than 1,500 Volts: If the voltage on the hook-up wire reads more than 1,500 volts, the hook-up wire is fine. Reconnect this line to the fence and move to Test Five.

TEST FIVE — FENCE TEST

electric fence testing guide
Test 5 – Fence Test

When you have eliminated all other options, it’s time to take a good look along the length of your fence.

  • Step One – Power: Turn the power on.
  • Step Two – Walk and Test: Every 100 feet or so, test your line. If you get no reading or a low reading, back up 50 feet test again and try to find where the drop begins.
  • Alternative: Get a KADIS.COM.NG Fence Doctor, which will indicate the direction of the fault so you can find it quicker.
  • Tip One: Be aware that the longer your fence, the more voltage drop you should expect at the most-distant portions of your fence.
  • Tip Two: If the voltage drop along a lengthy fence is too much, you may want to buy a more powerful charger or set up a second fence fueled by another charger.

ELECTRIC FENCE TROUBLESHOOTING – WHAT TO LOOK FOR

After Test Five, you may determine that your fence has a short somewhere and you will have to walk your fence line. Shorts can be created by numerous situations, so be sure to consider all of the following as you make your survey:

TPost Gate handle Anchor

  • Are the Hook-up Wires Firmly Attached? – These wires can make or break your fence, make sure all your fasteners are attached.
  • Are the Jumpers Between Lines Connected Properly? – Jumper wires carry voltage from one fence wire to another, often between gates, at corners or in multiple wire situations. If one wire is hot, and another shows no charge, check your jumper wire for a good connection.
  • Are Splicers and Splices Providing a Good Connection? – When you perform fence repairs or need to extend a line, you may opt to install a connector or make a splice directly with your wire. Even if these appear to be secure, they may not be making a good connection, so check for voltage before and after the splice.
  • Is the Fence Leaking Voltage into the Earth? – You want to look to see if a shovel or other object was left leaning against the fence. Such an object would lead to a short.
  • Is Vegetation Touching the Line? – If a plant – whether it’s a weed growing up from below the fence, a bush growing into the fence, or a branch resting on the fence – will drain voltage from your electric fence. Clear these items from the fence and maintain a regular schedule of trimming these plants.
  • Are Gates Properly Wired to Connect Over the Gap? – One of the biggest trouble spots for fencing (after improper grounding) is trouble with wiring around and under gates. Check for good connections and that wire bridging the gap is remaining hot.
  • Are the Proper Insulators Installed? – If you are using insulators
  •  that are not built specifically for the brand or wire style you’re using, then they may not properly insulate the electricity from being grounded by your fence posts.
  • Are the Insulators Damaged, Cracked or Dirty? – Damaged and cracked insulators can create shorts or drain voltage on your fence. Be prepared to replace individual insulators during your regular survey of your fence line. Insulators can be damaged by prolonged exposure to sun and temperature variations as well as stresses to the fence line, such as an animal attempting to run through the fence or a tree collapsing on it. Dust and cobwebs can also create problems with insulators.
  • Is the Wire, Polyrope or Polytape Touching a Fencepost Somewhere? – Check to see if your wire got dislodged from an insulator somewhere along the fence. If your wire comes in direct contact with a fencepost, it will short out.
Electrified gate
Fence trouble? Be sure to check for connections around your gates, whether they are electrified or not. Electrified gates can lose a connection over time, and insulated wires running under non-electric gates may deteriorate.
How to Troubleshoot Electric Fence Problems and Then Fix them!

CCTV, Security Cameras, Access Control, Video Door Phones, Biometric Devices, Bio-metrics Attendance, Spy Gadgets, Automatic Gate, Electric Gate, Intercom, PABX, Burglary alarm systems, Fire Alarm Systems, Perimeter Intrusion Alarm, System, Electric Fence, Automobile/Car Tracker, DSTV, Free-To-Air, Satellite Systems, Gotv, Abuja, Apo, kabusa, galadimawa, gudu, lokogoma
CCTV, Security Cameras, Access Control, Video Door Phones, Biometric Devices, Bio-metrics Attendance, Spy Gadgets, Automatic Gate, Electric Gate, Intercom, PABX, Burglary alarm systems, Fire Alarm Systems, Perimeter Intrusion Alarm, Electric Fence, Automobile/Car Tracker, DSTV, Free-To-Air, Satellite Systems

I have approximately 20 acres enclosed by a high tensile electric fence. I put it up myself and have been troubleshooting this electric fence for about three years now. These are my lessons learned about how to troubleshoot electric fence problems.

It is a constant struggle to keep an electric fence working. Between trees falling on it, weeds growing up it, lightning striking it, and wear and tear on the insulators, you can expect to maintain it a few hours each month. The good news? This is a great excuse to go on a walk with your dogs (while carrying a bundle of tools with you).

Here are all the ways my fence has broken, and how I fixed it, and how I am trying to prevent future problems.

First question: When you put in the fence originally, was the charge good?

When I first put in my fence, I had almost no faults. My fence charger showed 14.1, which I think translates to 14,100 volts. To put things into perspective, these fence chargers are effective deterrence against cattle down to a reading of 2.0. Horses will avoid the fence down to 0.5 or even lower.

If you answered NO – that you never had a good charge on your fence, then you need to ask whether your wires are insulated properly, or whether there are major design flaws. This may not be fixable without rebuilding some of your fence.

In particular, be careful how you string the brace wire on your corner posts. If you aren’t careful with how you route it, this wire will lie against your fence wires (causing a short). Normally you want the brace wire to be on the inside compared to other fence wires.

If you answered YES – that you once had a good charge (like the picture of the fence charger above), but over time your voltage has dropped, then it should be fixable. Read on!


Is your electric fence grounded correctly?

Electric fence chargers need to be connected to the ground with a long metal rod. Most manufacturers say that you need three 8′ (2.8m) ground rods pounded into the ground, spaced several feet (2m) apart. If your fence is less powerful during dry weather, it is a sign that your grounding system needs help.

Tips for testing your electric fence

Using a Zareba voltage tester to see if the fence is live.

You can purchase a voltage tester at your local farm store. Hook the top end to your electric fence, plug the bottom end into the ground, and see whether lights flash. This is a slow, annoying way to test your fence because you have to plug it into the ground each time. More expensive testers will show you a digital readout instead of lights.

No fence tester? No problem.

A word of caution: This advice is from my own experience. I’m not an expert. Perform at your own risk. If you are wearing a pacemaker or getting zapped would be really bad, don’t do any of these things.

Electric fences for farms send very short “pulses” of electricity across the wire. Normally one pulse per second, and each pulse lasts a tiny fraction of a second. This is meant to allow the animal (or human) to get away from the fence before they are shocked again. If you have a fence charger, you probably have heard it clicking like a metronome. Each click is a pulse.

Electric fences are not meant to do permanent harm to animals (or humans). The voltage can be very high, but the amperage is low. Amps is what causes harm when we get shocked. Amperage should ideally by around 1. Voltage should be around 2,000 to 15,000.

I’ve been shocked at full strength (10,000+ volts) a few times. Not recommended!!! My most memorable shock actually left small entry and exit marks (they looked like small ashy circles with a burnt dot in the center). I haven’t had any long-term damage but I don’t want to repeat the experience!

The Badass Method for testing electric fences

shows brown rubber boots (knee high)

Ye olde rubber boots, AKA “Muck boots”. Available for $20 at your farm store. They provide significant protection against shocks.

Find some tall rubber boots and wear them. Assuming they don’t have holes, the grass isn’t higher than your boots, and you aren’t touching anything that could act as a ground, you will be mostly protected against shocks. This means that you will feel the zap in your finger, but it won’t go through your entire body like a lightning bolt. I have been known to test fences directly with my hand while wearing rubber boots.

This method is very impressive to people who don’t realize you are wearing rubber boots.

The Grass Method for testing electric fences

Testing electric fences without a tester. Picture of a hand holding a grass stem against electric fence. There is about 10 inches between the fence and the hand.

Start with a long blade of grass (at least 6 inches long). Hold one end, and lay the other end on your electric fence. You probably won’t be able to feel anything at max extension.

Picture of a hand holding a grass stem against electric fence. There is about 3 inches between the fence and the hand. Used to troubleshoot electric fences.

Slowly choke up on your grass stem. As you get closer to the fence, you will start feeling a very light zap in your fingers. This means the fence is on. Stronger voltage and wearing (or not wearing) rubber boots will change the distance you can feel a zap.

Use the grass method to test your fence when you don’t have rubber boots or you want to avoid pain. Pluck a long stem of green grass (ideally 10 inches or longer), and hold one end of it. Dangle the other end against your electric fence. Normally you won’t feel anything at this point. Slowly push the stem toward the fence so that there is less distance between your hand and the fence. At some point, you will start feeling a very faint zap. The closer you are before you feel the zap, the lower voltage and/or the more conductive your grass stem is.

Troubleshooting your electric fence

Did your Fence Charger stop clicking, and looks powered off?

Lightning strike on the electric fence destroys the charger

If you had a thunderstorm last night, I have bad news for you. Lightning probably hit your fence and traveled along it to melt the charger. Your charger is dead.

What can you do to prevent this in the future?

  1. Get a good warranty on your fence charger and keep the paperwork handy. Make sure the warranty protects against lightning strikes.*
  2. Install a lightning arrester on your fence about 50-100 feet before it connects to the charger.
  3. Use a surge protector between your electrical outlet and the fence charger.
Shows a lightning arrester for an electric fence. One side is connected to the fence wire, one side is connected to a ground. Once I started using this, I didn't have to fix my electric fence as often after lightning storms.

I use a Zareba Lightning Arrester. You connect one side to your electric wire, and one side to the ground. When lightning hits your electric fence, the electricity travels to this spot and then shortcuts to the ground by arcing across the arrester. As long as your fence charger is 50+ feet beyond this spot, it avoids the electricity.

Shows a lightning arrester for an electric fence. The ground side is connected to my existing non-electric fence. Because the non-electric fence is buried in the ground, it acts as a direct ground.

In my case, my non-electric fence is buried in the ground, so it works as a ground rod for my arrester. If you don’t have something like this, you should either bury your ground cable or install a ground rod.

My first year with electric fences, I had two chargers destroyed by lightning. I installed an arrester and haven’t had a problem in about 18 months.

* Don’t be like me and wait for shipping on a replacement charger. Get a new fence charger right away and install it. I had a cow escape my fence four days after the charger died. That stress was NOT worth saving a hundred bucks.

Blown fuse on the fence charger

Most fence chargers have a fuse inside them. This fuse limits the amperage, which is an important safety measure (getting electrocuted is not good). My fence chargers all use standard 1-amp fuses. These can normally be bought on the same store aisle as your charger. If in doubt, just replace it.

Lightning and blown fuses: When lightning hits a fence charger, the fuse will often explode. If you open up the fuse and shards of burnt glass fall out, it isn’t worth trying to fix it. Warranty repair and/or buy a new charger. I once spent a few hours trying to remove the pieces, clean out the compartment, and put a new fuse in – guess what, it didn’t work because the charger was melted on the inside.

If your fuse is just blown (it will look like it has smoke inside the glass), definitely try replacing it! This will often fix the issue. Since installing a lightning arrester, I’ve started to just get blown fuses instead of melted fence chargers. Big improvement.

Your power source isn’t working, so your fence charger is off.

If you use AC for your fence charger, make sure the power outlet is working. You may have to flip the breaker.

If you use batteries (solar or direct current) for your fence charger, make sure the battery is plugged in, the connections are polished, and your battery is charged up. The battery could also be frozen or missing battery fluid, etc.

Random note: I tried solar and found it lacking in juice. Not good for cows, they will ignore little zaps. I’ve only seen solar used successfully with horses.

GFCI outlets and electric fence chargers.

Were you amateur enough to use a GFCI outlet to power your fence charger? (I did this at first). Housing codes require that external power outlets are all protected by GFCI. Unfortunately, the act of zapping a critter is exactly what GFCI triggers on. It can feel the power flow into the ground and will shut down the circuit.

You need to get your charger off GFCI or it will keep shutting off. Luckily, this is pretty easy to do. Replace the GFCI outlet with a non-GFCI one. Then take steps to protect this outlet so that people can’t electrocute themselves by using it. For example, I have my outlet in a box that is physically locked shut to prevent access. You are responsible for complying (or not) with your local housing code.

Did the voltage on your electric fence drop to zero suddenly?

” alt=”An end-braced high tensile electric fence with a farm dog in the background. The brace wires travel near the high tensile wires and could cause grounding.” width=”616″ height=”567″ data-src=”https://dirtyfootfarm.com/wp-content/uploads/2019/09/corner-bracing-posts.jpg” data-srcset=”https://www.dirtyfootfarm.com/wp-content/uploads/2019/09/corner-bracing-posts.jpg 616w, https://www.dirtyfootfarm.com/wp-content/uploads/2019/09/corner-bracing-posts-300×276.jpg 300w” data-sizes=”(max-width: 616px) 100vw, 616px” />

Whenever you have wires in close proximity to each other, they are likely to touch. Wires have an amazing way of breaking through anything you put in their way (such as plastic insulators, electrical tape, wood blocks, and zip ties). If your electric fence connects to a ground wire, your charger reading will suddenly drop to 0.

Pro tip: I find it more effective to pull wires away from each other (such as using zip ties or wire to pull non-energized wires into a bundle), than to put an insulator between touching wires.

If your voltage was humming along at say, 4.7, then suddenly dropped to 0, you have a direct ground problem.

Look for cables that fall and touch either the ground or a non-insulated wire.

This means that you have an excellent conductor (such as a metal wire) connecting directly from your electric fence to the ground. Or part of your electric fence has fallen to the ground. Or you use T-Posts and one of the insulators broke so the fence is touching the T-Post directly. This is an OK fix for cables that want to touch each other. At first, I tried to use electrical tape as an insulator. The shocks melted through the tape after a few months. This insulator will last a year or two before natural friction (caused by wind, storms, etc) wears through it.

A better solution would be to pull the brace wires together in the center using zip ties or flexible wire. This will keep the brace wires from touching your fence wires, and last much longer. I changed to this method (pulling brace wires together in the center) after a few years.

When you are putting in a new fence, there is a way to string the cross-brace wires so that they don’t touch your energized wires. I didn’t realize that when I was putting in the fence, so this year (2020) I finally re-strung the bad ones.

Is the fence voltage slowly dropping over time?

Fix electric fence – stuff is touching your wires!

When your voltage slowly drops, it means that you have lousy conductors touching your electric fence. A small amount of your voltage is traveling through these conductors to the ground, and is lost.

  • Long grass is the most common. I weed spray my fence lines with long-term weed killer to prevent this issue. It is tricky (and dangerous) to mow around high tensile fences, so I avoid it.
  • Fallen trees or limbs across the fence. If you live in a wooded area, you will have stuff fall on your fence.
  • Spider webs across the fence??? I think I’m just paranoid, but it makes me crazy when I see spider webs bridging between electrified and non-electrified parts of my fence.
  • Water or ice. If you have enough rain or sleet, the ice can bridge around your insulators and cause a temporary dip in your voltage.

Fix: Are your electric fence insulators broken?

Insulators are the plastic pieces that go between wood posts and your fence, T-posts and your fence, trees and your fence, or your fence and other wires. A well built electric fence should have insulators between the fence wire and everything else it touches, except for air. Over years, your insulators may fail. The metal staples used to attach insulators to wooden posts are the main reason for insulator failure.

Important: Wood is not a good insulator.

If I were to re-do my fence, I would be way more careful about how I hammer in the staples. It is extremely important to not dent the insulators.

Metal staples break electric fence insulators over time

You need some sort of plastic or ceramic insulator between your electric fence and the fence posts. Especially when it has been wet, your fence posts will conduct electricity to other strands of the fence, and/or to the ground.

This is a failed insulator on my property (the black tube). It was stapled to the tree, the tree grew, the staple wore through the plastic. The fence started losing power into the tree as a result. The yellow insulator is my fix. It is a 1×6″ T-Post insulator that I stapled into place. This should last a long time.

Finding staples that cause a ground fault

  • Metal staples can dig through plastic insulators over time. When this happens, the staple contacts your electric fence wire and provides a conduit to the wooden post. This is a major problem with my fence, and is hard to diagnose. The way I look for it is to touch each metal staple with my finger (see The Badass Method above) and if I feel a zap, it means the staple has worn through the insulator. To fix, use a screw-in insulator instead.

Testing to see if the staple has degraded the insulator. If the staple has broken the plastic and is contacting the electric fence wire, you will feel a zap in your finger. Or get a shock, if you aren’t wearing rubber boots.

Testing another insulator on an end post. When I built the fence, I didn’t realize that staples will wear through insulators over time. Try not to dent the plastic when you are hammering. End and corner post insulators should be held in place by upper and lower staples that are not tight.

Electric Fence Problems and Solutions from Kadis.com.ng


CCTV, Security Cameras, Access Control, Video Door Phones, Biometric Devices, Bio-metrics Attendance, Spy Gadgets, Automatic Gate, Electric Gate, Intercom, PABX, Burglary alarm systems, Fire Alarm Systems, Perimeter Intrusion Alarm, System, Electric Fence, Automobile/Car Tracker, DSTV, Free-To-Air, Satellite Systems, Gotv, Abuja, Apo, kabusa, galadimawa, gudu, lokogoma
CCTV, Security Cameras, Access Control, Video Door Phones, Biometric Devices, Bio-metrics Attendance, Spy Gadgets, Automatic Gate, Electric Gate, Intercom, PABX, Burglary alarm systems, Fire Alarm Systems, Perimeter Intrusion Alarm, System, Electric Fence, Automobile/Car Tracker, DSTV, Free-To-Air, Satellite Systems

Electric fence problems often stem from issues with the energizer, grounding, or the fence itself. Common problems include low voltage, broken wires, faulty insulators, and poor grounding. Solutions involve checking the energizer’s power output, ensuring proper grounding with sufficient earth rods, repairing broken wires or insulators, and maintaining vegetation clearance to prevent grounding. 

Common Electric Fence Problems and Solutions:
  1. 1. Low Voltage:
    • Problem: The energizer is not producing enough voltage to deter animals. 
    • Solution:
      • Check the energizer’s power source (battery, solar, or mains) and connections. 
      • Ensure the battery is adequately charged and connections are clean and secure. 
      • Test the energizer’s output with a voltmeter or fault finder. 
      • If the voltage is low, consider replacing the energizer or adding a more powerful one. 
      • Ensure the fence is adequately grounded. 
  2. 2. Broken or Shorted Wires:
    • Problem: Wires can break due to tension, friction, or damage. Shorts can occur when wires contact the ground, metal objects, or vegetation. 
    • Solution:
      • Walk the fence line and visually inspect for breaks or shorts. 
      • Repair broken wires by splicing or using connectors. 
      • Remove any vegetation or objects touching the fence to prevent shorts. 
      • Use insulated posts, especially at corners, to prevent shorts. 
  3. 3. Faulty Insulators:
    • Problem: Insulators prevent the electricity from grounding out on the posts. If they are broken or damaged, voltage will leak, reducing the fence’s effectiveness. 
    • Solution:
      • Inspect insulators for cracks, damage, or wear. 
      • Replace any damaged insulators with new, high-quality ones. 
  4. 4. Poor Grounding:
    • Problem: A poorly grounded fence will not provide a proper shock. 
    • Solution:
      • Ensure the energizer is properly grounded with sufficient earth rods. 
      • The earth rods should be placed in moist soil and spaced apart. 
      • Test the grounding system with a voltmeter or fault finder. 
      • If necessary, add more earth rods or deepen existing ones. 
  5. 5. Vegetation Contact:
    • Problem: Grass, weeds, or other vegetation touching the fence can drain energy and reduce voltage. 
    • Solution:
      • Clear vegetation from around the fence line. 
      • Consider using a weed eater or herbicide to keep vegetation under control. 
      • If vegetation is unavoidable, use taller insulators or raise the fence to prevent contact. 
  6. 6. Energizer Problems:
    • Problem: The energizer may be faulty, leading to no output or reduced output. 
    • Solution:
      • Check the energizer’s power source (battery, solar, or mains) and connections. 
      • Consult the energizer’s manual for troubleshooting steps. 
      • Consider replacing the energizer if it is faulty. 
  7. 7. Loose Connections:
    • Problem: Loose connections can interrupt the flow of electricity. 
    • Solution:
      • Check all connections, including those to the energizer, ground rods, and fence wires. 
      • Tighten any loose connections and ensure they are secure. 

Read More

Common Problems of Automatic Gate and Major Solutions in Resolving the Automatic Gate Problems


Common problems with automatic electric gates include the gate not opening or closing, slow or jerky movement, and unusual noises during operation. These issues can often be resolved by checking the power supply, ensuring the remote batteries are functional, inspecting for obstructions, and examining the sensors. If these simple checks don’t resolve the problem, professional assistance may be needed to diagnose and repair more complex issues like motor malfunctions or control board problems. 

Common Problems and Solutions:
  • Gate Not Opening or Closing:
    • Possible Causes: Power outage, tripped circuit breakers, dead remote batteries, faulty receiver, obstructions in the track, or motor issues. 
    • Solutions: Check power supply and circuit breakers, replace remote batteries, clear any obstructions, and manually operate the gate to check for motor problems. 
  • Slow or Jerky Movement:
    • Possible Causes: Worn rollers or hinges, lack of lubrication, dirt and debris in the track, or motor problems. 
    • Solutions: Lubricate moving parts, clean the track, and consider replacing worn components. 
  • Unusual Noises During Operation:
    • Possible Causes: Misaligned tracks, loose or worn chains, rusted hinges, or motor strain. 
    • Solutions: Inspect and realign tracks, tighten or replace chains, lubricate hinges, and consider motor replacement if necessary. 
  • Faulty Sensors:
    • Possible Causes: Dirty or damaged sensors, misaligned sensors, or damaged wiring. 
    • Solutions: Clean sensors, realign sensors, and inspect wiring for damage. 
  • Interference:
    • Possible Cause: Interference from other devices using the same frequency. 
    • Solution: Consider switching to a different frequency for the gate’s remote control. 
  • Gate Not Responding to Remote:
    • Possible Causes: Dead remote batteries, faulty remote, or a faulty receiver. 
    • Solutions: Replace batteries, try a different remote, or check the receiver. 
When to Seek Professional Help:
  • If simple troubleshooting steps don’t resolve the issue. 
  • If you suspect a motor problem or control board malfunction. 
  • If the gate is making unusual noises or moving erratically. 
  • If you are unsure about any part of the troubleshooting process. 
Preventative Maintenance:
  • Regularly clean the gate track and sensors.
  • Lubricate moving parts periodically.
  • Inspect the gate for any signs of damage or wear.
  • Ensure the gate is properly aligned. 

By following these troubleshooting steps and performing regular maintenance, you can help ensure your automatic electric gate operates smoothly and reliablyautomatic electric gates problem solution from adamsdoors.co.za

Contact KADIS.COM.NG on 08061379390 or 08024207231 for sales, installation and consultancy services

Five Common Automatic Gate Problems and How to Fix Them Properly

Automatic gates are popular not just for their convenience, but also for their added security in keeping your property safe. They can also enhance the curb appeal of your home or business. However, just like any machine, they can break down and encounter issues. In this article, we will discuss five common automatic gate problems and how to fix them.

1. The Gate is Not Responding to Remote Control

When the gate does not respond to the remote control or is only working intermittently, it’s possible that the gate operator’s batteries need to be replaced. Check the remote control batteries and replace them if necessary.

If the batteries are alright, check if there are any obstructions or debris blocking the gate’s photo-eyes or sensors. Photo-eyes are responsible for detecting if there are objects or people within the gate’s path. Check if they are correctly aligned and clean.

Another reason the gate may not be responding to the remote control could be due to interference from other electronic devices. Try moving the gate opener’s antenna to improve reception.

2. The Gate is Moving Slower Than Usual

If the gate appears to be dragging or slower than usual, there may be an issue with the gate opener’s motor. Check if there are any visible signs of damage or wear and tear, such as cracked or missing gears.

Next, check the gate’s tracks, wheels, and bearings. Over time, these components can accumulate dust, dirt, or debris, which can cause the gate to move slowly or get stuck.

Lubricate the gate’s moving parts with a silicone spray or lithium grease to remedy any friction that might be causing the slow movement. Also, ensure the gate’s rollers or bearings are clean and free of debris, and they roll evenly along the track.

3. The Gate is Not Opening or Closing

If the gate is not opening or closing, check the gate’s power supply first. Make sure that the gate’s circuit breaker or fuse is functioning correctly.

Next, check the wiring connections between the gate operator and the control panel. Ensure all connections are tightly secured and free of any corrosion or rusting.

Another reason the gate may not be opening or closing could be the limit switches. The limit switches are responsible for regulating the gate’s opening and closing positions. Check if the limit switch is working correctly by testing it on the control panel. If the switch is faulty, it may need to be replaced.

4. The Gate is Making Unusual Noises

Grinding or screeching sounds from the gate can indicate a severe problem. If the noise is coming from the gate opener’s motor, it may suggest that there is damage or wear and tear in the gear shafts. Lubricate the gear shaft properly with the right lubricant to solve the issue.

If the sound is coming from the gate’s hinges or metal parts, it could be an indication that the gate needs to be lubricated. Use a non-corrosive, rust protection lubricant to eliminate any sounds coming from the gate hinges or metal parts.

5. The Gate is Stuck Open or Closed

If the gate is stuck in the open or closed position, check if there are any physical obstructions, such as debris or objects blocking the gate’s wheels or track.

Also, inspect the gate’s wheels, track, and bearings to ensure they are functioning correctly. Any damages or malfunctions in these components can cause the gate to stick.

If the gate opener’s motor is overheating or overloaded, it can cause the gate to get stuck. Allow the motor to cool off for a few minutes before attempting to operate the gate again.

FAQs-

1. Can I fix automatic gate problems myself?

It depends on the severity and nature of the problem. Some automatic gate issues can be easily resolved without professional assistance, such as replacing remote control batteries or cleaning the gate’s moving parts. However, if the problem is more complex, it’s recommended to seek professional help. Trying to fix a problem without the right knowledge may lead to further damage or accidents.

2. How often should I lubricate my automatic gate?

It’s recommended to lubricate the gate’s moving parts, such as hinges and bearings, every six months or as necessary. This will extend the life of the gate and reduce the risk of malfunctions or breakdowns.

3. Can weather conditions affect the gate’s operation?

Extreme weather conditions, such as heavy rains, snow, or heat, can damage the gate operator’s motor and affect its operation. It’s recommended to protect the gate’s control panel and motor from harsh weather conditions by installing protective elements, such as a seal or cover.

Conclusion:

Automatic gate problems can be frustrating and hinder the convenience and security they provide. However, by understanding the common problems and how to fix them, you can ensure that your gate works correctly and lasts longer. Remember to seek professional assistance when necessary and maintain your automatic gate regularly for optimal operation.

CCTV, Security Cameras, Access Control, Video Door Phones, Biometric Devices, Bio-metrics Attendance, Spy Gadgets, Automatic Gate, Electric Gate, Intercom, PABX, Burglary alarm systems, Fire Alarm Systems, Perimeter Intrusion Alarm, System, Electric Fence, Automobile/Car Tracker, DSTV, Free-To-Air, Satellite Systems, Gotv, Abuja, Apo, kabusa, galadimawa, gudu, lokogoma
CCTV, Security Cameras, Access Control, Video Door Phones, Biometric Devices, Bio-metrics Attendance, Spy Gadgets, Automatic Gate, Electric Gate, Intercom, PABX, Burglary alarm systems, Fire Alarm Systems, Perimeter Intrusion Alarm, System, Electric Fence, Automobile/Car Tracker, DSTV, Free-To-Air, Satellite Systems
Lists and Links of Digital Skills, Products, Courses, Services and Trainings at Discounted Rate
List of Professional Digital Skills, Courses, Training, Products and Services at Discount Price. Click https://academy.analytics.ng
📚💻💽🎦🔊 You can learn at your convenience and at your own pace using our practical recorded and  detailed videos, ebooks and texts. Up-Skill, Learn & Earn! Visit https://academy.analytics.ng or Contact 08061379390 for more enquiries.
To enrol, select any digital skill, course or product of your choice and pay exactly the  amount to the account details as stated on academy.analytics.ng
Thereafter, send your evidence of payment, email, course title and link to 08061379390 for onward delivery.
For further enquiries, please normal phone calls are preferred🙏
Comprehensive List👇
1.     WHATSAPP AUTOMATION PILOT (N2,000)
2.     LEARN THE A_Z OF VIDEO EDITING AND MANIPULATION (N2,000)
3.     HOW TO CREATE INTERNATIONAL TIKTOK ACCOUNT (N3,000)
4.     E-MAIL SPAM WORDS CONVERTER SOFTWARE (N2,000)
5.     15,000,000+ DIGITAL PRODUCTS PLR BUNDLE (N15,000)
6.     PIXEL A.I SALES INTEGRATION PROGRAM (N5,000)
7.     DESIGNER’S ULTIMATE TOOLKIT (N3,000)
8.     GET YOUR AD ISSUES FIXED WITHIN 24HRS (N5,000)
9.     FLUTTER APPLICATION DEVELOPMENT COMPLETE VIDEO COURSE [iOS/ANDROID] (N2,000)
10.MASTER A.I VIDEO CREATION FROM PROMPT TO VIDEO (N2,000)
11.INVIDEO.IO SUBSCRIPTION (FREE)
12.GET LIFERTIME ACCESS TO CAPCUT PRO [ANDROID ONLY] (N3,000)
13.5 IN 1 AI PREMIUM APPS BUNDLES (N2,000)
14.STEP-BY-STEP LEARN THE A-Z ON DIGITAL MARKETING (N5,000)
15.ADOBE 2024 COLLECTION (N5,000)
16.3M+ EBOOKS [BUY & RESELL FOR 100% PROFIT] (N15,000)
17.DESIGN RESOURCE PACK (N2,000)
18.DEVELOPER BUNDLE 2.0 (N2,000)
19.7 IN 1 BUNDLE PACK GRAPHICS DESIGN (N3,000)
20.RUN PROFITABLE WHATSAPP ADS COURSE WITH YOUR SMARTPHONE (N3,000)
21.CARTOON ANIMATION (N2,000)
22.EDITABLE PIXELLAB TEXT EFFECT (N1,500)
23.GET 100+ COURSES WITH RESALE RIGHTS (N2,000)
24.1 TB PREMIUM ULTIMATE DIGITAL MARKETING TOOLS BUNDLE (N15,000)
25.10 HIGH INCOME SKILL COURSES (N3,000)
26.CORELDRAW ADVERTISEMENT FLYER VIDEO COURSE
27.30,000+ COMPLETE DIGITAL SECRETS (N3,000)
28.3000+ EXCEL TEMPLATES (3,000)
29.KIDS 3D ANIMATION (N2,000)
30.PHP SCRIPTS (N5,000)
31.500+ HIGH QUALITY YOUTUBE THUMBNAIL PACK (N2,000)
32.A STEP-BY-STEP GUIDE TO MY DAILY ALERTS BLUEPRINTS (N50,000)
33.HOW TO PACKAGE WHAT YOU KNOW INTO E-BOOKS & SELL ONLINE (N2,000)
34.THE COMPLETE MICROSOFT OFFICE COURSE (N5,000)
35.LEARN WEB DESIGN WITH YOUR SMARTPHONE (N2,000)
36.ULTIMATE GUIDE TO DROP-SHIPPING (N2,000)
37.SMARTPHONE DESIGN FOR BEGINNERS (N2,000)
38.BUILD AND MONETIZE MOBILE APPS [GET PAID IN DOLLARS] (N2,000)
39.HOW TO MAKE 100K – 500K MONTHLY FROM HOME (N3,000)
40.BUILD AMAZING WEBSITES IN LESS TIME WITH THESE RESOURCES (N2,000)
41.WEBSITE DESIGN SECRET BUNDLE (N2,000)
42.LEARN A DIGITAL SKILL (N4,000)
43.HOW TO GET ISBN (N15,000)
44.IGNITE YOUR INSTAGRAM INFLUENCE QUICKLY (1,000)
45.COMPLETE AMAZON KDP GUIDE (N2,000)
46.BECOME A PROFESSIONAL PHOTO EDITOR (N2,000)
47.ADVERTISE ON MY WHATSAPP STATUS (N100)
48.COMPLETE EXCEL COURSE (N3,000)
49.20+ MOST SOURCED DIGITAL COURSES (N2,000)
50.A-Z OF WORDPRESS (N5,000)
51.SMARTPHONE>>>>>PHOTO EDITING + VIDEO EDITING + MANIPULATION (N2,000)
52.FOREIGN COURSES BUNDLE 2.0 (N5,000)
53.FRONT/BACKEND WEBSITE DEVELOPMENT (N3,000)
54.BUILD AMAZING MOBILE APPLICATIONS AND UPLOAD TO PLAYSTORE (N2,000)
55.DESIGN IT YOURSELF (N2,000)
56.HOW TO WRITE AND SELL BOOKS FOR MONEY (N2,000)
57.NEW CYBERSECURITY & ETHICAL HACKING COURSES BUNDLE (N1,500)
58.A.I. ART AND ANIMATION (STEP-BY-STEP) – (N2,000) https://academy.analytics.ng/courses/a-i-art-and-animation-step-by-step/
60.THE MOST COMPLETE DIGITAL COURSE BUNDLE (FOR ALL DIGITAL FIELDS) – (N5,000) https://academy.analytics.ng/courses/the-most-complete-digital-course-course-bundle-for-all-digital-fields/
61.UNVEILING THE STRATEGIES BEHIND A SUCCESSFUL WEB DESIGNER (N2,000) https://academy.analytics.ng/courses/unveiling-the-strategies-behind-a-successful-web-designer/
62.10,000 BUSINESS WHATSAPP GROUP LINKS (N1,000) https://academy.analytics.ng/courses/10000-business-whatsapp-group-links/
65.GET OVER 90,000 GRAPHIC DESIGN RESOURCES (N2,000) https://academy.analytics.ng/courses/get-over-90000-graphic-design-resources/
69.CREATE LANDING PAGES WITH YOUR SMARTPHONE (N3,000) https://academy.analytics.ng/courses/create-landing-pages-with-your-smartphone/
77.GET ACCESS TO OVER 950 PREMIUM WEBSITE TEMPLATES AND DESIGN WEBSITE WITHOUT CODING  https://academy.analytics.ng/courses/get-access-to-over-950-premium-website-templates-and-design-website-without-coding/
78.SECRETS TO EDIT AND CONVERT ANY PDF FILE (N2,000) https://academy.analytics.ng/courses/secrets-to-edit-and-convert-any-pdf-file/
87.Explainer Videos: A Comprehensive Guide to Creating Engaging Content https://academy.analytics.ng/courses/explainer-videos-a-comprehensive-guide-to-creating-engaging-content/
Join and share our WhatsApp group as  we’ll soon start free trainings on digital skills
One-Stop-Solution, Shop, Office, ICT Support and Training, Office or Virtual Assistance, Computer Business Centre, Research - Academic, Business, Social, Data Collection, Data Analysis, Survey and Questionnaire Development, Professional Writing Services, Digital Marketing, Social Media Management, Business Incubation, Support, Business Training, Graphics Design and Printing, 2 Minutes Passport Photos, website designing, video editor, editing, advert jingles, door-delivery, services, one-on-one, Opay agent, Moniepoint agent, CCTV, PABX, Intercom, Electric Fence, Security System, Biometrics, Access Control Systems, Car Tracker, Monitoring, Spy Gadgets, TV Decoders, Satellite Systems, DSTV, Free-to-Air, GOTV, Startime, FreeTV, SLTV, Phone and Computer Accessories, PS Game Pads, Cables, Consoles, Accessories, maitama, CBD Federal Secretariat, Head of Service, Abuja, Central Business District, Central Area, door-step, efranky, e-franky, kadis, digitals, analyticsng, data3ix, consult, technology, computers, gadgets, equipment, adapters, keyboard, mouse, sound card, Bluetooth, laptop, chargers, otg, converters, media
One-Stop-Solution, Shop, Office, ICT Support and Training, Office or Virtual Assistance, Computer Business Centre, Research – Academic, Business, Social, Data Collection, Data Analysis, Survey and Questionnaire Development, Professional Writing Services, Digital Marketing, Social Media Management, Business Incubation, Support, Business Training, Graphics Design and Printing, 2 Minutes Passport Photos, website designing, video editor, editing, advert jingles, door-delivery, services, one-on-one, Opay agent, Moniepoint agent, CCTV, PABX, Intercom, Electric Fence, Security System, Biometrics, Access Control Systems, Car Tracker, Monitoring, Spy Gadgets, TV Decoders, Satellite Systems, DSTV, Free-to-Air, GOTV, Startime, FreeTV, SLTV, Phone and Computer Accessories, PS Game Pads, Cables, Consoles, Accessories, maitama, CBD Federal Secretariat, Head of Service, Abuja, Central Business District, Central Area, door-step, efranky, e-franky, kadis, digitals, analyticsng, data3ix, consult, technology, computers, gadgets, equipment, adapters, keyboard, mouse, sound card, Bluetooth, laptop, chargers, otg, converters, media
A Carton of POS Paper Thermal Roll now Sold at N7,000. Visit us at KADIS.COM.NG

Original POS Paper Thermal Roll of different sizes is promoted by KADIS.COM.NG, A Subsidiary of E-Franky Global Services Limited

Description

Thermal printers don’t use ink cartridges or ribbons, which most retail business owners find advantageous because they can cut down their expenses. This is one of the reasons why most retail stores use thermal paper for printing their POS receipts. Even credit card machines and portable POS systems also use thermal paper, nowadays. our quality thermal paper roll is long-lasting, and prints on it can also last for a very long time. However, it’s imperative that you store them properly, especially if you’ll be needing them for audits and other accounting purposes.

The thermal printing process is also used by ATM operators as it is fast, reliable, and makes no sound. Just like with POS and credit card receipts, you may want to store your ATM receipts properly if you think you’ll be needing them in the future. POS Thermal Papers are widely used by Shopping Malls,Banks,Eateries,Transport Companies,Corporate Organisations for Cash Register Receipt, ATM Receipt,Parking Ticket among others. Enjoy you business receipt system by using this Thermal paper roll.

KEY FEATURES

  • pos paper roll
  • quality paper
  • maximum utility
  • value for money

SPECIFICATIONS

  • SKU: GE779SN45E55XNAFAMZ
  • Product Line: Stepping forward
  • Weight (kg): 2
  • Color: WHITE
  • Main Material: paper
KADIS.COM.NG Internet Data Subscription

Begin Leveling up your online world today with our smart data bundles. Start enjoying low rates Data Plan for your internet browsing with convenience.
We Offer Instant Services For :
Internet Data Subscription
Airtime Recharge
Cable Subscription and Electricity Bill Payment.

For Payment: 

GTBank

E-Franky Global Services Ltd.

Account Number: 0424528897
Send your required details before or after payment.

KADIS.COM.NG Internet Data Subscription

    MTN   AIRTEL                      GLO 9MOBILE
Plan            |      Prize


500MB –     –      N150

1GB   –      –     –  N280

2GB   –     –    –    N550

3GB   –    –     –    N800

5GB  –     –    –     N1300

10GB –    –    –     N2500


Plan            |      Prize


500MB –     –      N200

1GB   –      –     –  N300

2GB   –     –    –    N600

3GB   –    –     –    N850

5GB  –     –    –     N1400

10GB –    –    –     N2700


Plan            |      Prize


1.05GB –   –   –    N700

2.9GB –    –    –    N1100

4.1GB –     –    –   N1600

5.8GB –     –    –   N2000

7.7GB –     –    –   N2500

10GB –      –    –   N3000


Plan            |        Prize


500MB –     –    –   N500

1.5GB –    –    –      N1000

2GB –    –    –     –   N1200

4.5GB –    –     –     N2000

11GB   –   –    –   –  N3700

15GB   –   –    –      N4600

ACCOUNT DETAILS: E-FRANKY GLOBAL SERVICES (GTBANK) – 0424528897             CALL/WHATSAPP: 09010734334


Over 100 Million Nigerians Phone Numbers And Email Database (Updated And Verified)

…Reaching 80,000,000+ customers online with over 100 million verified emails and phone numbers of Nigerians in the database and sending more than 120 client ads nationwide per month via our Online Store, Business Facilitation, Advertising, Email Marketing, Bulk SMS and Voice SMS 

THE QUESTIONS YOU MAY WANT TO ASK US

  1. Why Email marketing?
  2. What packages/offers are available?
  3. I don’t have the contacts, how much can I buy it from you?
  4. Can you design the ad for us?
  5. How can the payments be made?
  6. Can you come to further discuss/collect the payment?
  7. I am ready to advertise with you, what do I need to do now?
  8. I already paid and booked to a time slot. I want to cancel the booking now?
  9. How do we know whether you really send our mails to entire base?
  10. What is the response rate of a typical email ad we do?
  11. Last but not the least…!!!

WHY EMAIL MARKETING?

Email is the currency of the web, and anybody who is online has an active email address. So when it comes to connecting with your prospects and customers, there’s no channel with a wider reach than email. Email marketing is the fastest way to increase your brand awareness. It has larger reach. it’s the most cost-effective and efficient ways to advertise. It delivers your message. It drives conversions. It has a higher ROI. It’s the most preferred communication channel. It’s an open platform and it will be around forever.


WHAT PACKAGES AND OFFERS ARE AVAILABLE?

FOR EMAILS:

  1. Over 600,000 Active Emails addresses of online shoppers in Nigeria (those who buy stuffs regularly on JUMIA, KONGA, KAYMU, DEALDEY, YUDALA, etc)
  2. 10,000 Online Shoppers Phone numbers and Individual emails
  3. Top corporate business organizations emails
  4. Nigerian businesses and their emails
  5. Nigerian Churches emails
  6. Nigeria Internet users Email
  7. Events planners’ email
  8. Nigeria Job Seekers emails
  9. Nigerian Facebook Users Emails
  10. 160,000 High net worth Individuals emails Database and HR managers
  11. Over 50,000 Nigerian Recruiters and HR Emails
  12. 53,000 Nigerian Companies/Business Database with full details (Name, Address, Phone No, Email address, etc)
  13. 80,000 Medium to large scale businesses e-Mail Database-of SMEs
  14. Over 100,000 emails classified according to sectors and areas of specialization
  15. Real Estate Emails & Its GSM Database ( 0ver 50,000 entries)
  16. Engineers eMails & Its GSM Database (2,215 Entries)
  17. 17,000 GSM Business Owners In Surulere, Ikeja, Island & Amumo Odofin, Lagos State.
  18. 880,000 active Working Class email addresses in Nigeria
  19. 500,000 active General Internet users’ emails addresses in Nigeria
  20. Over 600,000 active Business details in Nigeria (Names, Phone Nos. & Emails)
  21. B2B (Business to Business) and B2C (Business to Customer) Nigerian emails
  22. Nigerian Hotels email addresses
  23. 50,000 active emails of top senior and co-operate executives in Nigeria
  24. 39,009 Lagos Students Active Emails address
  25. 39,009 Lagos Students Active Emails address
  26. 65, 536 Nigeria active emails nationwide
  27. 52,140 (Business School Alumni in Nigeria)
  28. 20,000 active classified contacts of Co-operate Executives in Nigeria
  29. Over 2 Billion emails of Foreign Countries including, USA, UK, China, India, South Africa, Malaysia, etc.
  30. And much more

 FOR PHONE NUMBERS:

  1. We have over 100 million active phone numbers of everyone in all the 36 states of Nigeria including FCT. The phone numbers are classified according to their First Name, Last Name, State, Local Government Area and Gender. We also have others classified by Polling Units, Gender, Names and Phone Numbers.

Furthermore, we also have the following:

  1. 50,000 active phone numbers of top senior and co-operate executives/Directors in Nigeria.
  2. Over 60,000 active phone numbers of business owners in Nigeria (properly arranged according to sectors and area of specialization such as construction, engineering, education, manufacturing, HR, real estate, printing & publishing, shopping, hospitality, retails & trade, advertising, oil and gas, technology, travel & tours, hotels, healthcare, energy, clothing and fashion, consumer products, customer services, auto trade, financial services, wholesale & distribution, etc).
  3. Over 50,000 phone numbers of Nigerians’ Job seekers
  4. Over 53,000 phone numbers of Job Recruiters in Nigeria.
  5. And much more.

I DONT HAVE THE CONTACTS, HOW MUCH CAN I BUY IT FROM YOU?

The email and phone numbers are for sale. However, they are relatively low and affordable. It varies according to the target location, sector or personalities involved. However, the bulk price package varies as follows:

FOR E-MAILS:

15,000 units of either email or phone number = N5000

40,000  units of either email or phone number = N10000

100,000 units of either email or phone number = N20000

…And so on.

FOR PHONE NUMBERS:

15,000 units of either email or phone number = N5000

50,000  units of either email or phone number = N10000

200,000 units of either email or phone number = N20000

1,000,000 units of either email or phone number = N50000

…And so on

It can be discussed and negotiated further if perhaps there is need for additional or special attached conditions and services. Just contact us now, we will answer all your questions.

CAN YOU DESIGN THE AD FOR US?

Yes we can. There will be additional fee per art work or design and need to be paid in advance.

This is an added service we give a special rate to our clients. Design requirements should be sent to us at least 7 days before the campaign date, as we need enough time to design it and get your feedback.

You need to provide us the extract titles/wordings you wish to have in the ad and if you have any images you wish to include, please provide them in advance.

Once the ad is designed, we will send it for your feedback and if there are any changes needed , please communicate them as soon as possible. After the changes, we will send it back to you and have only one more change to request any more change.

HOW CAN THE PAYMENTS BE MADE?

Pay by Bank Transfer or Cash Deposit

All bank transfers, cash and cheque payments should be made to:

Account Name: E-Franky Global Services Limited
Account Number: 0424528897
Bank: Guaranty Trust Bank (GTB)

After making the payment please scan the deposit slip and whatsapp/email us via efrankyglobal@gmail.com so  that we can verify the payment via internet banking and we will confirm your booking.

CAN YOU COME TO OUR PLACE?

  • To discuss how we can move forward
  • To brief our requirements
  • To collect the payment for our online marking services, we have been able to charge very attractive low prices mainly because we have minimized our sales & marketing cost, administrative cost and staff cost.
  • Notwithstanding, in a situation where its unavoidably required that we must come to your place, it will attract additional fees which is determined in accordance with the location/distance and time implication and its paid before we start making move to your place.
  • If we are to employ a big staff to visit clients regularly for discussions to collect payments, etc, our overhead cost could be very higher, hence the prices of our services could also be even higher than what we currently charge. Due to this fact, we always prefer to do the communication over the phone and via emails, and also settle the payments via bank payments/deposits

I AM READY TO ADVERTISE WITH YOU. WHAT DO I NEED TO DO NOW?

If your ad/artwork does not meet our specifications and design guidelines [explained in this document], we reserve the right to reject your ad & refund  the money. Therefore it is advisable to send your design/artwork for our review in advance [so that you have enough time to do the changes, if any].

Send us the subject line you wish to put in the email. This has to be limited to 8-10 words. If you do not provide a subject line, we will use an appropriate subject line based on your design/artwork or your ad/design.

READ OUR DESIGN GUIDELINES–VERY IMPORTANT

I HAVE ALREADY PAID AND BOOKED A TIME SLOT. I WANT TO CANCEL THE BOOKING NOW?

If you cancel at the last moment (within the last 24 hours of your reserved time slot), no refund will be made, if you are ready to do that campaign again on another future date, you will have to pay again and book the date.

If you cancel within 7 days of your reserved date, only 50% will be refunded. But if you wish to reschedule it again to another date, cancellation fee (50%) will not be charge.

If you cancel before 7 days reserved date, no cancellation fee will be charge and 100% will be refunded. Or else you re-schedule the ad another date.

HOW DO WE KNOW WHETHER YOU REALLY SEND OUR MAILS

TO YOUR ENTIRE BASE?

One email transmission may take about 0 – 12 hours to complete. For the purpose of clarity and confirmation, we normally take a screenshot before and after sending the email

After the transmission is completed, our system will tell us how many mails actually got delivered, bounced, clicked and opened; we can compile this information into a report and can send this to you for your information records.

In the area of Bulk-SMS, we also send a comprehensive report with a screenshot of the confirmation page so that you can confirm its successful delivery.

WHAT IS THE RESPONSE RATE OF A TYPICAL EMAIL AD WE DO?

An exact figure cannot be given as the response can depend on many factors such as:

How attractive is your email subject line?

Does it attract people’s attention to click and open the email?

How attractive is the offer you promote in the email?

Is your offer appealing to the majority of  the people in the data base?

or is it appealing only to one segment in the database, such as female only, high income earners only, etc?

Are you sending this ad at the right time? – for example, sending a hotel package ad during the holiday season can be very effective.

How attractive and creative is your advertisement?

In other words, “have you  followed the artwork design requirement explained at the end of this document?”

……………………………………………………………………………………………………………………………………………

 ARTWORK – DESIGN GUIDELINES – 1

File Dimension/Size/Format

Dimension – 9’  X 12’ inches (750 X 1000 pixels)

Size – should be less than 200 KB

Format – JPG

If your artwork does not meet the above requirements, we will have to resize it. if you have provided it in a different format, we have to change the file format. Please note that when resizing or changing the file formats. The quality of your original artwork may slightly drop. Sometimes this drop in quality may not be noticeable. However it is always recommended for you to stick to the guidelines we have given you.

ARTWORK or DESIGN QUIDELINE-2

Title /Subject:

Use limited number of words (8-10).

Don’t make the readers feel that you are trying to sell something.

Make it newsworthy- think about subject lines as headlines in newspapers. Does it catch enough of your attention to read on?

Avoid All CAPITAL LETTERS and exclamation marks. “[ALL CAPS] feel like you are shouting for attention and not being respectful of your readers’ time. Specially in the email subject line, try to avoid words such as “Free, Buy, Offers, Discount, Win”etc.

ARTWORK- DESIGN GUIDELINES-3

E-mail Body

Emails are visual media. Make best use of it by having a proper mix of images and text in your ad.

Don’t make it look like a “classified ad” in the Sundays news paper.

Maintain at least 40:60 ratio of image and texts in the full space of the ad (important).

If you have attractive images of your product /services, include them in the ad. Images can speak 1000 words for you.

Always stick to 5Bs- Big- Bold- Brilliant- Bright- Beautiful.

ARTWORK – DESIGN GUIDELINES – 4

Call to action

Make your contact details very prominent. Have full details: names, address, contact numbers, email addresses , website links etc.

Email is a “direct response media” so has a clear “call to action (verbs)” in your email.

Examples

  1. Call – give the contact numbers
  2. Click here to contact – link your ad to an email address
  3. Click here for more info –link your ad to a web page where you give more details.
  4. Buy/reserve/book – give the details of where and how to buy/reserve

ABOUT US

KADIS.com.ng is a subsidiary of E-Franky Global Services Limited. Its an ICT Company with specialties on Online Direct Marketing, Email marketing, Bulk-SMS Marketing, Search Engine optimization, Advertising, Web Designing/Development and eBusiness Consultancy. The operations in E-Franky are handled by a group of young and dynamic professionals who are well qualified and internationally experienced in E-Marketing and E-commerce.

SPECIAL NOTE

After receiving this proposal, if you decide to advertise with us, it is deemed that you have read and understood this proposal and this proposal will be considered as the complete set of terms and conditions with regard to your campaigns you do with E-Franky. Thanks in anticipation for your patronage.


Computer Accessories Prize List (Order online or visit our physical shop address)

Looking for any kind of computer accessories? contact us now at KADIS.com.ng (Order online or visit our physical shop address). Our prizes are most competitive (wholesale and retail) in the market. Here in this page, we have listed the accessories and their respective prizes for your order. Feel free to contact us and place your order for immediate delivery at your doorstep.

  1. Universal Wi-Fi –  N20,000
  2. Wireless Mouse (HP) – N2,500
  3. Wired Mouse – N1,500
  4. Hard Disk Cable – N1,000
  5. Mouse Pad – N1,000
  6. Laptop Chargers ( HP – N2500, Dell – N3000, Lenovo – N3000, Acer – N2500, Toshiba – N2500, Asus – N2500, Samsung – N2500, etc).
  7. VGA Cables (1.5m – N1000, 3m – N1500, 5m – N2500, 10m – N3500)
  8. Modem – N4, 500
  9. Webcam – N4,000
  10. PS2 Pad – N3,500
  11. PS3 Pad – N4,500
  12. AV Splitter (4 Port) – N5,500
  13. HDMI Splitter (4 Splitter – N6,000 & 8 Splitter – N13,000)
  14. Card Reader – N800
  15. Type C OTG – N1,800
  16. Laptop Batteries (HP – N8,500, Dell – N10,000, Toshiba – N9,000, etc.)
  17. Bluetooth Dongle ( 2.0 – N1,500, 4.0 – N2,000, 5.0 – N2,500)
  18. Wi-fi Adapter – N2,500
  19. Printer Cables (1.5m – N1,500, 5m – N2,000, 10m – N3,000 Etc)
  20. Flexible Keyboard – N2,500
  21. Handboss Universal Cleaner – N1,500
  22. Sound Card – N1,500
  23. Quick Heal Anti-Virus – N4,000
  24. VGA Splitter (4 – N4,500 & 8 – N6,500)
  25. Carton Mouse – N1,000
  26. MTN Wi-Fi – N16,000
  27. Airtel Wi-Fi – N15,000
  28. Easy Capture – N4,500
  29. Processor Paste – N1,500
  30. Hard Disk Casing – N2,500
  31. Chrome Cast – N8,000
  32. USB Light – N800
  33. Mobile Phone OTG – N1,500
  34. WD Element Casing – N3,500
  35. Any Cast – N7,500
  36. Wired Keyboard – N3,000
  37. PC Camera With MC – N4,500
  38. HDMI to Mini Display – N4,000
  39. Single Wired Pad – N2,500
  40. Double Wired Pad – N4,000
  41. Single Wireless Pad – N5,000
  42. Double Wireless Pad – N7,500
  43. External DVD Rom – N6,500

Contact us now via 08061379390 if the exact item/accessories you need is missing on the above list. The availability is certain.

What is Tethering & How to Enable It?

What is Tethering & How to Enable It?

Have you ever wondered what is tethering? Do you have any idea about what this word means? Here you will find interesting information on this topic.

Imagine you are in the park or traveling on the bus. You need to have internet access on your laptop or tablet at that moment but you cannot find any Wi-Fi network available. Have you ever been in this situation? Do not worry; you will not experience that again.

What is Tethering?


Tethering offers the possibility to use your mobile data in your tablet or laptop, so your cell phone works as a modem for another device. It will allow you to have internet access wherever you are.

Tethering is basically the sharing of your internet connection with any other device such a PC, laptop, tablet or cell phone. How can you do that? Simple: connecting your smartphone to the other device using a USB connector, Bluetooth or Wi-Fi.

How to Enable Tethering?


1. USB Tethering


Almost all the smartphones can share its mobile data by connecting a USB connector to any other device as a tablet, laptop or PC. Here you have some steps you must follow to do this. How to enable USB Tethering on Android

  1. Connect your Android smartphone to your PC using your USB cable.
  2. Go to Settings.
  3. Click More.
  4. Go to Tethering and portable hotspot.
  5. Turn on USB tethering.
  6. Wait for a few seconds and refresh your web page.

If you need a more detailed explanation to share your internet connection from your Android phone to your PC, you can watch this video. Keep in mind that menus and settings change from phone to phone but they are all quite similar. How to enable USB Tethering on iPhone

  1. Plug your iPhone into your iMac using the USB cable.
  2. Go to Settings.
  3. Tap Personal hotspot
  4. Choose iPhone from your list of network services in your computer settings.

This video provides you with a more detailed explanation on how to enable USB tethering from your iPhone to your iMac.

2. Tethering via Bluetooth


Did you know that you can share not only pictures or documents but also internet connection? Yes! If you pair your smartphone with your PC, laptop, tablet or even with another smartphone you will be able to share the internet connection with some of those devices. Your cell phone will turn into a portable modem, so you can browse the internet without using a Wi-Fi network. Do you know how to do this? You will find the explanation right here.

  1. Go to the Settings
  2. Wireless and Networks
  3. Tethering and Portable Hotspot
  4. Share Internet
  5. Share via Bluetooth

Remember that some menus are different from cellphone to cellphone, but they are similar in some options. After doing this, the other person needs to go to the Bluetooth settings and select the device that will share the internet connection, and then click on internet access. That is all!


Tethering Vs Hotspot


what is tethering advantages disadvantages tethering hospotIt is very common to think that they are the same, but actually, they have some differences that you will learn here. You will also find important information that will help you to decide which one is the best and the safest.

As you already know, tethering refers to share your internet connection with other devices such as laptops, tablets and some others. Some ways to do this is via Bluetooth, using a USB connector or through Wi-Fi. But now the question is: what is a hotspot?

Let’s say that hotspot is the act of creating a Wi-Fi network where the phone acts as a modem/router. So, when internet tethering is done via Wi-Fi, it is also known as a mobile hotspot. Mobile hotspots, which are also known as portable Wi-Fi hotspots, allow people to share internet connections with up to 5 other devices.

These devices can be mobile phones, tablets or personal computers. Hotspots are usually found in public places such as parks, shopping malls, cafés and some other places.

Tethering through a USB connector is, for sure, safer than a Hotspot since you connect both devices through a cable. Hotspots can be intercepted using special software to intercept Wi-Fi networks, so it is recommended to establish strong passwords.

The connection to Hotspots or public Wi-Fi zones is not secure. The fact that an access point requires a password to connect does not mean it is secure. Also, there is a risk of filtering sensitive information, such as credit card numbers or addresses.


Tethering Vs Broadband


Since you have already learned what is tethering, now you will learn a little bit more about a new word related to this topic: broadband.

You are probably wondering how is tethering related to broadband? Well, there are different mobile services that allow more than one device to be connected to the Internet using a single cellular connection. This process is known as tethering. 

But now, let’s start talking about broadband. Wireless Internet access, commonly known as broadband or mobile broadband, refers to the Internet access delivered from cellular towers to cell phones, laptops, tablets and some other digital devices. Now that you know the meaning of both words, you will find great information to decide which option is the best.

Mobile broadband allows you to connect with your laptop, PC or tablet and permits you to access the Internet from any place (within range of cell towers). It offers high-speed Internet anywhere in the world that your provider covers.

But broadband also has some disadvantages. Since it connects to the Internet through the same radio waves as your cell phone, your Internet service will also depend on the availability of cell tower. So, broadband will also present weak signals and “dead zones” as your cell phone does.


The Best Apps For Tethering


There are many apps that you can download to turn your mobile phone into a modem or router. But here are some of the most famous ones:

Pdanet


This app is really suitable for those plans that have an unlimited Internet service. It has two indispensable steps: 1) you need to install it both on the cell phone and the computer. 2) make sure that your device has at least a 3G network, so you will have faster Internet access.

After installing the app, you need to enable USB tether. Then, connect your device using the USB cable to your laptop or computer and click the Pdanet shortcut on the desktop screen. Next, go to your browser and click on the Pdanet icon you have on the taskbar, after that press Connect Internet. As simple as that you can browse on the internet.

Download Pdanet for Android here.

NetShare


This app is available on Google Play and it is completely free. With NetShare you will not have to pay tether fees or special plans for tethering. It allows you to create a portable Wi-Fi hotspot to share internet connection from your device to other devices as a Wi-Fi Repeater.

Download NetShare for Android here.

TP-Link Tether


TP-Link Tether is available for iPhone only and it is free. This app provides the easiest way to access and manage your cell phone as a modem/router and connect it with other devices.

Download TP-Link Tether for iOS here.

Definitely tethering is one of the best options to be connected anywhere and we hope this article was helpful for you and you never have to worry about not having internet access again!

How to Check Your Phone IMEI Number
There is no way that we can live without a mobile phone nowadays. Every night, at least the alarm function has to be set before we go to bed. Today’s topic is going to be about the importance of numbers that allow us to get to know our mobile phone better. Now, you can try to flip your phone and take a look if there is any line of 15 digits at the back cover of your phone – or what we call the IMEI number.

What is an IMEI?


Each smartphone available on the market has a unique identification implemented, which is being known as the International Mobile Equipment Identity (IMEI) number. The same as human fingerprints, the phone is manufactured with this number and the set of numbers is unique for every phone. The IMEI number contains 15 digits and is used to track phones anywhere in the world.

The IMEI number is used for 


  • Report lost or stolen – Initially, the IMEI number is created to decrease phone theft. When a person reports a lost/stolen phone to their carrier, the company will make the phone unusable and it will be added to a blacklist.
  • Checking phone information – With the IMEI number, you will be able to get to know more about your phone. The 15-digits code can be used to check more information about your mobile phone from the online IMEI checker. The information contains the origin country where it comes from, the manufacturer, the purchase date, and more.

How to check your IMEI


The most convenient way to find the IMEI number is to dial *#06# on your phone. This method works with both iPhone and Android and any other phone.

Here is how you can check your IMEI number:


  • Open a keypad on phone application
  • Dial *#06# The IMEI number will pop-up on the screen*

*A dual-SIM phone will have 2 sets of IMEI numbers

An alternative way to check IMEI number:

  • iPhone – Settings > General > About 
  • Android – Settings > About phone > Status

Keep your IMEI number private


For security reasons, the IMEI number must not be shown publicly. Otherwise, it is a high risk that the number will fall in the hands of fraudsters for scamming or bad purposes.

Frequently Asked Questions About IMEI

1. What is the difference between IMEI and Serial Number?


A serial number is a unique number assigned by the manufacturer for organizing and tracking their inventory. There is no fixed format of a serial number because the manufacturers create their format including the length and type of characters.

An IMEI is a standard format of 15-digits numbers assigned for international usage to identify the devices and check whether a specific phone has a clean IMEI or not, which means no lost/stolen reports.

2. What is ESN?


The ESN (Electronic Serial Number) is a unique number used to identify mobile devices. The ESN is for CDMA devices, while IMEI is for GSM devices.

3. What can I do to report a lost or stolen phone?


You have to call your network provider to report the matter. Only the network provider can add the reported IMEI number to the blacklist. Once the smartphone is on the blacklist, it is blocked from accessing any services from the network carrier.

If the phone was found, you can report back to the carrier to have it removed from the blacklist. Once the request has been processed, you will be able to access the provider’s service again.

4. How can I check the IMEI number without dialing *#06#? 


The IMEI number can be found physically on your device.

  • On the SIM card tray
  • On the back of the phone
  • Underneath the phone’s battery

In case your phone is lost/stolen, you can find the IMEI number within the box that came with the smartphone.

5. What is an IMEI scam?


It is the fraudulent use of the IMEI number by scammers. Scammers like to do phone cloning, which can lead to identity theft. Information will be intercepted from the original phone and send over to the cloned phone. In other cases, the scammer will use to make phone calls or send text messages which will incur a bill that you as the consumer has to pay.

6. How can I avoid buying a second-hand phone that was involved in an IMEI scam?


If you decided to purchase a used phone online, make sure to first read the reviews of the store.

If you purchase it in-person, you can check the phone’s validity beforehand to avoid getting an IMEI-locked phone.

You can ask the re-seller for the IMEI number of the phone to verify that it has not been reported lost or stolen. However, it is the seller’s decision to hand out an IMEI, as it is a risk as mentioned above.

Summing up, every cell phone user will be able to check the IMEI number by themselves either by dialing the dedicated number or check it in the menu settings on the phone. As it is the universal number used to identify the phone, it is can be used to report a lost or stolen phone. With the plenty IMEI checker available online, your work will be easy and quick. This is very helpful when buying a used phone – you can easily avoid buying a phone that has been reported lost or stolen. And now, do you know your IMEI number?

How To Unlock Your Phone

How To Unlock Your Phone

Have you ever wanted to buy a cell phone but it is locked for a specific carrier different from yours? This is a very common thing, but there are different possible solutions for you. If you want to have an unlocked phone, keep reading and follow this step by step.

Telecommunication companies usually sell blocked mobile phones. The main intention is that these phones only work with a single operator (the one where you bought it). However, there are different ways to unlock a device. Depending on the brand of the mobile phone, this process can be very simple or a little bit complicated.

How To Unlock A Phone?

Know Your IMEI


First, you will need the IMEI. This is the International Mobile Equipment Identity code. Its main function is to identify mobile phones worldwide. It can be understood as the identity document of a person, but in this case, is your phone’s identity number. Mobile phones are identified and registered to have control over them. In most of the mobile devices, this code has 15 numbers and it is important to get this code to know the different uses it has.

If you do not know your IMEI, you can make a phone call to *#06# to find it out. Make sure to write it down somewhere when the screen shows it. Just in case your mobile phone is stolen or you simply lose it, you can put in contact with your mobile network operator to lock your mobile device.

Check the Labels of Your Smartphone


If this first step does not work, do not worry about it, there is another way to get this unlock code. The only thing you have to do is checking the label under the battery or in the original box of your mobile phone.  The mobile network operators generally give the user this code, but it only works with a SIM card of the same telecommunication company.

Once your service contract is finished, you can automatically unlock the mobile phone through the IMEI code. So the first method to try unlocking your cell phone is to contact the operator or telecommunication company which the device belong mms to.

Call Customer Support to Unlock Your Phone

Since a few years ago, mobile phones have been sold unlocked, and sometimes companies offer the unlock code to their customers not only in the United States but also around the world. So, you may just have to call the customer service of the telecommunication company to which your mobile phone is associated and make your unlocked request.

Just by giving your IMEI code you got from the previous step, they will give you a code for your mobile phone to be automatically unlocked. So, you will be able to use it with any SIM card from any other mobile network.

Unlock The Phone On Your Own


There is another possible way to unlock your phone. First of all, you have to turn off your mobile phone and take out the SIM card. Then turn on the device without the SIM card and wait for it to show a message with the instruction to insert the SIM card. From that moment you will need to write the IMEI code to unlock the phone.

However, each brand and each type of mobile phone has different requirements, so you will not have to follow the same steps to unlock the mobile device.

Why You Couldn’t Unlock Your Phone?

Sometimes it may seem impossible to unlock your mobile phone. This can happen because of the terms and policies of your telecommunication company. So, before trying to unlock your device make sure you are able to do it. Just in case it is possible to unlock your device but you cannot do it by yourself, it is highly recommendable to get support from professionals to do this task and avoid breaking your phone.

It is important to know that the GSM phones are designed to work with every single operator once you insert the SIM card with the ID of the mobile network. However, telecommunication companies, as a marketing strategy, lock some cell phones in particular to protect their financial interests in a certain way. At the moment of trying to unlock these devices, we are persuading the firmware of the phone. So it will not apply anymore and the owner of the mobile phone can use it in any operator network.

Telecommunication companies can reject the request from the customers, of course, base on their policies and local laws.

Do not waste your time downloading different software to get your IMEI code because it is really unsafe. Keep in mind that the operators have a database. So, if you buy a locked cell phone from a specific telecommunication company and then you unlock it, it is possible that your phone will not work with that network anymore because the device was still under the contract and subsidized for the company.

Buying unlocked phones can be very expensive and unsafe. You can waste your money and maybe you will need to pay again to get in unlocked. The same happens when paying online services to unlock your phone from distance. Try to do it legally and by yourself. Of course, it can be kind of difficult sometimes, but remember there are several safe options for you. Let us know if you have a different way to unlock cell phones!

The Ultimate Guide to SIM Cards: Problems and Solutions
SIM Cards seem so simple – You plug it into your smartphone and most of the time, it works right away. Once you start digging deeper, you realize that these SIM Cards are a technological masterpiece! How much memory capacity does a SIM Card have? Are all SIM Cards secure? What even are APN Settings and who knows the difference between roaming and mobile data? Therefore, we wrote this ultimate guide to SIM Cards to help you better understand what a SIM Card actually is and what the technical terms relating SIM Cards mean.

  1. SIM Cards
    • What does SIM mean?
    • How do SIM Cards work?
    • How to insert a SIM Card?
    • What way does a SIM Card go in?
    • How do I activate my SIM Card?
    • What is stored on a SIM card?
    • How much memory does my SIM Card have?
    • What do you do when your SIM Card is full?
    • Are all SIM Cards the same?
    • What type of SIM Card do I have?
    • Can a SIM Card be cut?
    • Can I put my SIM Card in another phone and use it?
    • Can you buy a new SIM Card?
    • Can you track a phone with a SIM Card?
    • How do I replace my SIM Card?
    • How much is a SIM Card?
    • Why does my phone keep saying No SIM Card inserted?
    • Is my SIM Card secure?
    • Will my SIM Card work in another country?
    • Do prepaid phones work in other countries?
  • Access Point Names (APN)
    • What is an APN & how do I change it?
    • How do I find my APN Settings?
    • How do I reset my APN Settings?
    • What will Reset Network Settings do?
    • What happens if you reset all settings?
  • Roaming
    • How to activate roaming?
    • What is roaming on a cell phone?
    • Do I want data roaming on or off?
    • What is the difference between roaming and mobile data?
    • What are data roaming charges?
    • Do I need to turn off mobile data when abroad?
    • How do I avoid data roaming charges?
    • Can I use airplane mode to avoid international charges?


  • Airplane Mode
    • What is the function of airplane mode?
    • How to activate the airplane mode?
    • What is the benefit of airplane mode?
      • Charging faster
      • Games Advertisement
      • Children
      • Keep Focus & avoid the distractions
      • WhatsApp Messages
    • Does airplane mode save your battery?
    • Can you take pictures while in airplane mode?
    • Can you receive phone calls in airplane mode?
    • Can you text while in airplane mode?
    • Can you access Wi-Fi while airplane mode?
    • Is airplane mode really safe?


Everything You Need To Know About SIM Cards


What Does SIM Mean?

It stands for Subscriber Identity Module.

How Do SIM Cards Work?

A SIM card holds the information required to communicate with the cellular towers. It goes inside a device like a cell phone or tablet. Let’s say that this mini computer is your phone’s ID, so it’s something unique that allows you to make and receive calls, messages, browse the internet or download apps.

How To Insert A SIM Card?

  1. Turn off your phone
  2. Remove the cover of your phone and its battery (this is optional, sometimes it is not necessary)
  3. Find the SIM card slot and insert it
  4. Put again the cover and battery on the phone
  5. Turn on your phone

What Way Does A SIM Card Go In?

It depends on the phone. Some cell phones include a small figure of the SIM card next to the slot where is going to be inserted. But if not, place the golden pads on the SIM card (contacts) facing the screen of the phone.

How Do I Activate My SIM Card?

You just have to insert your SIM card as it was explained before. Then, turn on your phone and wait a few minutes or hours (it usually takes just minutes) and that’s it! Your SIM card will be activated.

What Is Stored On A SIM Card?

  • International mobile subscriber identity (IMSI) number
  • Authentication key (used to identify and authenticate subscribers)
  • Your contact list
  • Text messages

How Much Memory Does My SIM Card Have?

Most SIM cards have a capacity between 32 to 256 KB. It depends on the type of SIM card.

What Do You Do When Your SIM Card Is Full?

You can try deleting unnecessary text messages or contact entries that you do not need anymore. If it still full, contact your operator who should be able to change your card for another one with a larger capacity.

Are All SIM Cards The Same?

No, they are not. They vary in size, use and range of action. For example, there are three types talking about size: regular SIM card (25x15mm), Micro (15x12mm) and Nano SIM card (12.3×8.8mm)

Can A SIM Card Be Cut?

Yes, it can be cut, but it is not recommended to do it. Actually, cutting your SIM card is more of a risk than a benefit. People cut their SIM cards using scissors and a ruler. Sometimes they use a cutter but you can completely ruin your chip. But, if you still want to cut it by yourself, here is a guide how to cut a SIM Card.

Can I Put My SIM Card In Another Phone And Use It?

Yes, of course! But it will depend on the SIM card’s size of the other phone. If it is the same size as yours, it will work perfectly on the other device. You will keep your same number and any information you had saved on it.

Can You Buy A New SIM Card?

The answer is yes. If your SIM card is not working or you just want to change your cell phone number, you can buy a new SIM card. But keep in mind that changing your SIM card means changing your current phone number, too.

Can You Track A Phone With A SIM Card?

Technically yes! SIM cards have a serial number that will be transmitted to the nearest cell towers. If your cell phone was stolen, the police will need to obtain a warrant before getting location data from your mobile carrier. This will allow them to localize your cell phone.

How Do I Replace My SIM Card?

You can replace it just by calling your current carrier or a different one if you want. You can also replace it by buying a new SIM card on the internet or in any other store.

How Much Is A SIM Card?

SIM card’s prices vary. It will depend on different things such as the provider or company.

Why Does My Phone Keep Saying No SIM Card Inserted?

There are different possibilities:

  1. SIM card or cell phone manufacturing defects. Don’t worry; it’s not your fault! Some SIM cards or cell phones come with imperfections, but for you to know which one you should blame, you need to do two things: First, remove your SIM card and put it in another cell phone. Second, try another SIM card on your mobile phone.
  2. Physical damage to the SIM card during handling may result in a fracture in the internal circuit board.
  3. A misaligned SIM card can also cause failures. Sometimes this happens when people accidentally drop their phone. But, calm down, we have a possible solution! Just turn off your phone, remove your SIM card and insert it again, this should solve the problem.

Is My SIM Card Secure?

There is a feature called SIM Security that prevents unauthorized use of your SIM card. When the feature is on, your chip is protected by a code that you must enter before the SIM can be used in any other device.

Will My SIM Card Work In Another Country?

You can enable roaming service and keep using your SIM card without changing your phone number.

Do Prepaid Phones Work In Other Countries?

Yes, they do. You just have to activate the roaming service.


Everything You Need To Know About Access Point Names (APN)


What Is An APN And How Do I Change It?

APN means Access Point Name. It is the gateway between the public internet and your provider’s network. So it is what allows to access data. This should be configured by your provider, but if not, you can –carefully- change it yourself.

How Do I Find My APN Settings?

For iPhone: Settings > Cellular (Mobile) > Cellular (Mobile) Data Options > Cellular (Mobile) Network For Android: Settings>Mobile Networks>Access Point Names>Menu Button>New APN

How Do I Reset My APN Settings?

Some cell phones present network issues due to the APN. If this is your case, try to resent your APN following these steps:

  1. Settings
  2. Mobile Networks
  3. Access Point Names
  4. Menu
  5. Reset APN to default

What Will Reset Network Settings Do?

This option will “clear” all the networks used before. Your Wi-Fi networks, passwords, VPN settings and any other saved network will be deleted.

What Happens If You Reset All Settings?


All the settings will be reverted to their stock setting. They will be like they were when you first buy your phone. It will reset all of your preferences for Wi-Fi, Bluetooth, Notifications, Sounds, Brightness, Privacy and some others. You will not lose personal information such as contact lists, photos, music or calendars. Just be really careful not to tap on Erase all content option, you will lose all the things mentioned before. If the previous topics were interesting for you, keep reading and learn more about roaming:

Everything You Need To Know About Roaming


How To Activate Roaming?


To avoid the data consumption when you are abroad, it is recommendable to disable the roaming on your mobile phone. From that moment, you can only make voice calls, send text messages or use those apps that do not need an internet connection. Now, how can I activate it? It is simple: Menu > Settings > Wireless Connections > Activate Roaming.

What Is Roaming On A Cell Phone?


In the universe of the telecommunications, the roaming is the capacity that a cell phone has to make and receive phone calls beyond the limits of the coverage provided by the company. Despite being in another country, you communicate because of the roaming service. So, any person could travel around the world using the same cell phone, except that this user will pay an additional charge according to the taxes or rates that the companies develop depending on how much data, calls and SMS have been used while being outside of the carrier’s coverage.

Do I Want Data Roaming On or Off?


It is recommended to disable your packet data so you can avoid extra charges. If you are on a tight budget, then only turn on roaming if you are in an emergency situation.

What Is The Difference Between Roaming And Mobile Data?


The difference between these two services is that while you have roaming turned on, you only can make and receive phone calls and text messages. But, with mobile data, you will have internet access to browse abroad.

What Are Data Roaming Charges?


When you use your phone or tablet to browse the internet abroad, it generates charges for data roaming. If you know what your destination is, it is recommendable to look for de taxes and rate to activate a data roaming plan before traveling.

Do I Need To Turn Off Mobile Data When Abroad?


If you count with a data plan that has coverage in the zone in which you are, it does not matter if your mobile data is ON. But, if you find a Wi-Fi network you must disconnect your data connection because there is the possibility of being connected to your mobile data.

How Do I Avoid Data Roaming Charges?


If you need internet access, simply connect to a free Wi-Fi network without worrying about the future charges. But this is not the only option you have! You can also shop roaming plans with your carrier. Before you go traveling, call your carrier or visit it online to look up international roaming plans. After you arrive at your destination, go to the Settings > Cellular > Cellular Data Options > Turn on Data Roaming and other settings suggested by your carrier.

Can I Use Airplane Mode to Avoid International Charges?

There is a simple strategy to avoid expensive rates for roaming charges. Activate your airplane mode and use only the Wi-Fi networks that you find on your road. By doing this you can chat using WhatsApp and check your emails without receiving phone calls or text messages. So which options should you choose now? An international SIM Card, a local SIM Card or Roaming?

Everything You Need To Know About Airplane Mode


What Is The Function Of Airplane Mode?

It can be said that airplane mode has several functions. When it is activated, your mobile phone loses almost the entire connection. It does not allow you to make phone calls or browse on the internet, not even receiving text messages. However, it is an excellent reason to save energy. The mobile phones waste a lot of energy when they connect to an antenna from a remote distance. There are other things that you can do while airplane mode is enabled. Activating the Bluetooth is one of them; you will link your device to others and send documents or files without a cable.

How To Activate The Airplane Mode?

It is completely easy. You can go to the network settings in your mobile phone or keep pressing the power off button until the icon of the airplane appears. Then, wait for the notification with a little plane that indicates that the airplane mode is on.

What Is The Benefit Of Airplane Mode?

Most people tend to think that airplane mode is only useful when you are flying. But, the real thing is that you can take advantage of this, for example, you can save the battery. Here are some others interesting benefits:

Charging Faster

Nowadays, smartphones consume so much battery because people use them a lot. You could often be out of the home, and suddenly your device shows a notification of low battery. If you are consent that you are not going to go back soon, but you will have a break somehow, you can charge your cell phone on airplane mode to gain time. The thing is that it will charge faster while you have the connectivity turned off. The Wi-Fi, Bluetooth or GPS will not be inconvenient to reach the 100% of battery quickly.

Games Advertisement

People commonly have an addictive game installed on their mobile phone. The annoying thing is when the publicity appears at the beginning or for the next level. The good news is that you will not receive any ad if you activate the airplane mode. Why? Because you are not connected to any network. Or just look for games that not required any connection, it also works.

Children

If you are a cool father or the favorite uncle with a nice mobile phone or tablet with games on it, perhaps the kids of the house want to play with your device. For any reason, they can dial a number and make a phone call accidentally while they are playing. Do not worry and do not be mad with them, remember that you can activate the airplane mode and avoid these annoying situations.

Keep Focus And Avoid The Distractions

There are thousands of apps with which you can waste a lot of time when you are supposed to be doing something more important for the occasion. Just by activating the airplane mode in a single second all your apps will be disabled and you can continue working on your things. Sometimes you only want to rest after an exhausted workday, but you have this friend that has another time zone. Just when you manage to conciliate a sweet dream ¡Bing! There is someone who wants to chat. So, if you activate the airplane mode, you can set an alarm for the time you want to sleep and you can have the certainty that nobody is going to bother you, not even your boss.

WhatsApp Messages

This app lets you know when someone reads the messages that you send, and it has the same effect when you are the one that is reading. But there is a trick that maybe you did not know. If you activate the airplane mode, you can read these messages avoiding the double blue check from the transmitter. At least during the time, you are offline.

Does Airplane Mode Save Your Battery?

The airplane mode saves your battery considerably. Sometimes you schedule important phone calls, but you are going to be in the heights for a long time. So, you will not have a guaranty that your battery will last the whole time. Of course, you can turn off your phone, but if you want to read any document, see a picture or just consult the time you will not be able to do it, that is why activating the airplane mode is an excellent choice. When your smartphone or tablet is in airplane mode, it has a minimum of operability. It could happen that you can be on a zone without coverage, so immediately your device will seek to connect to any network. As a consequence of that, you will lose a remarkable percent of battery. Even when you go for a walk into the woods or the mountains, it works to have battery when you return.

Can You Take Pictures While In Airplane Mode?

Remember that the airplane mode only disables those functions on your phone that could provoke interference in mobile networks. So, keep calm and take advantage of the moment. Enjoy the beautiful landscapes while you are on a flight, and capture the best picture ever.

Can You Receive Phone Calls In Airplane Mode?

When the airplane mode is on, you have not data service or telephone lines, so it results impossible to make or receive phone calls.

Can You Text While In Airplane Mode?

The airplane mode not only disables the phone calls, the same thing occurs with the text messages. Instead of that, you can redact what you want to send and save it for the time you will be allowed to do it.

Can You Access Wi-Fi While Airplane Mode?

While your device is on airplane mode, your wireless connections will be disabled for security measures. But, you can use it for those functions that do not need any connection. For example, you can use Wi-Fi because its low frequency does not represent a danger for any system of the plane. Nowadays most of the airplanes incorporate this service for passengers.

Is Airplane Mode Really Safe?

The airplane mode is completely safe; in fact, it was created for security norms. In the past, people had to turn off their mobile phones while flying because in a certain way it interferes with systems of the plane.

20 Common Mobile Phone Problems & Their Solutions
Technology is not always perfect, so you can experience different problems that you can solve by yourself. Cell phones may present faults some times and we know it can be a very stressful situation. That is why we decided to make a top 20 of the most common mobile phone problems and their solutions, so you can solve them without losing your head –and your money-.

Of course, there are several troubles that are a bit more difficult to solve if you are not a technology expert. If you cannot do it by yourself, we recommend you to take your mobile phone to an authorized service technician and hopefully, they will help you. So, we invite you to come with us and discover things that maybe you did not know about your cell phone.

20 Common Mobile Phone Problems & Solutions

1. Slow Phone


This is something that everybody has experienced at least once. It is the most common mobile phone issue and it can be associated with old phones. However, newer devices can present the same problem. When your Random-Access Memory (RAM) is full of apps and files that you do not use or need, your phone tends to respond slowly.

The Solution: Clean your cell phone and close/delete apps, files and clear the cache data. If you recently installed an app and your phone is not working well, you should uninstall it and see if your mobile phone runs faster. If this does not help you, you can also try saving important information on Google Drive, Dropbox or just on your computer. Then, you can restore your cell phone to factory data.

2. Bad Battery Life


Another common problem that happens to everyone is when your phone never has battery enough although you do not use it all the time. There are different factors that can affect your battery life and you should take them into account before losing your battery.

The Solution: First, you should try to dim the screen brightness and turn off the GPS, WiFi and Bluetooth if you are not using them. You can also enable the Battery Saving Mode and see if your battery lasts longer. Additionally, you should check your Battery Usage in your phone Settings and see which apps are using more battery. You can close or disable the ones that are draining more battery if you usually do not need them.

3. Overheating Phone


This usual problem can be related to the previous one. An overheating phone is sometimes related to problems with your phone battery. But, it can also be related to your charger and also with the place you normally have your phone. If you are experiencing this, you should solve it soon because your battery and your phone screen can be seriously damaged.

Possible Solutions: You should try the previous possible solutions first to see if this problem is directly related to your battery issue. If it keeps overheating, try to carry your phone in a fresh place and keep it away from the sun’s heat. You can also give your phone some minutes to “refresh” and start using it again.

4. Full Storage Space


Maybe you are the kind of person that saves too many photos, songs, documents and some other files and although you do not need them anymore, you do not delete them. Sometimes those files are so old that you forget you have them stored in your cell phone. Unnecessary apps also occupy important storage space that can be used for other matters.

The Solution: This fourth common mobile problem can be related to the first we already mentioned before. When you have filled up your storage space, your cell phone tends to respond slowly. So, the possible solutions for this problem are the same: try to delete those files and apps that you do not use anymore, you can also delete old calls and text messages and clean the cache data. Try to transfer those files you would like to keep with you on an online cloud or buy a microSD card to save that valuable information in a safe place.

5. App Crashes/Freezes


This problem happens a lot and, although it is a very annoying thing, it is not so difficult to solve. Although it should not be a common thing, the truth is that apps sometimes present this issue and can be related to bugs on the app or maybe your operating system is not the best or the newest for those apps. There are apps that are constantly adding new options and improving some details for better performance, but sometimes your phone just cannot support the latest version and that app starts crashing all the time.

The Solution: The first thing you should try is to restart your cell phone and start using the app again. You can also go to the App Manager and stop the app, sometimes cleaning the cache data also works. If it continues doing the same, try to uninstall the app and install it again. As it was mentioned before, sometimes the app has a lot of bugs that cause this problem.

6. Phone Freezes


This happens a lot, especially in old phones or devices with full storage space. What people usually do is to restart their phones or turn them OFF and ON. When this does not work, we normally remove the phone battery and everything goes back to normal. However, some modern phones do not have this option because their batteries cannot be removed. Do not worry, we will tell what to do and how to do it.

The Solution: Depending on your phone, here are the steps you must follow to restart it:

  • Apple (iOS8 or higher)
    • Click Volume Uponce
    • Click Volume Down once
    • Hold the Power key for 15 seconds.
  • Apple (iOS7 or lower)
    • Press the Power key + Volume Down key at the same time for 10 seconds or until the Apple Logo appears.
  • Samsung
    • Press the Power key  + Volume Down key at the same time for 15 seconds or until the Samsung Logo appears.
  • Sony
    • Press the Power key + Volume Up at the same time for 10 seconds
    • When the phone vibrates, press the power key like normal to turn ON the mobile phone.
  • Nokia/HMD:
    • Press the Power key + Volume Up at the same time for 15 seconds or until the Android logo appears.


7. Apps Not Downloading


Users complain a lot about this issue that can be solved with just a few steps similar to the ones explained in the fourth problem. This mainly happens due to corrupt cache and it is pretty easy to solve it.

The Solution: Try cleaning the apps cache and you can also clean the history of Google Play and Google Play Services. Remember to restart your cell phone after doing that and try again to download the app you want

8. MicroSD card does not work


When your phone is full but you do not want to lose your files and you are too busy to move them to another place, you probably think about that old microSD card you bought few years ago. But, here comes the problem: your device does not want to accept that card.

The Solution: Your microSD probably has errors and your phone is not recognizing that card. Try to connect a card reader to your PC and format the microSD card at least two times. Restart your mobile phone and insert the SD card again.

9. Wet Cell Phone


Do not feel bad if you dropped your mobile phone and now it is wet. This happens a lot and most of the time it can be solved.

The Solution: The first this you should NOT do is to turn ON your device. It can be just the worst thing to do. Remove the battery and put the cell phone in a bowl full of rice. It will help to absorb the moisture. Now, take it to a service workshop and let them fix it.

10. Damaged Charging Port


Like everything in life, nothing lasts forever. And your phone is not an exception. Charging ports tend to deteriorate as time passes. Misuse or dirt can be some of the causes of this deterioration. This common problem needs to be solved by an expert. However, you can try some things to see if it works again.

The Solution: Before taking your mobile phone to the repair shop, try to clean the charging port with a new and dry toothbrush. You can also clean it using a dry cotton swab to remove the dust and dirt that does not allow your charging port to work properly. If this does not work, please take your phone the repair shop. Of course, these 10 problems are not the only ones that mobile phones have, but they are the most common ones according to Internet searches. However, we decided to add 10 more divided into 2 groups such as Android problems and iOS problems. Take a look at these following common issues.


11. Google Play Store Does Not Download Apps


This is something frequently experienced by Android users. People tend to panic and think there is nothing they can do and they will not be able to download anything again. Relax, we have 2 ways to fix this.

The Solution: The first option –and the most recognized- is to clean the Google Play cache. How can you do it? Go to Settings – Apps – Open Google Play Store – Clean Cache – Restart your phone. The second way to solve this problem is to clean the Google Play Store history. This is more simple than the first solution. First, you need to Open Google Play Store – Settings – Choose Clean History.

12. Google Play Store Crashes


We know how annoying is that you try to look for an app and Google Play crashes all the time. This happens a lot and must of the time is because of a corrupt cache. It should be solved with similar steps mentioned before.

The Solution: Although some menus vary, most Androids have the same options. So, you just need to go Settings – Apps – Open Google Play Store – Clean Cache and Data – Restart your phone. This should fix the crashing problem. But if it does not work, try doing the same with Google Play Services and Google Services Framework.

13. Connectivity Issues


Sometimes the connection through Bluetooth or WiFi can be a little bit difficult. This is one of the most common problems among Androids that can be solved just with a couple of simple steps.

The Solution: We recommend you to enable the airplane mode for at least 1 minute. Then, try to connect again. Occasionally, you can turn OFF and ON the connection that is failing and then try to connect it again.

14. Synchronization Failures


Sometimes you are trying to sync your account to a specific app but it seems just impossible to do it. Sometimes the app does not show you what the problem is, so you are not sure what you should do. When you have synchronization failures there are a few steps that you must follow.

The Solution: First of all, make sure that you are connected to the internet. You also need to check if the services that are you trying to sync (just like Google or Dropbox) is working as well. Another thing that you should do is to verify your password, check if it is correct and try again. If any of this works, remove entirely your account from your device and add it again.

15. Unsent Messages


Sometimes happens that you are texting someone and then the screen show “Message not sent, touch to retry”. You try over and over again to send the same message but it shows the same annoying alert.

The Solution: The first thing you must do is to make sure that you are connected to a WiFi network or that your mobile network is working correctly. Then, click on the message that was not sent and select the resend option. This should be enough, but if you still have the same issue, try to restart your phone or try downloading another message service app.

16. Control Center Button Does Not Respond


According to the Apple Toolbox, some users have been reporting some issues with the Control Center button or Home button. They say that the button is constantly freezing and does not respond.

The Solution: If this happens to you, you must go to Settings and then to the Control Center to customize and delete the specific app that does not work in the including section. You can do it by sliding it on the left and touching Delete. After that, you must restart your device and once it is turned ON again, you can customize the controls again and add the app that you remove before.

17. iPhone Overheats


A lot of customers complain that their devices turning extremely hot. They also affirm that feel like their phones are swelling and they open by themselves. This problem was already explained, but iPhones tend to present this issue more than other phones.

The Solution: If you are using a specific app and your cell phone overheats, let it rest for a while. You can disable the location service by going to Settings and Privacy. We recommend you to do this because the location service uses GPS, Bluetooth and mobile locations to determine where you are. This could mean a lot of activity for your phone. If you are charging your iPhone and it overheats, unplugged it for several minutes until it cools. Then, you can plug it again. Removing the case of your device also works. It will avoid that the plug keeps the heat and it will not block the heat output of the phone.

18. Issues to Connect to WiFi


Users express through the Apple forum that they lose the WiFi connection and they cannot connect to a local network. While a WiFi network is working with other devices; users assure that they have problems to find a stable connection.  Before trying to find out the possible error in your cell phone, make sure that the router is close to you.  You must also make sure that you can see your WiFi network to check that it is connected to the correct network.

The Solution: You can also try to restart your devise or the router by unplugging it and plugging it again. If it still not responds you may go to settings to reestablish your network. It will restore the Wi-Fi network and the password with the VPN and APN of your cell phone. Just in case the problem continues, remember that you can restore to the factory configuration by eliminating all the content. Before doing this make sure of have made a backup of all the important files that you have on your phone because everything will be erased once you restore your device.

19. The Screen Is Not Bright Enough


Some users explain they have noticed that the screen looks dark although the brightness is at the highest level. You are not the only one who has experienced this. So, keep calm and read what you need to do.

The Solution: To solve this problem you can go to General Settings, then to accessibility and after that click on Screen Adaptations. You will see an option to reduce the white point at the button so you can adapt the intensity of the colors until you consider is good for you.

20. Unable To Connect To The App Store


Besides some issues experienced at the moment of downloading apps, some users have also had problems to go on the App Store. They receive error messages saying that their devices cannot currently connect to the App Store.

The Solution: A possible solution for that is to set the date and time of your device. Disable the option of set automatically, instead of that, set the date and time manually. Then, go to the App Store and let it open for about 5 seconds at least. Activate the date and time automatically again and then close the App Store and open it again. We are sure there are many more problems among phones, no matter, if they are Android phones or they are part of the iOS technology. But, this time we just covered the most common issues and we hope those possible solutions work for you. Please share with us if you have experienced some of these problems and how you solved them!

Solving Problems with Mobile Phones

Abilities of a Mobile Phone

Key Terms

  • Mobile App – a program that runs on a phone
  • Sensors – Hardware on your phone that allows it to interact with the world around it

Mobile phones are extremely powerful devices with lots of sensors and functionality. Since you are developing a mobile app to solve a problem, you should take advantage of all powerful things mobile phones can do.

Here are some important components and sensors that a mobile phone has:

Component What it does
Camera, speaker, microphone Allow you to take pictures, videos, record sounds
GPS Shows the location of the phone
Storage on a phone Allows you to store preferences, images, sounds on the your phone
Connectivity to the web Allows you to connect the phone to information on the web
Accelerometer, gyroscope Shows how fast the phone is moving
Phone calls, text messages, contacts lists Allows you to make phone calls, send text messages, and connect to people

Mobile Apps versus Mobile Websites

Another way to develop technology for a mobile device is through creating a mobile website, but mobile websites are different than mobile apps. Since Technovation Girls is a mobile app competition, you’ll need to develop a mobile app rather than a mobile website. So what is the difference?

  • Mobile Website – A website that works on screens of all different sizes. A mobile website is accessed through the browser on a phone.
  • Mobile App –  A program that is downloaded and installed on a phone or tablet. It can be directly accessed from the memory of the device.

Mobile apps run on the actual phone, instead of inside a browser on the phone. Because of this, apps are much better at accessing the sensors and features on a phone. Here are some advantages that mobile apps have over mobile websites.

Key Capabilities Reason Example
Ability to access functions on the phone, such as the camera, sensors, phone calls, SMS, GPS etc. A mobile app is much better at accessing the phone’s features and hardware, such as the camera, GPS location, and so on. Any apps that use this functionality would be better suited to use a mobile app. 

  • Push notifications
  • Tap-to-call/email
  • Device vibration/ alerts
  • Camera
  • Instant and automatic updates
Apps like Instagram access the camera, location sensor, and more on your phone.
Ability to be very interactive – good for gaming Mobile apps are better at accessing the accelerometer sensors on phones. Gaming apps such as Angry Birds are very fun to play due to their interactivity.
Easier to use regularly It is much more convenient for someone to use an app than to navigate to a website on the web. Social media offer both an online site and mobile app so that frequent users can download the app.
Ability to be personalized Mobile apps can store information on a users’ phones, so this makes them a better choice for apps that need a lot of customization. Health or period trackers can store information and allows you to track your health.
Ability to function offline Since mobile apps are stored on the phone, they can perform functions without a network/wireless connection. 

However, mobile apps require the user to regularly download updates. Web apps will update themselves.

Spotify can save your songs to play offline.
Has a nicer interface Since mobile apps are designed for the devices that they are used on, the interfaces often look better than those of mobile websites. Notice how different the Facebook app looks on your phone compared to the Facebook website.

Of course there are also some downsides to mobile apps. They require the user to go to the app store to download them and also require updates to be downloaded. Also, most apps only work on iOS or Android and not both.

When you develop your solution you will want to make sure that what are you creating really takes advantage of the features of a mobile phone.

Here are some ways you can check if your solution takes advantage of mobile phone features.

Ask Yourself Consider
Could this be done without any technology at all? If so, does adding technology make it better? For example, you could spread awareness about earthquake safety by hosting information sessions and classes in your town. How can you use technology or a mobile app to add to this solution and make it better?
Could this be a mobile website instead of an app? If so, does turning it into an app make it better? For example, a quiz about heart disease could just be a website. Before turning this into an app, you should brainstorm how you can take advantage of the capabilities of mobile apps.
How can we take advantage of the key components of mobile apps in our solution? Check with the table above and make sure that your solution uses at least one of the key capabilities of apps. This will prevent you from developing a solution that is better as just a mobile website, or using no technology at all.

Check out the activity to practice identifying how apps are using the abilities of a mobile phone.

Activity: Features of your Favorite Apps

This should take around 20 minutes

Brainstorm at least 2 of your favorite apps.  Answer these questions either out loud or on a piece of paper.

  • What features of your phone do they use?
  • Would it still work as a website or as something different than a mobile app? Why or why not?

Example:

App Name Mobile features the App uses Would it still work as a website or as  different than a mobisomethingle app? Why or why not?
 Snapchat
  • Camera, video, microphone
  • Frequent use
  • Sends push notifications
  • Connecting you to friends in your contacts
No, this would not work as well as a website because I use it frequently and I like to get push notifications when I have a message.

Reflection

When you develop your solution you should ask yourself these questions:

  1. Could this be done without any technology at all? If so, does adding technology make it better?
  2. Could this be a mobile website instead of an app? If so, does turning it into an app make it better?
  3. How can take advantage of the key capabilities of mobile apps in your solution?
How to check DStv balance

Multichoice pre-paid entertainment dots most households and entertainment spots. However, nothing gets you off balance like the conspicuous mail icon on the top corner of your screen (a reminder of pending expiry of your subscription) when you thought everything was okay. Which begs the question, how do you check your DSTV balance?

Multichoice offers its customers easy ways to confirm their balances and the pending expiry of their subscriptions. If you are wondering how do I check my Dstv balance here are some of the ways.

CCTV, Security Cameras, Access Control, Video Door Phones, Biometric Devices, Bio-metrics Attendance, Spy Gadgets, Automatic Gate, Electric Gate, Intercom, PABX, Burglary alarm systems, Fire Alarm Systems, Perimeter Intrusion Alarm, System, Electric Fence, Automobile/Car Tracker, DSTV, Free-To-Air, Satellite Systems
CCTV, Security Cameras, Access Control/Biometric System, Video Door Phones, Spy Gadgets, Automatic/Electric Gate, Intercom/PABX, Burglary/Fire Alarm Systems, Perimeter Intrusion Alarm System/Electric Fence, Automobile/Car Tracker, DSTV/Free-To-Air/Satellite Systems, etc.

Use SMS

  • Compose a text
  • Type Bal (space) your smartcard number (10 digits)
  • Send the message to 22788
  • You will receive a message of your balance from DSTV
  • Go to DSTV website
  • Use the link http://eazy.dstv.com
  • On the website dashboard’s click on Service
  • You will be redirected to a page that requires your sign in
  • You will be required to fill your surname or Mobile number and Smartcard number.
  • You can click on “My account “to find out about your balance.

Using DStv connect

Alternatively, you can sign in using DStv connect (you register for this service). The service allows you to access your balance and login since your account details and customer ID are synced.

Contacting customer care

If you find all the above tasking, you can opt to contact customer care directly.

If you need an instant response, then it’s advisable to call customer care line. The service agents will guide and check your balance but there is a need for proof of ownership.

Another relatively swift method is through the use of social media

You can now direct message DSTV  directly to check your DStv account balance. Ensure you provide personal details and account number.

Email is one other option but it may not be as swift as the other two especially at night. In case you find this option suitable you can email DStv.

There are plenty of ways you can use to check your balance. These are some of the ways you can confirm your balance before making any payments.

How to Watch DsTV on Phone
Multichoice has offered its clients a new viewing experience on the go. You can easily watch your favorite programs and channels through the DSTV app. Users can download the application and enjoy live streaming games and programs. Alternatively, you can save the programs to watch later.To enjoy watching DSTV on your phone, ensure your phone has the latest android application. Also, you have to be a premium DSTV compact or Compact plus subscriber to enjoy this service at no extra cost. It simply connects your DStv to your phone.

CCTV, Security Cameras, Access Control, Video Door Phones, Biometric Devices, Bio-metrics Attendance, Spy Gadgets, Automatic Gate, Electric Gate, Intercom, PABX, Burglary alarm systems, Fire Alarm Systems, Perimeter Intrusion Alarm, System, Electric Fence, Automobile/Car Tracker, DSTV, Free-To-Air, Satellite Systems
CCTV, Security Cameras, Access Control/Biometric System, Video Door Phones, Spy Gadgets, Automatic/Electric Gate, Intercom/PABX, Burglary/Fire Alarm Systems, Perimeter Intrusion Alarm System/Electric Fence, Automobile/Car Tracker, DSTV/Free-To-Air/Satellite Systems, etc.

How to watch DSTV on phone

  • Go to Google Play store/Apple store or now.dstv.com
  • Download DSTV Now Click “install now” button to allow you to download the application.
  • Allow the application to install (this will take a few minutes)
  • Register your personal details
  • Complete the registration process by accepting the terms and conditions spelled out.
  • Launch the application.
  • Log into your DSTV account.
  • You can then enjoy watching your games from this application
  • Ensure you have a stable and reliable internet connection either 3G or 4G.

You can also store videos and watch later (a maximum limit of 25 has been set but also ensure your device has enough memory storage)

There is a wide array of channels that you choose from the menu and app dashboard.

Click on the play button and the application automatically starts playing it.

The guidelines are how you can simply watch DSTV on your phone without the hassles of additional costs or registration on the go.

How to Convert Your GOTV Decoder to a Free To Air Decoder

Update: GOtv scrapped its FTA conversion clause a while back. You can no longer turn your GOtv decoder into a full-fledged free to air decoder. The best you can do is subscribe to the GOtv Lite package that gives you a couple of local channels and other interesting channels to keep your days filled up. You can take the:

  • GOtv Lite Monthly
  • GOtv Lite Quarterly
  • GOtv Lite Annual

I bought a GOtv decoder, about a year ago and I was impressed at what it had to offer at the time. I would say it is mostly because there was no competitor with fairer prices. Even if that was not the case, they used to air premier league matches on SuperSport Select 2, more than they do now.  A couple of months down the line, a lot has changed for the better, except Gotv.

I opted to turn my decoder into a free to air decoder, as they had given this option, instead of paying for what I did not need. At first I was told that I had only to pay administration fee, for my decoder to be converted before I can begin watching free to air channels. The thing is that, their staff is very reluctant to make the change, but I somehow managed to do it. However, if you are not aware, changing your GoTV decoder from pay TV to free to air does not mean that you will stop paying for it. It actually attracts a recurring fee very year, for purposes they can only describe as maintenance.

Nevertheless, I know many people are currently facing a problem that I faced some time back and I would quickly try to help them using a method that worked for me. In a few simple steps, you should have your GoTV  decoder showing free to air channels, in a few hours (Although most FTA channels are below par!). Apart from these, the only other GoTv channels that you will receive are Faith TV, Islam TV and GO Channel.

How to Convert your GOtv Decoder

First, you need to top up your account by making payment. Ensure that you have topped up the right amount into your account, or else  they will not convert your decoder. Afterwards, you can opt to use their self-care center by dialing *423# and following the voice prompts or you can opt for calling their customer care service. If you only pay and fail to use any of the two options above to contact their customer care, your decoder will not be converted.

Before you make the call, make sure that you have your IUC number, as it is essential to associate your account with the decoder. Converting your decoder should be easy unless you find a customer care agent who is not in a good mood to help. Within a short time, your decoder will be showing free to air channels.

I have heard of people who, after converting their decoders to free to air, got an error message (E016-0 – Service is currently scrambled). It is very simple to clear this message. Just send an SMS with the word ‘RESET’ followed by a single space and then your IUC number to 22688. For example, if your IUC number is 1234567, your SMS should look this way without the full stop: RESET 1234567.

I hope you have managed to convert your decoder. Share your experience with us.

How to change GOtv Package

Pay-TV has become an entertainment staple in most houses. Multichoice invested heavily in their lower-tier pay-TV GOtv to cater for the middle and low-income earners. Depending on your wallet, you can either upgrade or downscale to your current financial situation. So how does one change their GOtv package?

CCTV, Security Cameras, Access Control, Video Door Phones, Biometric Devices, Bio-metrics Attendance, Spy Gadgets, Automatic Gate, Electric Gate, Intercom, PABX, Burglary alarm systems, Fire Alarm Systems, Perimeter Intrusion Alarm, System, Electric Fence, Automobile/Car Tracker, DSTV, Free-To-Air, Satellite Systems
CCTV, Security Cameras, Access Control/Biometric System, Video Door Phones, Spy Gadgets, Automatic/Electric Gate, Intercom/PABX, Burglary/Fire Alarm Systems, Perimeter Intrusion Alarm System/Electric Fence, Automobile/Car Tracker, DSTV/Free-To-Air/Satellite Systems, etc.

Down or upgrading has its benefits, mostly downgrading is premised on cost-cutting measures while upgrading usually is driven by the need to watch specific channels not readily available to other packages.

Method #1: How to change GOtv package via SMS

This is considered a swift method of changing your bouquet.

  • Confirm your IUC number
  • Enter this number on a blank text in addition to the word UPGRADE
  • Send the text message to 22688

how to change gotv package

Method #2: Calling Customer Care Representatives

The old school talk never disappoints. Calling your representatives may take a shorter time but requires you have all the requisite information about your decoder. You can call them on any of their stipulated phone number.

  • Call the Customer care number
  • Inform the representative of your change of package request
  • Furnish the representative with details they need
  • Wait for your application to be affected

Method #3: Change GOtv Package Online Option

GOtv offers an easy online change of subscriptions by its Easy self-care service on their platform.

The service enables the customer to make changes in their packages without the hassles of making phone calls to customer care. If you were wondering how to change to your GOtv max this is how you go about it.

  • Log into your GOtv account (This includes your name, phone number, device IUC number)
  • Upon accessing your account select “Build your account” from the dashboard.
  • From the list, of packages select the one you wish to migrate to then click next
  • Pick the payment option from the play button this offers the various payment options you can use for the transaction
  • Enter the additional required details on the fields, after complete payment your new package activated in few minutes between and 10 minutes.
How to fix DStv signal problems

DStv signal problems can be caused by faulty connections, dish alignment, and bad weather. To fix DStv signal problems then you need to make sure the cables are connected properly and the dish is correctly aligned.

CCTV, Security Cameras, Access Control, Video Door Phones, Biometric Devices, Bio-metrics Attendance, Spy Gadgets, Automatic Gate, Electric Gate, Intercom, PABX, Burglary alarm systems, Fire Alarm Systems, Perimeter Intrusion Alarm, System, Electric Fence, Automobile/Car Tracker, DSTV, Free-To-Air, Satellite Systems
CCTV, Security Cameras, Access Control/Biometric System, Video Door Phones, Spy Gadgets, Automatic/Electric Gate, Intercom/PABX, Burglary/Fire Alarm Systems, Perimeter Intrusion Alarm System/Electric Fence, Automobile/Car Tracker, DSTV/Free-To-Air/Satellite Systems, etc.

If your television displays errors like DStv no signal foundDStv signal strength 0DStv error- no signal due to bad weather, and any other errors. Then, you need to follow the following fix solutions below.

Fix faulty connections

Poor connection of the cables from the dish to the decoder can interrupt the transfer of waves from the dish to the decoder. This will result in poor signal strength or no signal errors. To fix this.

  1. Check for any loose DStv cables and make sure they are firmly connected.
  2. Make sure the F-type connectors are correctly connected to the LNB.
  3. Ensure the F-type connectors are correctly and firmly connected to the decoder ports.
  4. Make sure that the F-type connecters are correctly connected with the coaxial cables.
  5. Ensure the coaxial cables are in good condition.

Fix incorrect Alignment of the dish

Before disturbing the alignment of the dish, make sure that the LNB is in good condition. If the LNB is at fault it may lead to DStv no signal found error, which means you need to replace it first.

If the signal is not restored the follow the following steps.

  1. Make sure the arms are not broken or rusted. If broken or rusted, then replace the arms.
  2. Check all the bolts if they are loose. In case any bolt is loose, make them tight.
  3. Adjust your DStv satellite dish properly by adjusting the horizontal and elevation angle. This will need to be done using a signal detector.

How to fix DStv signal problems due to bad weather

Bad weather conditions may cause DStv error- no signal due to bad Weather. It may also cause the DStv signal problem on certain channels.

To fix this problem you can try the following tips.

  1. Make sure that your DStv signal strength is above 90% during normal weather conditions. This will increase immunity during bad weather conditions.
  2. Make sure the dish is installed closer to where you are going to place the decoder. Signals get lost with distance.
  3. Make sure there are no cuts on the cable that may allow rainwater. This may cause shocks and signal loss.
  4. Cover the LNB with plastic or a bottle to prevent water from entering the LNB components.
  5. Cover or insulate the F-type connectors connecting to the Low-Noise Block Downconverter (LNB).

How to fix DStv signal problems by rebooting

A quick reboot of your decoder may help fix multiple problems such as scrambled channels. Scrambled channels may also cause a DStv signal problem error. This is because DStv keeps searching for signals and other decoder errors which only require a restart to work perfectly.

To reboot your DStv decoder, continuously press the power button. Rebooting takes a while; this means you need to ensure a steady power supply and be ready to wait.

How to check DStv signal strength

Monitoring your DStv signal strength may help to identify any fault and fix it before the signal is fully lost. These are the steps to follow to check your DStv signal strength.

  1. Click the HELP button on your remote control.
  2. Choose the general information option.
  3. Then select the Tuner Status option.
  4. After that, your DStv signal strength and quality will be displayed on your television screen.

How to improve DStv signal strength

If you have a strong signal strength you may enjoy immunity during harsh weather conditions. And these are some of the things that may help improve or maintain your DStv signal strength.

  1. Cut down trees or prune trees that may cause obstruction of the signals.
  2. Do not install your DStv satellite dish between tall buildings.
  3. Reposition your DStv satellite dish in case a tall building is coming on its way.
  4. If you are using a polar mount for your dish, ensure the polar is upright.
  5. Ensure your DStv satellite dish is properly aligned and tightened to the host.
  6. Align your LNB correctly at a skewed angle in relation to the polarity of the signal, your local position, and the selected satellite.
  7. Ensure proper connection of the F-type connector on the LNB and the decoder.
  8. Replace any fault LNB, F-type connector, and cables.
  9. If you are using more than one television, you may need to buy a DStv signal booster or amplifier.
  10. Always monitor your DStv signal strength settings to know when it starts losing strength.

Conclusion

If you have tried all the above fix solutions and you still have a problem with your signal, then you must call an accredited DStv installer to come and fix the problem.

The installer will perform advanced diagnostics to identify the problem. You can also call the installer if you do not want to perform the above fix but doing it yourself is preferable since it helps cut the cost.

How to Clear E16 Error on GoTV

Chances are your GOTV is displaying e16 error on your screen. Perhaps your subscription expired without your knowledge and you are wondering what this means. Well, it simply means your GOTV needs a recharge. However, there are special instances that despite paying the error message still displays. Maybe you have done everything right, (ensured your decoder is on, and made necessary payments) but still get the message, we got you covered.

CCTV, Security Cameras, Access Control, Video Door Phones, Biometric Devices, Bio-metrics Attendance, Spy Gadgets, Automatic Gate, Electric Gate, Intercom, PABX, Burglary alarm systems, Fire Alarm Systems, Perimeter Intrusion Alarm, System, Electric Fence, Automobile/Car Tracker, DSTV, Free-To-Air, Satellite Systems
CCTV, Security Cameras, Access Control/Biometric System, Video Door Phones, Spy Gadgets, Automatic/Electric Gate, Intercom/PABX, Burglary/Fire Alarm Systems, Perimeter Intrusion Alarm System/Electric Fence, Automobile/Car Tracker, DSTV/Free-To-Air/Satellite Systems, etc.

How to Clear e16 Error

The first step is the elimination of the possible causes of the error. If you haven’t paid yet ensure you do

While at it ensure your decoder is powered on. This should do the trick. However, if the problem persists there are other ways to go about this.

How to Clear E16 Error on GoTV Online

  • If the error persists go online to https://eazy.gotvafrica.com/en/ke/clear-error-code
  • The home page has an easy self-service section on the dashboard
  • Click the section
  • You will be prompted by a dialogue box attached to the section
  • Fill in your decoder IUC number (This can be accessed on the body of the decoder) usually below in a red sticker.
  • Fill the next dialogue box usually has two error options GOTVE16 Or GOTV30 (you will get this option if you scroll down; just select the former)
  • Enter the Captcha text that is provided by the prompt
  • Click the green “FIX ERROR” button below and wait.

Ensure when doing this your decoder is powered on. The error should clear after a few minutes.

Calling Customer Care and Support

Not everyone can access the internet or have smartphones. Don’t worry getting your error is still simple. You can call the customer care.

They will either remotely solve your problem or at times lead you to step by step in clearing the error.

You can also contact them through their handles in social media platforms like Twitter, Facebook or use USSD *423#

Using Your Remote Control

  • Go to menu
  • Navigate to go easy self-service
  • There will be a display indicating an option of “clear error codes”
  • Click on it
  • Type your IUC number using your remote
  • Enter this and press ok to clear the codes
How to Reactivate DsTV After Payment

It is logical to expect that your decoder starts showing the channels after you have paid the subscription fees. At times, you are forced to reset your decoder to continue enjoying your channels.

CCTV, Security Cameras, Access Control, Video Door Phones, Biometric Devices, Bio-metrics Attendance, Spy Gadgets, Automatic Gate, Electric Gate, Intercom, PABX, Burglary alarm systems, Fire Alarm Systems, Perimeter Intrusion Alarm, System, Electric Fence, Automobile/Car Tracker, DSTV, Free-To-Air, Satellite Systems
CCTV, Security Cameras, Access Control/Biometric System, Video Door Phones, Spy Gadgets, Automatic/Electric Gate, Intercom/PABX, Burglary/Fire Alarm Systems, Perimeter Intrusion Alarm System/Electric Fence, Automobile/Car Tracker, DSTV/Free-To-Air/Satellite Systems, etc.

Here is how to reactivate DSTV after subscription

Using your DSTV remote

  • Using your remote control
  • Forget the complex processes; you can simply reset your decoder by pressing the right buttons after payment.
  • Go to your remote and press “Reset” and “Standby” buttons simultaneously.
  • The letter DL will appear on your screen
  • Press P+ then P-
  • This should reset your decoder.

However, this method at times fails to work. There are other viable alternatives of resetting  DSTV after payment in Kenya

Contact support

While the idea may not seem genius, it is actually more reliable and at times even swift.

  • You can contact DSTV customer care. Report the problem and follow the support agent’s instructions.
  • Another option is contacting DSTV customer support via social media sites like Twitter and Facebook.

Ensure your personal details and smart card number and issues are addressed to the support.

Write down the problem (In this case resetting your decoder) you wish to be rectified. You will be furnished with a DSTV reset number that will assist you in resetting your decoder.

The customer support should be able to reset your decoder (The response time is usually swift).

As you can see, how to reset your DStv decoder after making payments isn’t that hard.

List of GOtv problems and solutions – complete guide

GOtv is one of the leading companies when it comes to entertainment in Africa. Most of the subscribers face various issues from connectivity to being unable to watch GOtv after paying.

CCTV, Security Cameras, Access Control, Video Door Phones, Biometric Devices, Bio-metrics Attendance, Spy Gadgets, Automatic Gate, Electric Gate, Intercom, PABX, Burglary alarm systems, Fire Alarm Systems, Perimeter Intrusion Alarm, System, Electric Fence, Automobile/Car Tracker, DSTV, Free-To-Air, Satellite Systems
CCTV, Security Cameras, Access Control/Biometric System, Video Door Phones, Spy Gadgets, Automatic/Electric Gate, Intercom/PABX, Burglary/Fire Alarm Systems, Perimeter Intrusion Alarm System/Electric Fence, Automobile/Car Tracker, DSTV/Free-To-Air/Satellite Systems, etc.

This guide will help you get through most of the common problems.

Missing channels

This is one of the most common problems GOtv users experience. It usually occurs when upgrading the decoder’s software. To fix this, follow these steps:

  1. Press MENU on your decoder’s remote.
  2. Press the i button and then press 7.
  3. The decoder will automatically reboot and launch the FTI page.
  4. Select the language as English, the country to where you reside and set the antenna power OFF.
  5. The decoder will re-scan itself for available channels.

You can also use these steps if the ones above don’t recover the missing channel(s):

  1. Press MENU on your decoder’s remote.
  2. Select Advanced Options.
  3. Scroll down the list and select Installation and then select Tuning.
  4. Choose the Automatic Scan option and press the OK button in each stage.
  5. The number of channels for the normal GOtv package should be 27. GOtv Plus has 37 channels whereas GOtv Max has 57 channels.
  6. The scan should show how many channels are available.
  7. Press EXIT when the scan is done.

Error messages

If you are encountering any of these errors on GOtv, here is a detailed guide for fixing each of them:

E017-0 and E48-32

These error messages indicate that the decoder is not enabled for the specific channel you are trying to view. It’s usually caused when the software is not up to date.

  1. Press MENU on your decoder’s remote.
  2. Select Information Central to check whether you have the latest software.
  3. If there is an upgrade available, press MENU and select Advanced Options.
  4. Select Decoder Upgrade.
  5. A red button will appear below on your screen, press it to download the upgrade.

This error message can be prompted by other issues as well. You can still fix it by following these steps:

  1. Switch off the decoder and switch it back on.
  2. If the problem persists, send an SMS to 4688 with the following wordings; RESET IUC number.
  3. You can also visit their website at http://eazy.gotvafrica.com/ and search for the Clear Error Code section. Enter your IUC number and key in the error code then click on Clear Error.

E16

This error message comes about when you’ve paid for your subscription but the channels aren’t showing. This is because GOtv’s system failed to reactivate your account automatically.  To fix this, follow these steps:

  1. Send an SMS to 4688 with the following wordings; RESET IUC number.
  2. You can also visit their website at http://eazy.gotvafrica.com/ and search for the Clear Error Code section. Enter your IUC number and key in the error code then click on Clear Error.

Low signal

Whenever the signal is low, viewing any of your favorite shows becomes a problem. It is usually brought about by bad weather. To fix this, follow these steps:

  1. Press MENU on your decoder’s remote.
  2. Select Advanced Options.
  3. Scroll down the list and select Installation.
  4. Select Signal Information and then press OK.
  5. The signal bar should be higher than 50% while the signal quality bar should be higher than 40%.
  6. If both values are lower than that, move your antenna up or down and from side to side until the signal is at its highest.
  7. Once satisfied with your signal strength, secure the antenna tightly, and select EXIT.

Account suspension

Sometimes when you migrate from one package to another, you will be suspended. When something like this happens, simply contact GOtv Customer Care to verify your ownership and your account will be reactivated instantly. The following are some of their contact details depending on the country you reside in:

  1. Ghana: Phone No: +233 302 740 540. Email Address: customerservice@gh.multichoice.com. USSD: *759#
  2. Kenya: Phone No: +254 711 066 000. Email Address: kenya@gotv.co.za. USSD: *423#
  3. Malawi: Phone No: +265 1 895 777. USSD: *570#. Shortcode: 54688
  4. Uganda: Phone No: +256312245245. Email Address: uganda@gotv.co.za. USSD: *206#
  5. Zambia: Phone No: +260 211368343. Email Address: zambia@gotv.co.za. USSD: *668#

Account reconnection

Whenever you fail to pay your monthly subscription, you will be disconnected from GOtv until you are ready to pay. To be connected back, you will need to follow these steps:

  1. Visit eazy.gotvafrica.com
  2. Key in your IUC number.
  3. Select your country from the drop-down list.
  4. Enter the captcha and then click ‘Verify’.
  5. This will take you to the online payment page.
  6. Once you settle your balance, click on ‘Reconnect’ to have your account back on track.

GOtv remote not working

Many subscribers have had an issue with the decoder not responding to the remote. This may be caused by a couple of issues.

Batteries

If the batteries are working the LED lights on the decoder will flicker whenever you press the remote. When the remote is not responding accordingly, remove and put back the batteries into the remote. You can also replace the existing batteries with new ones.

Technical issue

If the remote has a technical issue, you can fix it by pressing both ‘P+’ and ‘P’ at the same time on your decoder. A pop-up screen will show up on your TV indicating the channel’s name. When you press the direction buttons or any button on your remote, it will start working as before.

Clogged up from the inside

If the remote has been exposed to dust or food particles, it may malfunction. To fix this, you will need to clean the remote from the inside. Follow these steps:

  1. Open the remote using a flat metal such as a knife.
  2. Once it is open, clean the green board with a slightly wet cloth.
  3. If there is too much dirt, dip a toothbrush in methylated spirit and clean the green board with it.
  4. Clean the rubber part and leave it to dry as well.
  5. Once the parts are dry, put them back together and test the remote. It should be working by now.

Reset the decoder

Most of the problems listed above can also be fixed by resetting the decoder. This should be the final solution when nothing else is working. To do so, follow the steps below:

  1. Unplug the device from the power source.
  2. Press and hold the P+ button on the decoder.
  3. Plug the device back to the power source.
  4. You should see a green LED light flashing on the decoder.
  5. Quickly after the light stops flashing, release the P+ button.
  6. You should then press P+ and P- buttons at the same time.
  7. This will reset the decoder.

Conclusion

If any of the problems listed above persist, you should contact Zuku’s Customer Care. I hope this article was helpful. If you have any questions surrounding this topic, let us know in the comments belo

Top Mobile Phone Problems and Solutions
For better or worse, we are all glued to our smartphones. A phone that’s not working correctly can be a major inconvenience, especially if you need it for work or school. Read on for solutions to four of the most common smartphone problems.

Your Phone’s Slower Than 90’s Internet

If your phone has gotten slower over time, chances are that it’s bogged down with apps and files. To solve this problem, start by taking a look at your files and deleting things you don’t need. Consider moving media files like photos to an external hard drive or a cloud service. If you have apps, you aren’t using anymore uninstall them.

Next, check to see which apps are running in the background. Anything that sends you push notifications is suspect. Do you really need twenty news updates a day? If not, go into the app’s settings and turn off push alerts.

Your Battery Dies Before Noon

Short battery life is one of the most common cell phone problems. Batteries do wear out over time, and if your phone is more than two years old, you should consider getting it replaced. If your phone is newer or you aren’t ready to take that step yet, there are some things you can try first.

Many smartphones will tell you which apps are sucking the life out of your battery. Go to settings and find the “battery” section. This will be labeled slightly differently depending on your device. Once you’ve found it, look to see which apps are using the most battery. If you see apps listed that you haven’t used recently, it means they are running in the background. Again, push notifications are a common culprit, so consider navigating to those apps and turning push alerts off.

If you don’t see any obvious problems with apps, you can try changing some other settings. Turning your “location” function off and lowering your screen’s brightness can help save power. You can also shorten your phone’s screen timeout setting so it will fall asleep sooner when not in use. If none of these changes help, it’s probably time to take your device to a phone repair shop and get a new battery.

Your Screen Keeps Freezing

This is another problem that is usually caused by an overloaded device. Start by clearing your phone’s cache and getting rid of unneeded files and apps. If your phone’s storage space is still almost full after doing that, move some things to outside storage, like your PC or a cloud service. Screen freezing is sometimes caused by a malware infection, so after taking the steps above install an antivirus program and run a scan.

Your Whole Phone Shuts Off or Freezes

You’re in the middle of checking your email, and your phone goes black and won’t wake up. Don’t panic! You should be able to restart it. On most devices holding the power button and the home button down at the same time for several seconds will force a restart on a crashed or frozen phone. If that doesn’t work, it means something serious has gone wrong, and you’ll need to get the professionals involved. If the phone restarts, you may be able to fix the problem yourself.

Crashing phones can be caused by several things. Start by checking to see if your phone is overloaded with apps and files ( yes there is a reoccuring theme here). After you’ve removed stuff you don’t need and cleared your cache, run a virus scan. Ideally, you will do this with an app that can both find and remove viruses.

If your phone is squeaky clean, then software might be to blame. It’s pretty common for operating system updates to cause problems, so if you’ve recently updated something, you might need to reset the phone to factory settings. If you have tried all the above steps and your phone is still crashing, don’t hesitate to take it into a repair shop.

Mobile Cell Phone Earpiece / Ear Speaker Problem and Solution

Learn to Solve / Fix if Speaker of Android Smartphone or iPhone is Not Working During Call.

This chapter explains Mobile Phone Earpiece or Speaker Problem and Solution – How to Solve Earpiece or Speaker Fault in any Mobile Cell Phone. These problem and solution apply to all brands and make of mobile phones including Nokia, Samsung, iPhone, China Mobile Phones, Motorola, HTC, Sony, Blackberry, Alcatel, Apple, AudioVox, Benefone, Danger, FIC, Hagenuk, Palm, Kyocera, LG, Panasonic, Huawei, ZTE, Spice, Lava, Sony Ericsson, Micromax etc.

What is Earpiece or Speaker in a Mobile Cell Phone?


Earpiece or Speaker in a mobile cell phone is an electronic component or part that helps to listen to sound during phone call. It is also called Speaker or Ear Speaker. Earpiece is controlled by Audio IC or Power IC (UEM).

Types of Faults or Mobile Phone Earpiece Problem Problems

  • No sound during phone call.
  • Less sound during phone call.
  • Sound with interruption.

How to Solve and Fix Earpiece or Speaker Fault in Android Smartphone and iPhone

  1. Check Speaker Volume during Phone Call.If speaker volume is OK the Check Earpiece / Speaker using a Multimeter.
  2. Keep the Multimeter in Buzzer Mode. Value must be 25~35 Ohms. If the Value is NOT between 25~35 Ohms then change the Earpiece / Speaker.
  3. If the problem is not solved then Check Circuit Track of Earpiece Section. Do Jumper Wherever required.
  4. If the problem is not solved then Heat, Reball or Change the UEM / Audio IC.
  5. If the problem is still not solved then Heat, Reball or Change the CPU.

Note:

  • If there is less sound or sound is not clear during phone call then change the speaker.

Mobile Phone Ringer / Loud Speaker Problem and Solution
Mobile Phone Ringer Problem and Solution – How to Fix Loud Speaker Not Working

Here we will learn different Mobile Phone Ringer Problem and Solution – How to Solve Ringer / Loud Speaker Not Working Fault in any Mobile Cell Phone or Smartphone. These problem and solution apply to fix No Sound from Ringer / Loud Speaker of all brands and make of mobile phones including Nokia, Samsung, iPhone, China Mobile Phones, Motorola, HTC, Sony, Blackberry, Alcatel, Apple, AudioVox, Benefone, Danger, FIC, Hagenuk, Palm, Kyocera, LG, Panasonic, Huawei, ZTE, Spice, Lava, Sony Ericsson, Micromax etc.

What is Ringer in a Mobile Cell Phone?

Ringer is a type of card level part of a mobile phone or smartphone that rings or plays loud sound. It is also called by several other names like – I.H.F Speaker, Buzzer, Loud Speaker, and Melody etc.

Types of Faults or Problems in Mobile Phone Ringer

There can be several types of faults or problems in the ringer of a mobile cell phone:

  • Ringer / Loud Speaker not working
  • Less sound from the Ringer
  • Sound coming from Ringer but with interruption
  • Sound not clear
  • Cannot Play Music or No Sound from Video
  • Android Phone Not Ringing
  • Android Smartphone or Apple iPhone Vibrate but won’t ring

Mobile Phone Ringer Problem and Solution – How to Solve Ringer / Loud Speaker Not Working Fault in any Mobile Cell Phone

  1. Check ringer settings in mobile phone. Check Ringer Volume and Silent Mode. Adjust or change volume and / or mode if required.
  2. If the problem is not solved then disassemble the mobile phone and clean point and connector of the ringer / loud speaker.
  3. If the problem is not solved then check ringer using a multimeter. Keep the multimeter in buzzer mode. Value must be 8~10 Ohms. If the Value is not between 8~10 Ohms then change the Ringer.
  4. If the problem is not solved then check track of ringer section. Do jumper wherever required.
  5. If the problem is not solved then check Ringer IC. Give Heat using Hot Air Blower or change the IC if required.
  6. If the problem is not solved then heat, reball (BGA) or change UEM / Logic IC.
  7. If the problem is still not solved then heat, reball or change the CPU.

NOTES

  • If there is less sound from the Ringer then change the Ringer directly.
  • If the problem is not solved then heat or change the Ringer IC.
Top 5 ways on How to Turn off Roaming on Android

Top 5 ways on How to Turn off Roaming on Android

You need to keep in touch with your coworkers or family even if you’re out of town. What do you do if you don’t even have a mobile plan for that other location? Obviously, turn on roaming facilities on your phone if your phone service provider offers them. But, when you get back and you still can’t figure out how to turn off roaming on Android or turn off roaming on iPhone.  Then there’s an issue that needs to be troubleshot and fixed. Roaming can be really expensive and using it when it’s not required will 100% burn a hole in your pocket.

To tackle the issue of “why is my phone still stuck on roaming”, we have some quick solutions that’s hardly going to take a few minutes to activate.

Sync Mobile Data and Data Roaming

Before we dive into how to turn off roaming on Android. We need to address how data functions on roaming and what is data roaming Android? When you use data internationally, you’re under a roaming service for data. To use that facility, you need to make sure that your mobile data settings are in line with the roaming setting. Even if one of them is turned off, you may not be able to use data.

How to turn on roaming?

  • Settings
  • Connections
  • Mobile networks
  • Switch on the toggle for roaming

How to turn on mobile data? (Through settings)

  • Settings
  • Wireless & Networks option
  • Cellular data- switch it on.

If both are on, you can continue to use data on roaming freely.

Turn on and off.

Turning on and off data roaming to determine if there was only a tiny glitch with the settings is one of the simplest fixes we can provide for this problem. You’re good to go if it’s fixed. To do so, simply follow the instructions above, to work with roaming, then switch the toggle on and off.

Reboot

Another classic yet crucial step if you can’t figure how to turn off roaming on Android is restarting or rebooting your device. Here’s how you can restart it:

  • Press and hold the power button and click on the restart button if it flashes on the screen to directly restart.
  • Press and hold the power button until your phone completely turns off and repeat the same process to turn on. That would be a manual restart.
  • Then comes, press and hold the power button along with the volume/home buttons, simultaneously to force restart.

This should most probably fix the issue, if not, check out the next step.

Software update

But why is my phone roaming all of a sudden? Even after you’ve turned it off and you haven’t activated the roaming service in a really long time, how does it still get activated? When our phones are not up to date, they start acting up in ways we won’t even realize. This is why data roaming randomly turning on and off is an indication that your software needs a little nudge.

How to update your software?

  • Make sure your phone is charged or is connected to a power source
  • Tap on settings
  • About phone
  • Click on “Check for an update”
  • If there’s one, then update it.

It will reboot and install it automatically and your issue should be resolved in no time.

Factory Reset

In a lender of last resort circumstance, a factory reset is used. Always save this option for last, when you’ve exhausted all other possibilities. We have a strong backup in place because our phones automatically sync with Google. If you don’t want to use auto-sync, you may always use manual synchronizing. As a result, a factory reset isn’t necessarily a bad idea.

After you’ve taken up the right call, the following steps will enable you to factory reset your phone:

  • Pop open settings
  • Scroll down to system preferences
  • Click on advanced
  • Find the reset options
  • Hit “Reset all settings and Data”
  • Enter your phone passcode
  • And

You can then restore all your data through the backup you’ve taken while still having a clean new device internally.

Data Roaming Options for iOS

Now that we’ve covered everything that there was for Android, let’s shed some light on iPhones as well. Like, Android iPhone users also ponder about “Why is my phone roaming at home?”. You can replicate the same exact steps that have been mentioned above, to fix the issue on iPhones. Make sure you’re keeping the factory reset option as the last one, in this case too.

Hopefully, by the end of this, you all have been able to follow all the steps and have finally learned how to turn off roaming on Android and iOS.

Process System Isn’t Responding? Effective Fixes To Revive Your Device

Process System Isn’t Responding? Effective Fixes To Revive Your Device

Muhammad Akmal

If you’re also facing the “process system isn’t responding” error on your Android device, it’s probably infuriating you right now. However, it’s a common problem on many older Android devices, and there are various ways to fix it.

Even though your Android phone is probably won’t say “process system isn’t responding” in 2021, you can’t tell the same for all Android devices, especially the entry-level devices with low memory and basic hardware. If by any means you woke up to the “process system isn’t responding” error on your Android device, the solutions in this article will help you out.

We’ve arranged this article in different parts, so you can navigate to what part concerns you, according to your Android device:

Table of Contents:

Why does my Android device say “process system isn’t responding”?

Part 1: 7 ways to fix “process system isn’t responding” on Android phones

  1. Force your phone to restart
  2. Free up your phone storage and RAM
  3. Enter Safe Mode to uninstall suspicious apps
  4. Update your apps from the Play Store
  5. Install System Updates
  6. Wipe the cache partition of your phone

Part 2: How to fix process system isn’t responding on Chromebook

Part 3: How to fix process system isn’t responding in Honda Odyssey

Part 4: How to fix process system isn’t responding on Oculus Quest

Why does my Android device say “process system isn’t responding”?

There are various reasons you may experience this problem on any of your Android devices. Despite that, many users reported the problem showed up after upgrading their Android software, installing apps from an unknown source, tampering with the system files (via rooting), and more.

Below are some reasons you might experience “process system isn’t responding” on your device.

  • Insufficient phone storage.
  • Software glitches & bugs.
  • Installing malicious apps outside the Play Store.
  • Altered or missing system files/apps.
  • Rooting and more.

Part 1: 7 ways to fix “process system isn’t responding” on Android phones

1. Force your phone to restart

First things first: we recommend you restart your device whenever the problem occurs. Doing so will wipe all ongoing system processes, refresh the memory, and probably fix the issue.

There are various ways to restart your device:

  • Press and hold the Power button for 10 seconds or more.
  • Alternatively, you can do it manually: long-press the Power Button, then select Restart (or Reboot) from the options.
  • And, if your phone’s battery is removable, you can remove it, then reinsert and reboot it instead.

2. Free up your phone storage and RAM

One of the more prominent reasons Android users face the “process system isn’t responding” issue is because of low storage. Your apps and the Android OS need some free storage space to store and maintain temporary files. If your phone storage is filled to the brim, your phone will misbehave.

If that’s the case, a simpler approach to solve the problem is to free up your phone’s internal memory. Just delete unnecessary files, large photos, videos, unused apps, and other redundant files on your phone. Or better still, you can move extensive files to an SD card if your device supports it.

But first, you need to check what’s eating into your storage before clearing things out. Follow these steps to do that.

  • Fire up the Settings app on your device.
  • Scroll down a bit and hit Storage!
  • Open Internal Storage to see your storage usage overview.
  • If the Available storage is less than 500MB, that’s a sign you need to do some cleaning in there. Of course, we recommend up to 1GB of free internal memory on your device, to ensure it’s always running at its best.

3. Enter Safe Mode to uninstall suspicions apps

Equally important, you should try uninstalling creepy apps on your phone if the “process system isn’t responding” keeps reappearing after cleaning up your storage. If an app you installed recently is conflicting with the system, you’re likely going to experience such a problem.

Nevertheless, you need to confirm if the problem was caused by an app or not. That’s where Safe Mode comes in. This mode lets you boot up your device without loading all third-party apps. Consequently, you may use Safe Mode to diagnose and fix various software issues, including the one currently disturbing your device.

Follow these steps to boot into Safe Mode:

  • Long-press the Power button.
  • Tap and hold Restart/Reboot in the power menu until you see a “Reboot to Safe Mode” pop-up message.
  • Finally, tap OK to reboot your device.

Note: the steps might be different on your device. However, you can always do a Google search for how to boot your device into Safe Mode. E.g., “How to boot TECNO CAMON CX into Safe Mode”

Immediately after your device enters Safe Mode, navigate the phone as usual for a few minutes. If the problem doesn’t occur, that means you’ve found the culprit. Now, you need to start uninstalling the creepy apps on your phone until the problem is solved. Start from the ones you installed recently.

4. Update your apps from the Play Store

If the problem persists after uninstalling suspicious apps on your phone, you should try updating your apps. In fact, many Android users claimed the problem was no more after updating their apps. So, you should do the same:

  • Launch the Play Store
  • Tap your Profile icon at the upper-right corner.
  • Hit My apps & games, then wait for a few moments to fetch available updates.
  • Tap Update all to update all you’re apps. Otherwise, you can update them manually from there.

5. Install System Updates

As well as updating your apps, it’s essential to keep your phone software up-to-date to fix process system isn’t responding error.

System Updates are not only for new features, they help keep your phone free from bugs, address critical issues, and protect you from hijackers. If you’re not sure you have the latest System Updates, follow these steps to check:

  • Launch the Settings app
  • Scroll to System and tap it.
  • Select System Update.
  • Tap Check for updates.

If an update is available, you’ll find it there. Simply download and install it as soon as possible. It may take a while before your device reboot while installing the updates. Just chill around.

However, if you still get the error after updating your device, try other solutions below.

6. Wipe the cache partition of your phone

Another method to fix “process system isn’t responding” on Android devices is to wipe the cache partition. This partition contains some temporary files created by the system to enhance performance. On the flip side, they can be problematic when corrupted or too much. Hence, clearing it may solve the problem you’re currently facing.

To do that, you need to boot into the Android Recovery Mode first:

  • Power off your device and wait for a few moments.
  • Next, press and of the combination of Power + Volume up button.
  • Release the Power button when the Android logo is shown.
  • Now, you’ll see a fallen Android Robot on the screen. Press the Power + Volume up buttons again to get into recovery mode proper.
  • Use the Volume down button to highlight “Wipe cache partition”, then select it with the Power button.
  • Confirm the action, and finally, reboot your device after that

Note: if you’re unable to boot into Recovery Mode, do a Google search for how to boot your device into recovery mode. For instance, “How to boot Infinix Hot 2 into recovery mode”.

Part 2: How to fix process system isn’t responding on Chromebook

If your Chromebook says “process system isn’t responding” trying most of the fixes mention in Part 1 should be able to fix it.

But first, restart your Chromebook. Press and hold the Power button for about 30 seconds to shut down the computer. After that, power it on normally

If that didn’t do the trick, try the methods below to fix the process system isn’t responding on Chromebook:

  • Free up your Chromebook storage and RAM
  • Update your apps
  • Install all pending system updates

Part 3: How to fix process system isn’t responding in Honda Odyssey

Many users of the Honda Odyssey vehicle also reported this same issue. If this happened to you as well, there are two things you can try restart the vehicle or report the problem to the manufacturer.

Follow these steps to fix the Honda Odyssey process system isn’t responding.

  • Power off the vehicle and leave it for 15-20 minutes.
  • After that, start the vehicle normally. The problem should be fixed by now.
  • If not, you can report the problem to Honda, and hopefully, they’ll help you fix it.

Part 4: How to fix process system isn’t responding on Oculus Quest

Like others, the Oculus Quest device isn’t left out in this problem. And if your Oculus Quest Device says “process system isn’t responding” or “Oculus app runtime isn’t responding”, there’s a way to fix it.

Many users who experienced this problem said it stopped showing after the device runs down. So, the solution is simple.

  • Turn on Oculus Quest and leave it for a few hours or days to let the battery run down.
  • Next, recharge the battery fully.
  • And finally, turn on your Oculus Quest device. Hopefully, it doesn’t show the problem anymore.

On the whole, your Android device saying process system isn’t responding can be frustrating. Nonetheless, following the guides in this article should see you through the problem. If non of the solutions worked for you, kindly seek help from an expert. And if you started experiencing this problem after rooting your device, the safest way out is to flash your phone with its custom ROM.

How To Find Hidden Apps On Android Devices

How To Find Hidden Apps On Android Devices

We all know many Android users want a clean app list on their device apps drawer and homepages. You might also hope the apps you frequently use can be well sorted out first on your homepages and app drawer list. This is possibly done by hiding these few unused apps either when using your Android launcher. Let us guide you through how to find hidden apps on Android.

HOW DO I FIND HIDDEN APPS ON MY ANDROID PHONE?

You may find it hard, or have no clue on how to find hidden apps on your Android device even as an existing user. Fortunately, we can guide you through where and how to find these apps with these simple steps.

Apps Drawer

As stated earlier, your app drawer houses the various apps downloaded and installed on your Android devices with the system apps designed to perform specific actions on the device. Most Android devices’ hidden apps can be searched and found on the App drawer page. However, the app drawer page varies on different Android launchers.

Though various launchers have customized app pages with different icons and steps for hidden apps searches, the steps below will be centered for Android launchers such as Smart Launcher, and Nova Launcher.

Nova Launcher

This launcher is a third-party developed app that lets you customize and overhaul your home screen with amazing features and themes. As a user, you can locate your apps hidden from your home screen on Nova Launcher with these few steps:

  • Long press your screen on the Homepage
  • Click on Settings
  • Locate and tap on the App Drawer
  • Select Hide Apps
  • Remove Hidden Apps

Smart Launcher

Smart Launcher is another efficient third-party-developed launcher that provides Android users with a customized experience different from your default launcher. Your hidden apps can be located easily on the launcher by:

  • Swipe and Open the Smart Launcher app drawer page
  • Click on the three dots located at the top corner of the page
  • Select Show Hidden apps

For most Android devices, your hidden apps cannot be found on your App Drawer. The other ways to find them are explained further in this thread

General Settings

The general settings of your device are where you can check and alter your overall device settings. Your full app list downloaded and installed alongside your system apps can be found here in the Settings app. You can easily access your enabled and disabled apps with the few steps below

  • Open your App Drawer
  • Click on Settings
  • Locate and Tap on Apps & notifications.
  • Tap See all apps.
  • From there, you’ll find all the apps installed on your phone.

Homepages

Your homepage can have other pages aside from the main page where your app drawer is located when you have a full homepage with various apps. The other page is created and hides other apps from your glance. Newly installed and received apps are mostly situated on the other page and remain unseen unless the page is revised. These hidden apps can simply be found by swiping left or right on your homepage.

Folders

Another way on how to find hidden apps on Android is to unbox your folders. Google developed apps like Google Photos, Google Drive, and Google Mails are hidden in folders created automatically for Google apps, although these apps might be noticeably present on the App Drawer page. But, you may not easily find them alphabetically arranged on the App Drawer page.

These apps can be found handily in the folder.

Third-Party common hidden Apps

Third-party apps are developed by independent developers for Android devices to perform specific functions. An intruder can install a third-party app on your device and hide your apps to hinder you from using them. Sadly, you may find it hard to find them because most of these apps covers are mostly different from their features.

Below is a list of common hidden apps that are perhaps used to hide apps on  Android phones. You might find them useful as well.

  • Calculator Vault: This app is designed as a calculator but helps to hide apps with a password.
  • App Hider: App Hider is another common app that hides apps by importing the app to its app.
  • Hide App: Hide App is a third party application that hides apps from a user with a secured pin lock
  • Phone Master: Phone Master is quite different from other apps as it is a system app designed to monitor data usage, file transfer, smart charge, and freezing unused apps. You can also check the freezer to check if you have no hidden app there.

HOW TO UNHIDE APPS

To enable a lasting solution after finding your apps on your Android, you can apply these methods to avert a reoccurrence.

  1. Uninstall Third-Party Apps
  2. Always Enable Disabled Apps
  3. Unfreeze Apps

This article should ultimately guide you on how to find your hidden apps and how to get rid of spy apps on your device. It’s assured to work at an optimum rate.

How To Repair Dead Android Phone

How To Repair Dead Android Phone

By Muhammad Akmal

HOW TO REPAIR A DEAD ANDROID PHONE: TRY THESE FIXES IF YOUR PHONE WON’T TURN ON

From fixing a dead phone that won’t turn or charge to flashing a new ROM, here’s your all-in-one guide on how to repair a dead Android phone.

An Android phone that won’t turn on or charge can be the most infuriating experience you’ll ever experience using a smartphone. While you can easily trace a faulty part of your phone to a certain component, it’s clearly uncertain to point out why you have a dead Android phone in the first place. This article will guide you through various tips and tricks on how to repair a dead Android phone.

There can be various reasons why your Android phone died and won’t turn on. However, it can be grouped into two categories: hardware damage, and software malfunctions. Inconsiderate of why your Android phone is dead, the fixes below will help you revive it. For most software issues, you can fix them on your own. But hardware problems may require technical assistance from a certified repairer.How To Repair Dead Android Phone That Won’t Turn on

Part 1: How to fix a dead phone that won’t turn on.

My phone died and won’t turn on or charge: try the fixes below to troubleshoot your dead Android phone.

1)    Fix the charging problem

If your phone died and won’t turn on or charge, the first thing to do is to troubleshoot the charging problem: your charger, USB cable, the charging port, and the power outlet.

At a non-technical level, you need to ensure your charger is delivering power to the phone. If not, your dead phone won’t turn on or charge. If you have any other working Android phone around you, try charging it with the original charger you’re using to charge your dead phone. If it doesn’t charge it, then the charger is faulty: you need to troubleshoot it first. Make sure you’re using the original charger that came with your phone or its equivalent, then try the fixes below to fix your charger

  • First, ensure the USB cable is firmly connected to the charging brick (charger), and to your phone.
  • Look into your phone’s charging port and ensure there’s no lint or dust inside it. If the port is dirty, try cleaning it first.
  • If it’s still not charging, try plugging the charger into another (working) wall outlet. If you’re not sure the power outlet (wall socket) is working, try plugging in another appliance, such as a lamp or tester, into it.

The steps above should fix your phone’s charging problem. If not, you can try using another original charger and USB cable marked with your phone. You can also try charging from the USB port on your computer.

2)    Keep charging the dead phone

After clarifying that your charger is working, the next solution on how to repair a dead Android phone is to charge your phone for a while. One of the common reasons why many users’ phones died and won’t turn on or charge is because the battery is drained to zero.

In that case, we recommend you plug in your phone with the working charger and let it charge for 30 minutes or up to 2 hours before try another solution. Doing so ensures your phone has enough battery juice to power it on.

If your phone has a charging indicator, make sure it’s working when your plug in the charger. And if you’re lucky, the screen may turn on when the battery is charging. Meanwhile, leave it to charge for at least 30 minutes or up to 2 hours before turning it on.

3)    Try to force restart your dead phone

If your dead android phone still won’t turn on or charge after plugging it to a working charger for 30 minutes, you should force it to restart. Doing so will close all the active sessions on your phone and restart it. Try any of these methods to force your dead Android phone to restart.

  • Press and hold the Power button for 8 – 10 seconds. OR,
  • Press the Power + Volume down (or up) button for 8 – 10 seconds.

4)     Is your screen Faulty?

Simply do a quick check-up before we move to some advanced troubleshooting to fix a dead phone that won’t turn on. If your phone normally vibrates or makes sounds when it’s powered on, you can use it to diagnose whether your screen is malfunctioning.

  • Long-press the Power button for 10 – 30 seconds (trying to force your phone to restart)
  • Wait for a few seconds to hear if your phone vibrates or make the boot-up sound.
  • Otherwise, wait for like 5 minutes, then ask someone to call you. If your phone rings, your screen is probably the problem.

If you find out your screen is at fault, you may need to visit a repair center to fix it first. More so, if none of the fixes above worked, you may need to visit the service center for battery replacement or further checkup. OR, try the advanced troubleshooting methods below on how to repair a dead Android phone.

Part 2: Check your dead phone with Multimeter

If you have a multimeter at home, you can use it to diagnose and know how to repair a dead Android phone. Meanwhile, this will require you to open the phone and check various components on the motherboard with a multimeter. So, if you’re not a professional repairer, its better you stay off that area. Just visit a repair center straight.

If you’re a professional mobile repairer, then you should know how to check dead mobile with a multimeter. The thing is, the reason why your phone is dead might not be totally power issues, but a minor hardware problem. But by checking the phone hardware with a multimeter, you can know where to fix the problem.

Part 3: Flash your dead Android phone

Why many people think about how to fix a dead Android phone only by troubleshooting the hardware, it’s not the only thing to do. As far as it’s concerned, your dead Android phone could be as a result of corrupted firmware or flashing of incompatible custom firmware. If that’s the problem, what you need to do is to re-flash your phone with the stock firmware.

Now, that could be an arduous task or risky task based on your past experience with flashing phones. Risky in the sense that: flashing your dead Android phone with the wrong firmware can brick your phone. Meaning it’ll render your phone useless forever.

Meanwhile, if you’re scared, it’s best to visit a professional technician to help you look into it. If you can do it yourself, all you need is a PC, original USB cable, the ROM (firmware) you want to flash, and the flash tool compatible with your phone.

How to flash a dead Android phone

Depending on who made your phone, ways of flashing Android phones differ. For example, how to fix dead boot MediaTek phones is different from flashing a dead Samsung phone. So, the best thing to do is search for how to flash your phone mode on Google. Here’s how:

  • Search for how to flash your phone on Google using this format: how to flash “brand name” + “phone model”.

For example, you can search for “how to flash TECNO CAMON 15”

  • Click on any of the results from a trusted website.
  • Download the required flash files (ROM, flash tool, and driver) on your computer.
  • Follow the flash guide strictly.

Part 4: Visit the official service center

Relax, you’ve tried enough. But unfortunately, if flashing a new ROM and trying all the fixes above cannot power on your dead Android phone, the last resort is to visit the official service provider for your brand.

Most times, the official service provider may help you repair your dead Android phone for free if the problem wasn’t caused artificially or through mishandling.

If you use a TECNO, Infinix, or itel smartphone, Carlcare is your best bet to repair a dead Android phone. They’re the official service provider for these brands, and they have professional engineers who can help you diagnose and repair your dead Android device. Visit any of their service centers near you for high-quality mobile repair service.

Why your phone isn’t charging and how to fix it

Have you ever come home after a long day to plug in your phone, only to find that it won’t charge? It’s a more common phone issue than you might think. The good news is that, in many cases, there’s a simple reason why this is happening and an easy solution to fix it.

Maybe your phone fails to start charging when you plug it into the wall, or it says it’s charging without adding to the battery bar. Whatever is happening when you try to charge your device, we’ll offer a few tips below that can help you find the right solution.

Why Does My Phone Not Charge?

If you’re wondering why your phone says it’s charging but it’s not responding to the cord and adapter, there are a few possibilities to explore. You may be able to address the issue on your own without having to replace the whole device.

For example, your charging issue could be as simple as a software glitch in your phone’s system. Perhaps dust, moisture or debris have started to build up in your charging port. In some cases, it may even be the fault of the charger or adapter rather than the phone itself.

There are several potential culprits that could be hindering your phone’s ability to charge. Once you know what they are, it’s often easy to troubleshoot and fix them.

How to Fix a Phone That’s Not Charging

If something is preventing your cell phone from charging and you suspect any of the above issues, consider using some of these quick fixes. You can try:

  • Turning it off and back on: The most obvious step is often one of the most effective. Before trying anything else, reboot your phone and see if that helps. If it’s a bug or glitch in the system, a reboot can return your device’s performance to normal.
  • Updating your device: You can also fix small software bugs by making sure your device is up-to-date. Updates are often designed to patch glitches that can cause performance issues.
  • Using a different charging cable: Charging cords wear out over time, and sometimes they can stop working altogether. Consider buying a different charger or using a spare to find out if that’s the root cause you’re looking for.
  • Cleaning out the charging port: If you suspect that your phone’s charging port has become clogged with dust or other particles, power down the device and look inside. Gently blowing on the port can loosen any particles that are in the way.
  • Making sure your phone is dry: Water or moisture can cause all types of performance issues with your phone. If moisture is the culprit, you may be able to dry the device by placing it in a bowl of rice overnight.

What Are Your Other Options?

What if you try all these tricks and your phone continues to resist a charge? It could be an issue with the device’s battery or hardware. Depending on the device, you may be able to buy a brand-new battery to maximize the life of your phone. If it’s another hardware issue, you may need to take it in for repairs or replacements.

Once you know what’s causing your phone’s charging issue, it’s up to you to decide how to handle it.

Common Mobile Phone Problems and How to Fix Them

Common Mobile Phone Problems and How to Fix Them
By Abraham Miller

Even now that smartphone technology seems to be near the climax, it’s not always perfect. And at some times, we wish not to face the common mobile phone problems like poor battery life, low storage space, low stamina, and others again. But thank goodness, you can fix common mobile phone problems in minutes, even consulting no one. And in this guide, we’ll run through various familiar smartphone issues, and we’ll recommend the quickest ways to fix them.

Ready? Get on the bus and let’s take you on a journey!

common mobile phone problems and how to fix

10 common mobile phone problems and how to fix them!
We’ve picked these 10 problems out of the lot since they’re the ones you likely may face while in entanglement with your tiny pocket machine.

  • Storage space running out
  • Poor battery life
  • A phone running sluggishly
  • Overheating
  • Connection problems
  • App or phone crashing
  • Blurry camera
  • An unresponsive phone
  • A phone that won’t turn on or charge
  • Hardware defects
  • Now, shall we delve into them and their possible fixes?

1. Storage space running out
One of the common mobile phone problems people still face to date is low storage space. It doesn’t matter if you’ve got a phone with 128GB of storage or more; your phone would certainly run out of capacity after storing a whole lot of things on it.

Well, the solution is that you almost don’t have to store anything on your phone, talk less of filling up the storage, in today’s era. Even if all you have is 32GB of storage or less, you can live happily without worrying about the messy “Storage space running out” notifications.

First, we’d recommend you scan your device with the Files by Google app from the Play Store. The app tells you everything taking up your phone storage and help you get rid of them comfortably.

Additionally, you should delete every app, video, and other files you don’t need on your device.

Continue by backing up your photos (and videos) to the cloud with Google Photos. Doing so allows you to delete the heavy local files to reduce storage usage. Not just that, your photos (and videos) remains in the cloud forever and syncs across all your devices that have your Google account signed into.

Finally, you may consider transferring your stuff to the SD card to reduce the stress on your phone storage. Of course, many phones in 2021 still offers expandable storage.

2. Poor battery life
We can’t but emphasize how beautiful it is to go all day without feeling frustrated to see the low battery warning.

And while your battery spec has more to say about having great battery life, it all boils down to how you use your phone – specifically the screen and other activities that may follow.

Start by lowering the screen’s brightness. You should see the brightness slider in the Quick Settings by swiping down twice from the top of your phone screen. The brighter your phone screen is, the faster it burns your battery.

And if you don’t want to keep adjusting the brightness in every lighting condition, you can enable Adaptive Brightness. That adjust your screen brightness automatically based on the lighting condition of your current environment. You can find the Adaptive Brightness (A) beside the brightness slider or via Setting > Display > Adaptive Brightness. Right there, also reduce your screen timeout to ensure your display is not using an extra battery when you’re not using it.

Additionally, if your phone has an AMOLED display – like the TECNO PHANTOM X – and it runs on Android 10 and above, turning on Dark Theme is another reliable way to reduce how much battery your screen uses.

And finally, if your battery is still dying fast, be sure to check these extra 15 tips to make your phone battery last longer. Or better still, you may check whether your phone’s battery is due for replacement.

3. A phone running sluggishly
For most of us, a slow-running phone is somewhat equivalent to having a bad day. But that shouldn’t be the case since you’re here.

And in most cases, fixing a slow-running phone is practising most of the tips we’ve said earlier and the later ones in this article. These include freeing up your phone storage, deleting apps you don’t need, reducing background tasks and apps, etc.

That’s not all; all the tips covered in our “how to fix a phone running slow” guide should help you out. But there’s one more thing: adjusting your phone’s animation duration can speed up your phone heavily.

You can’t find where to reduce your phone’s animation duration straight in the device settings app – you’ll need to delve into the developer options to see the little trick. Here’s how.

First, enable Developer option:

Open the Settings
Navigate to My Phone (or System → About Phone, depending on your OEM’s choice)
From there, find the tab labelled Build number and tap it 7 times.
You’ll receive a prompt to confirm your screen lock. Confirm it and wait to test your new trick.
Now, it’s time to reduce the animation speed:

Go back to the main Settings and select
Tap the Developers option from there.
Keep scrolling down till you get to the “Drawing”
Under it, you should see “Window animation scale,” Animator duration scale,” and “Transition animation.”
Tap them one after the other and change their parameters to “Animation 0.5x”
Your device should feel snappier now. You may also set the animation scale to “Animation off,” but that’d remove animations for your phone entirely.
Meanwhile, do not tinker with the developer settings if you don’t know what you’re doing. Playing with the wrong options may affect your user experience.

4. Overheating
While it’s acceptable for your smartphone to get warm while using it, that doesn’t mean it should feel like it has been in the oven for a while. Do you get it?

If your phone overheats while charging, try not to use it during that time. And, ensure you keep it under room temperature while charging.

Next, you want to ensure you don’t run apps that need high CPU and GPU for long hours. If you’re a game addict, ensure to take breaks between games sessions to allow your phone to cool off. Similarly, make sure you don’t have many heavy tasks running in the background.

After all, the takeaway is to allow your phone to rest once it’s getting hot. Using a hot phone continuously may cause more harm than good. And if the issue persists, however, you may need to see a technician.

5. Connection problems
Unlike most of these common mobile phone problems, the pain of having connection issues is nothing to write home about. But’s it’s what you can fix in under 2 minutes.

Whether you’re having a problem connecting to your mobile data, a Wi-Fi network, or a Bluetooth gadget, turning on Airplane mode for a least one minute is a reliable solution. Here’s how.

Locate the Airplane toggle in your Quick Settings panel.
Turn it on for at least 1 minute
Turn it off again, then try reconnecting to the network.
If that didn’t do the trick, we recommend you to restart your device or contact your network provider.

And of course, you can get more tips in our guide on “how to fix internet connection problem on your device”

6. App or phone crashing
App and phone crashing seem like that problem you can’t but come across on mobile phones, even if you’re using the most expensive phone out there. The reason is developers make changes, and sometimes it breaks things.

Even so, your phone caches some app data on your phone to use later. However, they cause apps to crash when corrupted. In that case, you need to clear the cache data for the specific app. Here’s how:

Locate the problematic app from your app drawer. Example:
Long press on its icon, then select “App info” (on some devices, they may represent the button with
From there, tap Storage & cache
Hit Clear cache.
Go back in one step and tap the Force Stop button to close the app. Then, try using the app to see if it misbehaves again. If yes, then you may need to tap the Clear data button as well.
Additionally, updating your apps and phone software, freeing up your phone storage, deleting unused apps, and all the tips mentioned in our “How to fix app crashing on Android” guide will help you get rid of the issue.

7. Blurry camera
It’s undeniable that smartphones have replaced Digital Cameras for many people. But it’s quite frustrating to see your phone taking mediocre pictures unexpected.

When such a thing happens, your phone’s camera lens (glass) might be dirty. All you need is to grab a piece of a soft cloth and wipe the camera glass.

If cleaning the lens is not the problem, however, it’s time to visit the technician.

8. A frozen/unresponsive phone
Imagine having your phone freeze up in the middle of an important task… I’ve been there, and it’s just one of the most frustrating common mobile phone problems out there.

And when your phone becomes unresponsive, there’s nothing you can do other than restarting it. But how do you restart your phone when the screen is completely frozen? We have a trick.

For most Android devices, long-pressing the power button for about 10 seconds or more will trigger it to restart. And when your device restarts, it fixes the hanging issue.

After your phone’s sense is restored via the hard restart, you should learn how to fix a frozen phone by yourself, so you won’t face the problem next time.

9. A phone that won’t turn on or charge
Another worst-case scenario of a smartphone issue is a phone that won’t turn on or charge. No matter how hard you try, the phone remains in its dumb state, feeling useless like a piece of brick.

When you face such a problem, though, you don’t have to panic. There are two things you need to troubleshoot – the charger/charging port and the phone itself.

Start by learning how to clean the charging port. Basically, you need to get a toothpick to remove the debris inside the charging port. Your phone may not charge when the charging port is faulty. But cleaning it gently could fix the problem.

After that, you’ll want to confirm your charger is working, then leave your phone to charge for a while. If the battery ran all the way to zero earlier, it might take a time to recharge. So, let it charge while you do other things.

If that didn’t fix the issue, check our complete guide on how to fix a dead Android phone that won’t charge or turn on.

10. Hardware defects
The last common smartphone problems we’ll mention here are hardware defects. These range from faults like poor battery life, broken screen, hardware sound problems, broken camera lenses, and many more.

As you presumably know, these are not the issues you can fix on your own. With that, you need to find the official repair centre for your brand to resolve the issues.


How to Download MP3s From YouTube

How to Download MP3s From YouTube

Many applications on the web make it very easy to convert a YouTube file to an MP3.
Sometimes it seems like you can find just about anything you want on the internet. Other times it feels like that one song you can’t live without is missing from the major music subscription services. And then sometimes there’s that situation in between, where the only place you can find the song is in a YouTube video. There are a couple of challenges to overcome, the first of which is how to download the video in the first place. Where do you begin?
Before we even get started, it’s important to note that this isn’t just a technical challenge. YouTube’s Terms of Service explicitly say that you can’t download and modify (among other things) content from the service without express consent from YouTube, and possibly the rights holder of that content. If you aren’t sure, the safest thing to do legally is to leave it alone.
The task here is to convert a video file into an audio file. If you were to download a video directly from YouTube, it still wouldn’t be in the MP3 format. You might be able to listen to the file with a video app on your smartphone, but if you’re creating an audio playlist, for example, your top workout songs, you can’t simply drop the downloaded video into an audio app playlist.
Although some YouTube converters are applications you can download and use on a computer or smartphone, others do their magic on a website. Be careful to choose an app that doesn’t include any malware or viruses. Do a little research on reputable websites before downloading that converter app, even if you’re in a hurry.
Some converter applications can do much more than simply download videos from YouTube. Any Video Converter, available for Windows and Mac computers, can download and convert the tracks to make MP3s, but the free version of the software also lets you edit and save video files, and burn DVDs, too. Paid versions of the software add more features, including screen recording and the ability to convert your DVDs to video files on your computer. But don’t forget, copyright laws and software terms of service apply here, too. If you aren’t the rights holder or don’t have express permission, it’s probably not OK to make copies this way.
4K Video Downloader is another application for Windows, Mac and Ubuntu Linux. The free version lets you download up to 30 videos per day, playlists of 10 videos and five videos per channel. Paid versions remove these limits and add more features. The same company offers 4K YouTube to MP3, which offers a similar feature set.
YouTube to MP3 Converter is a well-known website you can use to convert YouTube videos to MP3. Mp3skull is another. Whether it’s website- or computer-based, these tools are all simple to use. To convert a single YouTube video to MP3 using the two converters we just mentioned:
1. Copy the URL for the YouTube video you wish to convert, and begin the next phase of the conversion process.
2. Choose the save location and file format options, which will depend on the software you’re using. This may include format and bit rate, among others.
3. Once you’ve told the computer what it needs to know and tell it to continue, it will process your request and convert the file for you. You can now finish your workout playlist!

error

Enjoy KADIS.com.ng? Please spread the word