Computer Accessories Prize List (Order online or visit our physical shop address)

Looking for any kind of computer accessories? contact us now at KADIS.com.ng (Order online or visit our physical shop address). Our prizes are most competitive (wholesale and retail) in the market. Here in this page, we have listed the accessories and their respective prizes for your order. Feel free to contact us and place your order for immediate delivery at your doorstep.

  1. Universal Wi-Fi –  N20,000
  2. Wireless Mouse (HP) – N2,500
  3. Wired Mouse – N1,500
  4. Hard Disk Cable – N1,000
  5. Mouse Pad – N1,000
  6. Laptop Chargers ( HP – N2500, Dell – N3000, Lenovo – N3000, Acer – N2500, Toshiba – N2500, Asus – N2500, Samsung – N2500, etc).
  7. VGA Cables (1.5m – N1000, 3m – N1500, 5m – N2500, 10m – N3500)
  8. Modem – N4, 500
  9. Webcam – N4,000
  10. PS2 Pad – N3,500
  11. PS3 Pad – N4,500
  12. AV Splitter (4 Port) – N5,500
  13. HDMI Splitter (4 Splitter – N6,000 & 8 Splitter – N13,000)
  14. Card Reader – N800
  15. Type C OTG – N1,800
  16. Laptop Batteries (HP – N8,500, Dell – N10,000, Toshiba – N9,000, etc.)
  17. Bluetooth Dongle ( 2.0 – N1,500, 4.0 – N2,000, 5.0 – N2,500)
  18. Wi-fi Adapter – N2,500
  19. Printer Cables (1.5m – N1,500, 5m – N2,000, 10m – N3,000 Etc)
  20. Flexible Keyboard – N2,500
  21. Handboss Universal Cleaner – N1,500
  22. Sound Card – N1,500
  23. Quick Heal Anti-Virus – N4,000
  24. VGA Splitter (4 – N4,500 & 8 – N6,500)
  25. Carton Mouse – N1,000
  26. MTN Wi-Fi – N16,000
  27. Airtel Wi-Fi – N15,000
  28. Easy Capture – N4,500
  29. Processor Paste – N1,500
  30. Hard Disk Casing – N2,500
  31. Chrome Cast – N8,000
  32. USB Light – N800
  33. Mobile Phone OTG – N1,500
  34. WD Element Casing – N3,500
  35. Any Cast – N7,500
  36. Wired Keyboard – N3,000
  37. PC Camera With MC – N4,500
  38. HDMI to Mini Display – N4,000
  39. Single Wired Pad – N2,500
  40. Double Wired Pad – N4,000
  41. Single Wireless Pad – N5,000
  42. Double Wireless Pad – N7,500
  43. External DVD Rom – N6,500

Contact us now via 08061379390 if the exact item/accessories you need is missing on the above list. The availability is certain.

What is Tethering & How to Enable It?

What is Tethering & How to Enable It?

Have you ever wondered what is tethering? Do you have any idea about what this word means? Here you will find interesting information on this topic.

Imagine you are in the park or traveling on the bus. You need to have internet access on your laptop or tablet at that moment but you cannot find any Wi-Fi network available. Have you ever been in this situation? Do not worry; you will not experience that again.

What is Tethering?


Tethering offers the possibility to use your mobile data in your tablet or laptop, so your cell phone works as a modem for another device. It will allow you to have internet access wherever you are.

Tethering is basically the sharing of your internet connection with any other device such a PC, laptop, tablet or cell phone. How can you do that? Simple: connecting your smartphone to the other device using a USB connector, Bluetooth or Wi-Fi.

How to Enable Tethering?


1. USB Tethering


Almost all the smartphones can share its mobile data by connecting a USB connector to any other device as a tablet, laptop or PC. Here you have some steps you must follow to do this. How to enable USB Tethering on Android

  1. Connect your Android smartphone to your PC using your USB cable.
  2. Go to Settings.
  3. Click More.
  4. Go to Tethering and portable hotspot.
  5. Turn on USB tethering.
  6. Wait for a few seconds and refresh your web page.

If you need a more detailed explanation to share your internet connection from your Android phone to your PC, you can watch this video. Keep in mind that menus and settings change from phone to phone but they are all quite similar. How to enable USB Tethering on iPhone

  1. Plug your iPhone into your iMac using the USB cable.
  2. Go to Settings.
  3. Tap Personal hotspot
  4. Choose iPhone from your list of network services in your computer settings.

This video provides you with a more detailed explanation on how to enable USB tethering from your iPhone to your iMac.

2. Tethering via Bluetooth


Did you know that you can share not only pictures or documents but also internet connection? Yes! If you pair your smartphone with your PC, laptop, tablet or even with another smartphone you will be able to share the internet connection with some of those devices. Your cell phone will turn into a portable modem, so you can browse the internet without using a Wi-Fi network. Do you know how to do this? You will find the explanation right here.

  1. Go to the Settings
  2. Wireless and Networks
  3. Tethering and Portable Hotspot
  4. Share Internet
  5. Share via Bluetooth

Remember that some menus are different from cellphone to cellphone, but they are similar in some options. After doing this, the other person needs to go to the Bluetooth settings and select the device that will share the internet connection, and then click on internet access. That is all!


Tethering Vs Hotspot


what is tethering advantages disadvantages tethering hospotIt is very common to think that they are the same, but actually, they have some differences that you will learn here. You will also find important information that will help you to decide which one is the best and the safest.

As you already know, tethering refers to share your internet connection with other devices such as laptops, tablets and some others. Some ways to do this is via Bluetooth, using a USB connector or through Wi-Fi. But now the question is: what is a hotspot?

Let’s say that hotspot is the act of creating a Wi-Fi network where the phone acts as a modem/router. So, when internet tethering is done via Wi-Fi, it is also known as a mobile hotspot. Mobile hotspots, which are also known as portable Wi-Fi hotspots, allow people to share internet connections with up to 5 other devices.

These devices can be mobile phones, tablets or personal computers. Hotspots are usually found in public places such as parks, shopping malls, cafés and some other places.

Tethering through a USB connector is, for sure, safer than a Hotspot since you connect both devices through a cable. Hotspots can be intercepted using special software to intercept Wi-Fi networks, so it is recommended to establish strong passwords.

The connection to Hotspots or public Wi-Fi zones is not secure. The fact that an access point requires a password to connect does not mean it is secure. Also, there is a risk of filtering sensitive information, such as credit card numbers or addresses.


Tethering Vs Broadband


Since you have already learned what is tethering, now you will learn a little bit more about a new word related to this topic: broadband.

You are probably wondering how is tethering related to broadband? Well, there are different mobile services that allow more than one device to be connected to the Internet using a single cellular connection. This process is known as tethering. 

But now, let’s start talking about broadband. Wireless Internet access, commonly known as broadband or mobile broadband, refers to the Internet access delivered from cellular towers to cell phones, laptops, tablets and some other digital devices. Now that you know the meaning of both words, you will find great information to decide which option is the best.

Mobile broadband allows you to connect with your laptop, PC or tablet and permits you to access the Internet from any place (within range of cell towers). It offers high-speed Internet anywhere in the world that your provider covers.

But broadband also has some disadvantages. Since it connects to the Internet through the same radio waves as your cell phone, your Internet service will also depend on the availability of cell tower. So, broadband will also present weak signals and “dead zones” as your cell phone does.


The Best Apps For Tethering


There are many apps that you can download to turn your mobile phone into a modem or router. But here are some of the most famous ones:

Pdanet


This app is really suitable for those plans that have an unlimited Internet service. It has two indispensable steps: 1) you need to install it both on the cell phone and the computer. 2) make sure that your device has at least a 3G network, so you will have faster Internet access.

After installing the app, you need to enable USB tether. Then, connect your device using the USB cable to your laptop or computer and click the Pdanet shortcut on the desktop screen. Next, go to your browser and click on the Pdanet icon you have on the taskbar, after that press Connect Internet. As simple as that you can browse on the internet.

Download Pdanet for Android here.

NetShare


This app is available on Google Play and it is completely free. With NetShare you will not have to pay tether fees or special plans for tethering. It allows you to create a portable Wi-Fi hotspot to share internet connection from your device to other devices as a Wi-Fi Repeater.

Download NetShare for Android here.

TP-Link Tether


TP-Link Tether is available for iPhone only and it is free. This app provides the easiest way to access and manage your cell phone as a modem/router and connect it with other devices.

Download TP-Link Tether for iOS here.

Definitely tethering is one of the best options to be connected anywhere and we hope this article was helpful for you and you never have to worry about not having internet access again!

How to Check Your Phone IMEI Number
There is no way that we can live without a mobile phone nowadays. Every night, at least the alarm function has to be set before we go to bed. Today’s topic is going to be about the importance of numbers that allow us to get to know our mobile phone better. Now, you can try to flip your phone and take a look if there is any line of 15 digits at the back cover of your phone – or what we call the IMEI number.

What is an IMEI?


Each smartphone available on the market has a unique identification implemented, which is being known as the International Mobile Equipment Identity (IMEI) number. The same as human fingerprints, the phone is manufactured with this number and the set of numbers is unique for every phone. The IMEI number contains 15 digits and is used to track phones anywhere in the world.

The IMEI number is used for 


  • Report lost or stolen – Initially, the IMEI number is created to decrease phone theft. When a person reports a lost/stolen phone to their carrier, the company will make the phone unusable and it will be added to a blacklist.
  • Checking phone information – With the IMEI number, you will be able to get to know more about your phone. The 15-digits code can be used to check more information about your mobile phone from the online IMEI checker. The information contains the origin country where it comes from, the manufacturer, the purchase date, and more.

How to check your IMEI


The most convenient way to find the IMEI number is to dial *#06# on your phone. This method works with both iPhone and Android and any other phone.

Here is how you can check your IMEI number:


  • Open a keypad on phone application
  • Dial *#06# The IMEI number will pop-up on the screen*

*A dual-SIM phone will have 2 sets of IMEI numbers

An alternative way to check IMEI number:

  • iPhone – Settings > General > About 
  • Android – Settings > About phone > Status

Keep your IMEI number private


For security reasons, the IMEI number must not be shown publicly. Otherwise, it is a high risk that the number will fall in the hands of fraudsters for scamming or bad purposes.

Frequently Asked Questions About IMEI

1. What is the difference between IMEI and Serial Number?


A serial number is a unique number assigned by the manufacturer for organizing and tracking their inventory. There is no fixed format of a serial number because the manufacturers create their format including the length and type of characters.

An IMEI is a standard format of 15-digits numbers assigned for international usage to identify the devices and check whether a specific phone has a clean IMEI or not, which means no lost/stolen reports.

2. What is ESN?


The ESN (Electronic Serial Number) is a unique number used to identify mobile devices. The ESN is for CDMA devices, while IMEI is for GSM devices.

3. What can I do to report a lost or stolen phone?


You have to call your network provider to report the matter. Only the network provider can add the reported IMEI number to the blacklist. Once the smartphone is on the blacklist, it is blocked from accessing any services from the network carrier.

If the phone was found, you can report back to the carrier to have it removed from the blacklist. Once the request has been processed, you will be able to access the provider’s service again.

4. How can I check the IMEI number without dialing *#06#? 


The IMEI number can be found physically on your device.

  • On the SIM card tray
  • On the back of the phone
  • Underneath the phone’s battery

In case your phone is lost/stolen, you can find the IMEI number within the box that came with the smartphone.

5. What is an IMEI scam?


It is the fraudulent use of the IMEI number by scammers. Scammers like to do phone cloning, which can lead to identity theft. Information will be intercepted from the original phone and send over to the cloned phone. In other cases, the scammer will use to make phone calls or send text messages which will incur a bill that you as the consumer has to pay.

6. How can I avoid buying a second-hand phone that was involved in an IMEI scam?


If you decided to purchase a used phone online, make sure to first read the reviews of the store.

If you purchase it in-person, you can check the phone’s validity beforehand to avoid getting an IMEI-locked phone.

You can ask the re-seller for the IMEI number of the phone to verify that it has not been reported lost or stolen. However, it is the seller’s decision to hand out an IMEI, as it is a risk as mentioned above.

Summing up, every cell phone user will be able to check the IMEI number by themselves either by dialing the dedicated number or check it in the menu settings on the phone. As it is the universal number used to identify the phone, it is can be used to report a lost or stolen phone. With the plenty IMEI checker available online, your work will be easy and quick. This is very helpful when buying a used phone – you can easily avoid buying a phone that has been reported lost or stolen. And now, do you know your IMEI number?

How To Unlock Your Phone

How To Unlock Your Phone

Have you ever wanted to buy a cell phone but it is locked for a specific carrier different from yours? This is a very common thing, but there are different possible solutions for you. If you want to have an unlocked phone, keep reading and follow this step by step.

Telecommunication companies usually sell blocked mobile phones. The main intention is that these phones only work with a single operator (the one where you bought it). However, there are different ways to unlock a device. Depending on the brand of the mobile phone, this process can be very simple or a little bit complicated.

How To Unlock A Phone?

Know Your IMEI


First, you will need the IMEI. This is the International Mobile Equipment Identity code. Its main function is to identify mobile phones worldwide. It can be understood as the identity document of a person, but in this case, is your phone’s identity number. Mobile phones are identified and registered to have control over them. In most of the mobile devices, this code has 15 numbers and it is important to get this code to know the different uses it has.

If you do not know your IMEI, you can make a phone call to *#06# to find it out. Make sure to write it down somewhere when the screen shows it. Just in case your mobile phone is stolen or you simply lose it, you can put in contact with your mobile network operator to lock your mobile device.

Check the Labels of Your Smartphone


If this first step does not work, do not worry about it, there is another way to get this unlock code. The only thing you have to do is checking the label under the battery or in the original box of your mobile phone.  The mobile network operators generally give the user this code, but it only works with a SIM card of the same telecommunication company.

Once your service contract is finished, you can automatically unlock the mobile phone through the IMEI code. So the first method to try unlocking your cell phone is to contact the operator or telecommunication company which the device belong mms to.

Call Customer Support to Unlock Your Phone

Since a few years ago, mobile phones have been sold unlocked, and sometimes companies offer the unlock code to their customers not only in the United States but also around the world. So, you may just have to call the customer service of the telecommunication company to which your mobile phone is associated and make your unlocked request.

Just by giving your IMEI code you got from the previous step, they will give you a code for your mobile phone to be automatically unlocked. So, you will be able to use it with any SIM card from any other mobile network.

Unlock The Phone On Your Own


There is another possible way to unlock your phone. First of all, you have to turn off your mobile phone and take out the SIM card. Then turn on the device without the SIM card and wait for it to show a message with the instruction to insert the SIM card. From that moment you will need to write the IMEI code to unlock the phone.

However, each brand and each type of mobile phone has different requirements, so you will not have to follow the same steps to unlock the mobile device.

Why You Couldn’t Unlock Your Phone?

Sometimes it may seem impossible to unlock your mobile phone. This can happen because of the terms and policies of your telecommunication company. So, before trying to unlock your device make sure you are able to do it. Just in case it is possible to unlock your device but you cannot do it by yourself, it is highly recommendable to get support from professionals to do this task and avoid breaking your phone.

It is important to know that the GSM phones are designed to work with every single operator once you insert the SIM card with the ID of the mobile network. However, telecommunication companies, as a marketing strategy, lock some cell phones in particular to protect their financial interests in a certain way. At the moment of trying to unlock these devices, we are persuading the firmware of the phone. So it will not apply anymore and the owner of the mobile phone can use it in any operator network.

Telecommunication companies can reject the request from the customers, of course, base on their policies and local laws.

Do not waste your time downloading different software to get your IMEI code because it is really unsafe. Keep in mind that the operators have a database. So, if you buy a locked cell phone from a specific telecommunication company and then you unlock it, it is possible that your phone will not work with that network anymore because the device was still under the contract and subsidized for the company.

Buying unlocked phones can be very expensive and unsafe. You can waste your money and maybe you will need to pay again to get in unlocked. The same happens when paying online services to unlock your phone from distance. Try to do it legally and by yourself. Of course, it can be kind of difficult sometimes, but remember there are several safe options for you. Let us know if you have a different way to unlock cell phones!

The Ultimate Guide to SIM Cards: Problems and Solutions
SIM Cards seem so simple – You plug it into your smartphone and most of the time, it works right away. Once you start digging deeper, you realize that these SIM Cards are a technological masterpiece! How much memory capacity does a SIM Card have? Are all SIM Cards secure? What even are APN Settings and who knows the difference between roaming and mobile data? Therefore, we wrote this ultimate guide to SIM Cards to help you better understand what a SIM Card actually is and what the technical terms relating SIM Cards mean.

  1. SIM Cards
    • What does SIM mean?
    • How do SIM Cards work?
    • How to insert a SIM Card?
    • What way does a SIM Card go in?
    • How do I activate my SIM Card?
    • What is stored on a SIM card?
    • How much memory does my SIM Card have?
    • What do you do when your SIM Card is full?
    • Are all SIM Cards the same?
    • What type of SIM Card do I have?
    • Can a SIM Card be cut?
    • Can I put my SIM Card in another phone and use it?
    • Can you buy a new SIM Card?
    • Can you track a phone with a SIM Card?
    • How do I replace my SIM Card?
    • How much is a SIM Card?
    • Why does my phone keep saying No SIM Card inserted?
    • Is my SIM Card secure?
    • Will my SIM Card work in another country?
    • Do prepaid phones work in other countries?
  • Access Point Names (APN)
    • What is an APN & how do I change it?
    • How do I find my APN Settings?
    • How do I reset my APN Settings?
    • What will Reset Network Settings do?
    • What happens if you reset all settings?
  • Roaming
    • How to activate roaming?
    • What is roaming on a cell phone?
    • Do I want data roaming on or off?
    • What is the difference between roaming and mobile data?
    • What are data roaming charges?
    • Do I need to turn off mobile data when abroad?
    • How do I avoid data roaming charges?
    • Can I use airplane mode to avoid international charges?


  • Airplane Mode
    • What is the function of airplane mode?
    • How to activate the airplane mode?
    • What is the benefit of airplane mode?
      • Charging faster
      • Games Advertisement
      • Children
      • Keep Focus & avoid the distractions
      • WhatsApp Messages
    • Does airplane mode save your battery?
    • Can you take pictures while in airplane mode?
    • Can you receive phone calls in airplane mode?
    • Can you text while in airplane mode?
    • Can you access Wi-Fi while airplane mode?
    • Is airplane mode really safe?


Everything You Need To Know About SIM Cards


What Does SIM Mean?

It stands for Subscriber Identity Module.

How Do SIM Cards Work?

A SIM card holds the information required to communicate with the cellular towers. It goes inside a device like a cell phone or tablet. Let’s say that this mini computer is your phone’s ID, so it’s something unique that allows you to make and receive calls, messages, browse the internet or download apps.

How To Insert A SIM Card?

  1. Turn off your phone
  2. Remove the cover of your phone and its battery (this is optional, sometimes it is not necessary)
  3. Find the SIM card slot and insert it
  4. Put again the cover and battery on the phone
  5. Turn on your phone

What Way Does A SIM Card Go In?

It depends on the phone. Some cell phones include a small figure of the SIM card next to the slot where is going to be inserted. But if not, place the golden pads on the SIM card (contacts) facing the screen of the phone.

How Do I Activate My SIM Card?

You just have to insert your SIM card as it was explained before. Then, turn on your phone and wait a few minutes or hours (it usually takes just minutes) and that’s it! Your SIM card will be activated.

What Is Stored On A SIM Card?

  • International mobile subscriber identity (IMSI) number
  • Authentication key (used to identify and authenticate subscribers)
  • Your contact list
  • Text messages

How Much Memory Does My SIM Card Have?

Most SIM cards have a capacity between 32 to 256 KB. It depends on the type of SIM card.

What Do You Do When Your SIM Card Is Full?

You can try deleting unnecessary text messages or contact entries that you do not need anymore. If it still full, contact your operator who should be able to change your card for another one with a larger capacity.

Are All SIM Cards The Same?

No, they are not. They vary in size, use and range of action. For example, there are three types talking about size: regular SIM card (25x15mm), Micro (15x12mm) and Nano SIM card (12.3×8.8mm)

Can A SIM Card Be Cut?

Yes, it can be cut, but it is not recommended to do it. Actually, cutting your SIM card is more of a risk than a benefit. People cut their SIM cards using scissors and a ruler. Sometimes they use a cutter but you can completely ruin your chip. But, if you still want to cut it by yourself, here is a guide how to cut a SIM Card.

Can I Put My SIM Card In Another Phone And Use It?

Yes, of course! But it will depend on the SIM card’s size of the other phone. If it is the same size as yours, it will work perfectly on the other device. You will keep your same number and any information you had saved on it.

Can You Buy A New SIM Card?

The answer is yes. If your SIM card is not working or you just want to change your cell phone number, you can buy a new SIM card. But keep in mind that changing your SIM card means changing your current phone number, too.

Can You Track A Phone With A SIM Card?

Technically yes! SIM cards have a serial number that will be transmitted to the nearest cell towers. If your cell phone was stolen, the police will need to obtain a warrant before getting location data from your mobile carrier. This will allow them to localize your cell phone.

How Do I Replace My SIM Card?

You can replace it just by calling your current carrier or a different one if you want. You can also replace it by buying a new SIM card on the internet or in any other store.

How Much Is A SIM Card?

SIM card’s prices vary. It will depend on different things such as the provider or company.

Why Does My Phone Keep Saying No SIM Card Inserted?

There are different possibilities:

  1. SIM card or cell phone manufacturing defects. Don’t worry; it’s not your fault! Some SIM cards or cell phones come with imperfections, but for you to know which one you should blame, you need to do two things: First, remove your SIM card and put it in another cell phone. Second, try another SIM card on your mobile phone.
  2. Physical damage to the SIM card during handling may result in a fracture in the internal circuit board.
  3. A misaligned SIM card can also cause failures. Sometimes this happens when people accidentally drop their phone. But, calm down, we have a possible solution! Just turn off your phone, remove your SIM card and insert it again, this should solve the problem.

Is My SIM Card Secure?

There is a feature called SIM Security that prevents unauthorized use of your SIM card. When the feature is on, your chip is protected by a code that you must enter before the SIM can be used in any other device.

Will My SIM Card Work In Another Country?

You can enable roaming service and keep using your SIM card without changing your phone number.

Do Prepaid Phones Work In Other Countries?

Yes, they do. You just have to activate the roaming service.


Everything You Need To Know About Access Point Names (APN)


What Is An APN And How Do I Change It?

APN means Access Point Name. It is the gateway between the public internet and your provider’s network. So it is what allows to access data. This should be configured by your provider, but if not, you can –carefully- change it yourself.

How Do I Find My APN Settings?

For iPhone: Settings > Cellular (Mobile) > Cellular (Mobile) Data Options > Cellular (Mobile) Network For Android: Settings>Mobile Networks>Access Point Names>Menu Button>New APN

How Do I Reset My APN Settings?

Some cell phones present network issues due to the APN. If this is your case, try to resent your APN following these steps:

  1. Settings
  2. Mobile Networks
  3. Access Point Names
  4. Menu
  5. Reset APN to default

What Will Reset Network Settings Do?

This option will “clear” all the networks used before. Your Wi-Fi networks, passwords, VPN settings and any other saved network will be deleted.

What Happens If You Reset All Settings?


All the settings will be reverted to their stock setting. They will be like they were when you first buy your phone. It will reset all of your preferences for Wi-Fi, Bluetooth, Notifications, Sounds, Brightness, Privacy and some others. You will not lose personal information such as contact lists, photos, music or calendars. Just be really careful not to tap on Erase all content option, you will lose all the things mentioned before. If the previous topics were interesting for you, keep reading and learn more about roaming:

Everything You Need To Know About Roaming


How To Activate Roaming?


To avoid the data consumption when you are abroad, it is recommendable to disable the roaming on your mobile phone. From that moment, you can only make voice calls, send text messages or use those apps that do not need an internet connection. Now, how can I activate it? It is simple: Menu > Settings > Wireless Connections > Activate Roaming.

What Is Roaming On A Cell Phone?


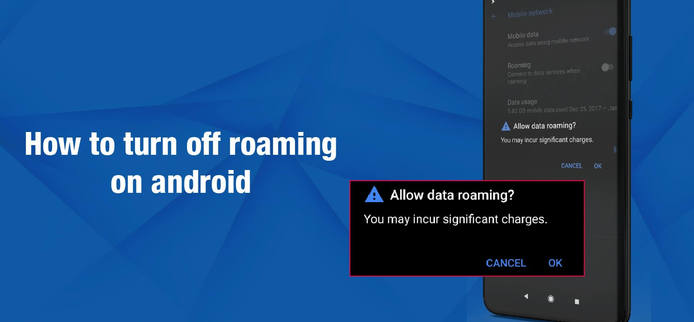
In the universe of the telecommunications, the roaming is the capacity that a cell phone has to make and receive phone calls beyond the limits of the coverage provided by the company. Despite being in another country, you communicate because of the roaming service. So, any person could travel around the world using the same cell phone, except that this user will pay an additional charge according to the taxes or rates that the companies develop depending on how much data, calls and SMS have been used while being outside of the carrier’s coverage.

Do I Want Data Roaming On or Off?


It is recommended to disable your packet data so you can avoid extra charges. If you are on a tight budget, then only turn on roaming if you are in an emergency situation.

What Is The Difference Between Roaming And Mobile Data?


The difference between these two services is that while you have roaming turned on, you only can make and receive phone calls and text messages. But, with mobile data, you will have internet access to browse abroad.

What Are Data Roaming Charges?


When you use your phone or tablet to browse the internet abroad, it generates charges for data roaming. If you know what your destination is, it is recommendable to look for de taxes and rate to activate a data roaming plan before traveling.

Do I Need To Turn Off Mobile Data When Abroad?


If you count with a data plan that has coverage in the zone in which you are, it does not matter if your mobile data is ON. But, if you find a Wi-Fi network you must disconnect your data connection because there is the possibility of being connected to your mobile data.

How Do I Avoid Data Roaming Charges?


If you need internet access, simply connect to a free Wi-Fi network without worrying about the future charges. But this is not the only option you have! You can also shop roaming plans with your carrier. Before you go traveling, call your carrier or visit it online to look up international roaming plans. After you arrive at your destination, go to the Settings > Cellular > Cellular Data Options > Turn on Data Roaming and other settings suggested by your carrier.

Can I Use Airplane Mode to Avoid International Charges?

There is a simple strategy to avoid expensive rates for roaming charges. Activate your airplane mode and use only the Wi-Fi networks that you find on your road. By doing this you can chat using WhatsApp and check your emails without receiving phone calls or text messages. So which options should you choose now? An international SIM Card, a local SIM Card or Roaming?

Everything You Need To Know About Airplane Mode


What Is The Function Of Airplane Mode?

It can be said that airplane mode has several functions. When it is activated, your mobile phone loses almost the entire connection. It does not allow you to make phone calls or browse on the internet, not even receiving text messages. However, it is an excellent reason to save energy. The mobile phones waste a lot of energy when they connect to an antenna from a remote distance. There are other things that you can do while airplane mode is enabled. Activating the Bluetooth is one of them; you will link your device to others and send documents or files without a cable.

How To Activate The Airplane Mode?

It is completely easy. You can go to the network settings in your mobile phone or keep pressing the power off button until the icon of the airplane appears. Then, wait for the notification with a little plane that indicates that the airplane mode is on.

What Is The Benefit Of Airplane Mode?

Most people tend to think that airplane mode is only useful when you are flying. But, the real thing is that you can take advantage of this, for example, you can save the battery. Here are some others interesting benefits:

Charging Faster

Nowadays, smartphones consume so much battery because people use them a lot. You could often be out of the home, and suddenly your device shows a notification of low battery. If you are consent that you are not going to go back soon, but you will have a break somehow, you can charge your cell phone on airplane mode to gain time. The thing is that it will charge faster while you have the connectivity turned off. The Wi-Fi, Bluetooth or GPS will not be inconvenient to reach the 100% of battery quickly.

Games Advertisement

People commonly have an addictive game installed on their mobile phone. The annoying thing is when the publicity appears at the beginning or for the next level. The good news is that you will not receive any ad if you activate the airplane mode. Why? Because you are not connected to any network. Or just look for games that not required any connection, it also works.

Children

If you are a cool father or the favorite uncle with a nice mobile phone or tablet with games on it, perhaps the kids of the house want to play with your device. For any reason, they can dial a number and make a phone call accidentally while they are playing. Do not worry and do not be mad with them, remember that you can activate the airplane mode and avoid these annoying situations.

Keep Focus And Avoid The Distractions

There are thousands of apps with which you can waste a lot of time when you are supposed to be doing something more important for the occasion. Just by activating the airplane mode in a single second all your apps will be disabled and you can continue working on your things. Sometimes you only want to rest after an exhausted workday, but you have this friend that has another time zone. Just when you manage to conciliate a sweet dream ¡Bing! There is someone who wants to chat. So, if you activate the airplane mode, you can set an alarm for the time you want to sleep and you can have the certainty that nobody is going to bother you, not even your boss.

WhatsApp Messages

This app lets you know when someone reads the messages that you send, and it has the same effect when you are the one that is reading. But there is a trick that maybe you did not know. If you activate the airplane mode, you can read these messages avoiding the double blue check from the transmitter. At least during the time, you are offline.

Does Airplane Mode Save Your Battery?

The airplane mode saves your battery considerably. Sometimes you schedule important phone calls, but you are going to be in the heights for a long time. So, you will not have a guaranty that your battery will last the whole time. Of course, you can turn off your phone, but if you want to read any document, see a picture or just consult the time you will not be able to do it, that is why activating the airplane mode is an excellent choice. When your smartphone or tablet is in airplane mode, it has a minimum of operability. It could happen that you can be on a zone without coverage, so immediately your device will seek to connect to any network. As a consequence of that, you will lose a remarkable percent of battery. Even when you go for a walk into the woods or the mountains, it works to have battery when you return.

Can You Take Pictures While In Airplane Mode?

Remember that the airplane mode only disables those functions on your phone that could provoke interference in mobile networks. So, keep calm and take advantage of the moment. Enjoy the beautiful landscapes while you are on a flight, and capture the best picture ever.

Can You Receive Phone Calls In Airplane Mode?

When the airplane mode is on, you have not data service or telephone lines, so it results impossible to make or receive phone calls.

Can You Text While In Airplane Mode?

The airplane mode not only disables the phone calls, the same thing occurs with the text messages. Instead of that, you can redact what you want to send and save it for the time you will be allowed to do it.

Can You Access Wi-Fi While Airplane Mode?

While your device is on airplane mode, your wireless connections will be disabled for security measures. But, you can use it for those functions that do not need any connection. For example, you can use Wi-Fi because its low frequency does not represent a danger for any system of the plane. Nowadays most of the airplanes incorporate this service for passengers.

Is Airplane Mode Really Safe?

The airplane mode is completely safe; in fact, it was created for security norms. In the past, people had to turn off their mobile phones while flying because in a certain way it interferes with systems of the plane.

20 Common Mobile Phone Problems & Their Solutions
Technology is not always perfect, so you can experience different problems that you can solve by yourself. Cell phones may present faults some times and we know it can be a very stressful situation. That is why we decided to make a top 20 of the most common mobile phone problems and their solutions, so you can solve them without losing your head –and your money-.

Of course, there are several troubles that are a bit more difficult to solve if you are not a technology expert. If you cannot do it by yourself, we recommend you to take your mobile phone to an authorized service technician and hopefully, they will help you. So, we invite you to come with us and discover things that maybe you did not know about your cell phone.

20 Common Mobile Phone Problems & Solutions

1. Slow Phone


This is something that everybody has experienced at least once. It is the most common mobile phone issue and it can be associated with old phones. However, newer devices can present the same problem. When your Random-Access Memory (RAM) is full of apps and files that you do not use or need, your phone tends to respond slowly.

The Solution: Clean your cell phone and close/delete apps, files and clear the cache data. If you recently installed an app and your phone is not working well, you should uninstall it and see if your mobile phone runs faster. If this does not help you, you can also try saving important information on Google Drive, Dropbox or just on your computer. Then, you can restore your cell phone to factory data.

2. Bad Battery Life


Another common problem that happens to everyone is when your phone never has battery enough although you do not use it all the time. There are different factors that can affect your battery life and you should take them into account before losing your battery.

The Solution: First, you should try to dim the screen brightness and turn off the GPS, WiFi and Bluetooth if you are not using them. You can also enable the Battery Saving Mode and see if your battery lasts longer. Additionally, you should check your Battery Usage in your phone Settings and see which apps are using more battery. You can close or disable the ones that are draining more battery if you usually do not need them.

3. Overheating Phone


This usual problem can be related to the previous one. An overheating phone is sometimes related to problems with your phone battery. But, it can also be related to your charger and also with the place you normally have your phone. If you are experiencing this, you should solve it soon because your battery and your phone screen can be seriously damaged.

Possible Solutions: You should try the previous possible solutions first to see if this problem is directly related to your battery issue. If it keeps overheating, try to carry your phone in a fresh place and keep it away from the sun’s heat. You can also give your phone some minutes to “refresh” and start using it again.

4. Full Storage Space


Maybe you are the kind of person that saves too many photos, songs, documents and some other files and although you do not need them anymore, you do not delete them. Sometimes those files are so old that you forget you have them stored in your cell phone. Unnecessary apps also occupy important storage space that can be used for other matters.

The Solution: This fourth common mobile problem can be related to the first we already mentioned before. When you have filled up your storage space, your cell phone tends to respond slowly. So, the possible solutions for this problem are the same: try to delete those files and apps that you do not use anymore, you can also delete old calls and text messages and clean the cache data. Try to transfer those files you would like to keep with you on an online cloud or buy a microSD card to save that valuable information in a safe place.

5. App Crashes/Freezes


This problem happens a lot and, although it is a very annoying thing, it is not so difficult to solve. Although it should not be a common thing, the truth is that apps sometimes present this issue and can be related to bugs on the app or maybe your operating system is not the best or the newest for those apps. There are apps that are constantly adding new options and improving some details for better performance, but sometimes your phone just cannot support the latest version and that app starts crashing all the time.

The Solution: The first thing you should try is to restart your cell phone and start using the app again. You can also go to the App Manager and stop the app, sometimes cleaning the cache data also works. If it continues doing the same, try to uninstall the app and install it again. As it was mentioned before, sometimes the app has a lot of bugs that cause this problem.

6. Phone Freezes


This happens a lot, especially in old phones or devices with full storage space. What people usually do is to restart their phones or turn them OFF and ON. When this does not work, we normally remove the phone battery and everything goes back to normal. However, some modern phones do not have this option because their batteries cannot be removed. Do not worry, we will tell what to do and how to do it.

The Solution: Depending on your phone, here are the steps you must follow to restart it:

  • Apple (iOS8 or higher)
    • Click Volume Uponce
    • Click Volume Down once
    • Hold the Power key for 15 seconds.
  • Apple (iOS7 or lower)
    • Press the Power key + Volume Down key at the same time for 10 seconds or until the Apple Logo appears.
  • Samsung
    • Press the Power key  + Volume Down key at the same time for 15 seconds or until the Samsung Logo appears.
  • Sony
    • Press the Power key + Volume Up at the same time for 10 seconds
    • When the phone vibrates, press the power key like normal to turn ON the mobile phone.
  • Nokia/HMD:
    • Press the Power key + Volume Up at the same time for 15 seconds or until the Android logo appears.


7. Apps Not Downloading


Users complain a lot about this issue that can be solved with just a few steps similar to the ones explained in the fourth problem. This mainly happens due to corrupt cache and it is pretty easy to solve it.

The Solution: Try cleaning the apps cache and you can also clean the history of Google Play and Google Play Services. Remember to restart your cell phone after doing that and try again to download the app you want

8. MicroSD card does not work


When your phone is full but you do not want to lose your files and you are too busy to move them to another place, you probably think about that old microSD card you bought few years ago. But, here comes the problem: your device does not want to accept that card.

The Solution: Your microSD probably has errors and your phone is not recognizing that card. Try to connect a card reader to your PC and format the microSD card at least two times. Restart your mobile phone and insert the SD card again.

9. Wet Cell Phone


Do not feel bad if you dropped your mobile phone and now it is wet. This happens a lot and most of the time it can be solved.

The Solution: The first this you should NOT do is to turn ON your device. It can be just the worst thing to do. Remove the battery and put the cell phone in a bowl full of rice. It will help to absorb the moisture. Now, take it to a service workshop and let them fix it.

10. Damaged Charging Port


Like everything in life, nothing lasts forever. And your phone is not an exception. Charging ports tend to deteriorate as time passes. Misuse or dirt can be some of the causes of this deterioration. This common problem needs to be solved by an expert. However, you can try some things to see if it works again.

The Solution: Before taking your mobile phone to the repair shop, try to clean the charging port with a new and dry toothbrush. You can also clean it using a dry cotton swab to remove the dust and dirt that does not allow your charging port to work properly. If this does not work, please take your phone the repair shop. Of course, these 10 problems are not the only ones that mobile phones have, but they are the most common ones according to Internet searches. However, we decided to add 10 more divided into 2 groups such as Android problems and iOS problems. Take a look at these following common issues.


11. Google Play Store Does Not Download Apps


This is something frequently experienced by Android users. People tend to panic and think there is nothing they can do and they will not be able to download anything again. Relax, we have 2 ways to fix this.

The Solution: The first option –and the most recognized- is to clean the Google Play cache. How can you do it? Go to Settings – Apps – Open Google Play Store – Clean Cache – Restart your phone. The second way to solve this problem is to clean the Google Play Store history. This is more simple than the first solution. First, you need to Open Google Play Store – Settings – Choose Clean History.

12. Google Play Store Crashes


We know how annoying is that you try to look for an app and Google Play crashes all the time. This happens a lot and must of the time is because of a corrupt cache. It should be solved with similar steps mentioned before.

The Solution: Although some menus vary, most Androids have the same options. So, you just need to go Settings – Apps – Open Google Play Store – Clean Cache and Data – Restart your phone. This should fix the crashing problem. But if it does not work, try doing the same with Google Play Services and Google Services Framework.

13. Connectivity Issues


Sometimes the connection through Bluetooth or WiFi can be a little bit difficult. This is one of the most common problems among Androids that can be solved just with a couple of simple steps.

The Solution: We recommend you to enable the airplane mode for at least 1 minute. Then, try to connect again. Occasionally, you can turn OFF and ON the connection that is failing and then try to connect it again.

14. Synchronization Failures


Sometimes you are trying to sync your account to a specific app but it seems just impossible to do it. Sometimes the app does not show you what the problem is, so you are not sure what you should do. When you have synchronization failures there are a few steps that you must follow.

The Solution: First of all, make sure that you are connected to the internet. You also need to check if the services that are you trying to sync (just like Google or Dropbox) is working as well. Another thing that you should do is to verify your password, check if it is correct and try again. If any of this works, remove entirely your account from your device and add it again.

15. Unsent Messages


Sometimes happens that you are texting someone and then the screen show “Message not sent, touch to retry”. You try over and over again to send the same message but it shows the same annoying alert.

The Solution: The first thing you must do is to make sure that you are connected to a WiFi network or that your mobile network is working correctly. Then, click on the message that was not sent and select the resend option. This should be enough, but if you still have the same issue, try to restart your phone or try downloading another message service app.

16. Control Center Button Does Not Respond


According to the Apple Toolbox, some users have been reporting some issues with the Control Center button or Home button. They say that the button is constantly freezing and does not respond.

The Solution: If this happens to you, you must go to Settings and then to the Control Center to customize and delete the specific app that does not work in the including section. You can do it by sliding it on the left and touching Delete. After that, you must restart your device and once it is turned ON again, you can customize the controls again and add the app that you remove before.

17. iPhone Overheats


A lot of customers complain that their devices turning extremely hot. They also affirm that feel like their phones are swelling and they open by themselves. This problem was already explained, but iPhones tend to present this issue more than other phones.

The Solution: If you are using a specific app and your cell phone overheats, let it rest for a while. You can disable the location service by going to Settings and Privacy. We recommend you to do this because the location service uses GPS, Bluetooth and mobile locations to determine where you are. This could mean a lot of activity for your phone. If you are charging your iPhone and it overheats, unplugged it for several minutes until it cools. Then, you can plug it again. Removing the case of your device also works. It will avoid that the plug keeps the heat and it will not block the heat output of the phone.

18. Issues to Connect to WiFi


Users express through the Apple forum that they lose the WiFi connection and they cannot connect to a local network. While a WiFi network is working with other devices; users assure that they have problems to find a stable connection.  Before trying to find out the possible error in your cell phone, make sure that the router is close to you.  You must also make sure that you can see your WiFi network to check that it is connected to the correct network.

The Solution: You can also try to restart your devise or the router by unplugging it and plugging it again. If it still not responds you may go to settings to reestablish your network. It will restore the Wi-Fi network and the password with the VPN and APN of your cell phone. Just in case the problem continues, remember that you can restore to the factory configuration by eliminating all the content. Before doing this make sure of have made a backup of all the important files that you have on your phone because everything will be erased once you restore your device.

19. The Screen Is Not Bright Enough


Some users explain they have noticed that the screen looks dark although the brightness is at the highest level. You are not the only one who has experienced this. So, keep calm and read what you need to do.

The Solution: To solve this problem you can go to General Settings, then to accessibility and after that click on Screen Adaptations. You will see an option to reduce the white point at the button so you can adapt the intensity of the colors until you consider is good for you.

20. Unable To Connect To The App Store


Besides some issues experienced at the moment of downloading apps, some users have also had problems to go on the App Store. They receive error messages saying that their devices cannot currently connect to the App Store.

The Solution: A possible solution for that is to set the date and time of your device. Disable the option of set automatically, instead of that, set the date and time manually. Then, go to the App Store and let it open for about 5 seconds at least. Activate the date and time automatically again and then close the App Store and open it again. We are sure there are many more problems among phones, no matter, if they are Android phones or they are part of the iOS technology. But, this time we just covered the most common issues and we hope those possible solutions work for you. Please share with us if you have experienced some of these problems and how you solved them!

Solving Problems with Mobile Phones

Abilities of a Mobile Phone

Key Terms

  • Mobile App – a program that runs on a phone
  • Sensors – Hardware on your phone that allows it to interact with the world around it

Mobile phones are extremely powerful devices with lots of sensors and functionality. Since you are developing a mobile app to solve a problem, you should take advantage of all powerful things mobile phones can do.

Here are some important components and sensors that a mobile phone has:

Component What it does
Camera, speaker, microphone Allow you to take pictures, videos, record sounds
GPS Shows the location of the phone
Storage on a phone Allows you to store preferences, images, sounds on the your phone
Connectivity to the web Allows you to connect the phone to information on the web
Accelerometer, gyroscope Shows how fast the phone is moving
Phone calls, text messages, contacts lists Allows you to make phone calls, send text messages, and connect to people

Mobile Apps versus Mobile Websites

Another way to develop technology for a mobile device is through creating a mobile website, but mobile websites are different than mobile apps. Since Technovation Girls is a mobile app competition, you’ll need to develop a mobile app rather than a mobile website. So what is the difference?

  • Mobile Website – A website that works on screens of all different sizes. A mobile website is accessed through the browser on a phone.
  • Mobile App –  A program that is downloaded and installed on a phone or tablet. It can be directly accessed from the memory of the device.

Mobile apps run on the actual phone, instead of inside a browser on the phone. Because of this, apps are much better at accessing the sensors and features on a phone. Here are some advantages that mobile apps have over mobile websites.

Key Capabilities Reason Example
Ability to access functions on the phone, such as the camera, sensors, phone calls, SMS, GPS etc. A mobile app is much better at accessing the phone’s features and hardware, such as the camera, GPS location, and so on. Any apps that use this functionality would be better suited to use a mobile app. 

  • Push notifications
  • Tap-to-call/email
  • Device vibration/ alerts
  • Camera
  • Instant and automatic updates
Apps like Instagram access the camera, location sensor, and more on your phone.
Ability to be very interactive – good for gaming Mobile apps are better at accessing the accelerometer sensors on phones. Gaming apps such as Angry Birds are very fun to play due to their interactivity.
Easier to use regularly It is much more convenient for someone to use an app than to navigate to a website on the web. Social media offer both an online site and mobile app so that frequent users can download the app.
Ability to be personalized Mobile apps can store information on a users’ phones, so this makes them a better choice for apps that need a lot of customization. Health or period trackers can store information and allows you to track your health.
Ability to function offline Since mobile apps are stored on the phone, they can perform functions without a network/wireless connection. 

However, mobile apps require the user to regularly download updates. Web apps will update themselves.

Spotify can save your songs to play offline.
Has a nicer interface Since mobile apps are designed for the devices that they are used on, the interfaces often look better than those of mobile websites. Notice how different the Facebook app looks on your phone compared to the Facebook website.

Of course there are also some downsides to mobile apps. They require the user to go to the app store to download them and also require updates to be downloaded. Also, most apps only work on iOS or Android and not both.

When you develop your solution you will want to make sure that what are you creating really takes advantage of the features of a mobile phone.

Here are some ways you can check if your solution takes advantage of mobile phone features.

Ask Yourself Consider
Could this be done without any technology at all? If so, does adding technology make it better? For example, you could spread awareness about earthquake safety by hosting information sessions and classes in your town. How can you use technology or a mobile app to add to this solution and make it better?
Could this be a mobile website instead of an app? If so, does turning it into an app make it better? For example, a quiz about heart disease could just be a website. Before turning this into an app, you should brainstorm how you can take advantage of the capabilities of mobile apps.
How can we take advantage of the key components of mobile apps in our solution? Check with the table above and make sure that your solution uses at least one of the key capabilities of apps. This will prevent you from developing a solution that is better as just a mobile website, or using no technology at all.

Check out the activity to practice identifying how apps are using the abilities of a mobile phone.

Activity: Features of your Favorite Apps

This should take around 20 minutes

Brainstorm at least 2 of your favorite apps.  Answer these questions either out loud or on a piece of paper.

  • What features of your phone do they use?
  • Would it still work as a website or as something different than a mobile app? Why or why not?

Example:

App Name Mobile features the App uses Would it still work as a website or as  different than a mobisomethingle app? Why or why not?
 Snapchat
  • Camera, video, microphone
  • Frequent use
  • Sends push notifications
  • Connecting you to friends in your contacts
No, this would not work as well as a website because I use it frequently and I like to get push notifications when I have a message.

Reflection

When you develop your solution you should ask yourself these questions:

  1. Could this be done without any technology at all? If so, does adding technology make it better?
  2. Could this be a mobile website instead of an app? If so, does turning it into an app make it better?
  3. How can take advantage of the key capabilities of mobile apps in your solution?
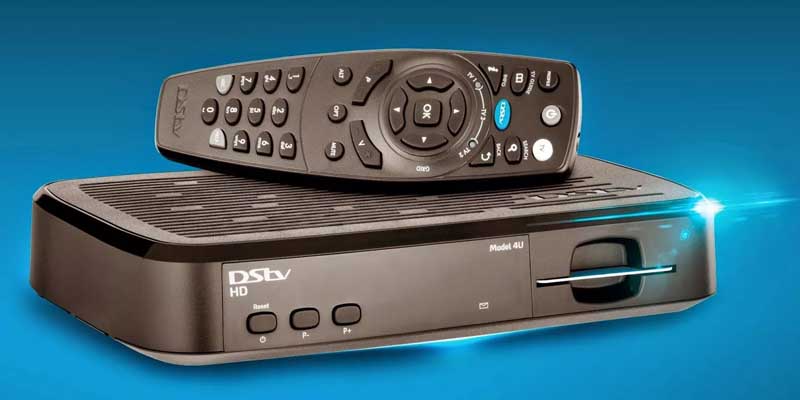
How to check DStv balance

Multichoice pre-paid entertainment dots most households and entertainment spots. However, nothing gets you off balance like the conspicuous mail icon on the top corner of your screen (a reminder of pending expiry of your subscription) when you thought everything was okay. Which begs the question, how do you check your DSTV balance?

Multichoice offers its customers easy ways to confirm their balances and the pending expiry of their subscriptions. If you are wondering how do I check my Dstv balance here are some of the ways.

CCTV, Security Cameras, Access Control, Video Door Phones, Biometric Devices, Bio-metrics Attendance, Spy Gadgets, Automatic Gate, Electric Gate, Intercom, PABX, Burglary alarm systems, Fire Alarm Systems, Perimeter Intrusion Alarm, System, Electric Fence, Automobile/Car Tracker, DSTV, Free-To-Air, Satellite Systems
CCTV, Security Cameras, Access Control/Biometric System, Video Door Phones, Spy Gadgets, Automatic/Electric Gate, Intercom/PABX, Burglary/Fire Alarm Systems, Perimeter Intrusion Alarm System/Electric Fence, Automobile/Car Tracker, DSTV/Free-To-Air/Satellite Systems, etc.

Use SMS

  • Compose a text
  • Type Bal (space) your smartcard number (10 digits)
  • Send the message to 22788
  • You will receive a message of your balance from DSTV
  • Go to DSTV website
  • Use the link http://eazy.dstv.com
  • On the website dashboard’s click on Service
  • You will be redirected to a page that requires your sign in
  • You will be required to fill your surname or Mobile number and Smartcard number.
  • You can click on “My account “to find out about your balance.

Using DStv connect

Alternatively, you can sign in using DStv connect (you register for this service). The service allows you to access your balance and login since your account details and customer ID are synced.

Contacting customer care

If you find all the above tasking, you can opt to contact customer care directly.

If you need an instant response, then it’s advisable to call customer care line. The service agents will guide and check your balance but there is a need for proof of ownership.

Another relatively swift method is through the use of social media

You can now direct message DSTV  directly to check your DStv account balance. Ensure you provide personal details and account number.

Email is one other option but it may not be as swift as the other two especially at night. In case you find this option suitable you can email DStv.

There are plenty of ways you can use to check your balance. These are some of the ways you can confirm your balance before making any payments.

How to Watch DsTV on Phone
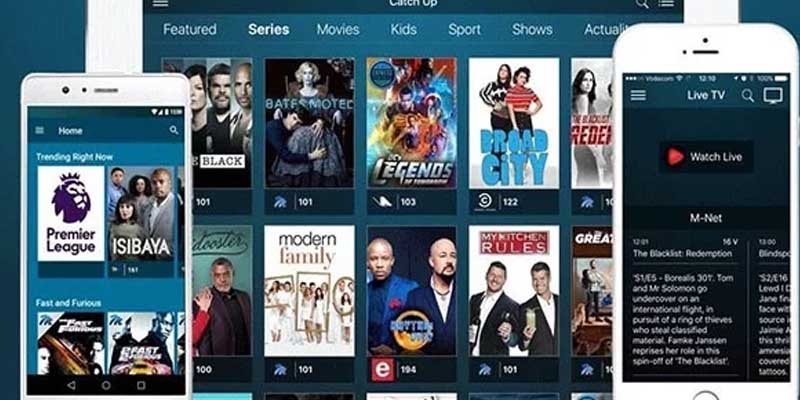
Multichoice has offered its clients a new viewing experience on the go. You can easily watch your favorite programs and channels through the DSTV app. Users can download the application and enjoy live streaming games and programs. Alternatively, you can save the programs to watch later.To enjoy watching DSTV on your phone, ensure your phone has the latest android application. Also, you have to be a premium DSTV compact or Compact plus subscriber to enjoy this service at no extra cost. It simply connects your DStv to your phone.

CCTV, Security Cameras, Access Control, Video Door Phones, Biometric Devices, Bio-metrics Attendance, Spy Gadgets, Automatic Gate, Electric Gate, Intercom, PABX, Burglary alarm systems, Fire Alarm Systems, Perimeter Intrusion Alarm, System, Electric Fence, Automobile/Car Tracker, DSTV, Free-To-Air, Satellite Systems
CCTV, Security Cameras, Access Control/Biometric System, Video Door Phones, Spy Gadgets, Automatic/Electric Gate, Intercom/PABX, Burglary/Fire Alarm Systems, Perimeter Intrusion Alarm System/Electric Fence, Automobile/Car Tracker, DSTV/Free-To-Air/Satellite Systems, etc.

How to watch DSTV on phone

  • Go to Google Play store/Apple store or now.dstv.com
  • Download DSTV Now Click “install now” button to allow you to download the application.
  • Allow the application to install (this will take a few minutes)
  • Register your personal details
  • Complete the registration process by accepting the terms and conditions spelled out.
  • Launch the application.
  • Log into your DSTV account.
  • You can then enjoy watching your games from this application
  • Ensure you have a stable and reliable internet connection either 3G or 4G.

You can also store videos and watch later (a maximum limit of 25 has been set but also ensure your device has enough memory storage)

There is a wide array of channels that you choose from the menu and app dashboard.

Click on the play button and the application automatically starts playing it.

The guidelines are how you can simply watch DSTV on your phone without the hassles of additional costs or registration on the go.

How to Convert Your GOTV Decoder to a Free To Air Decoder

Update: GOtv scrapped its FTA conversion clause a while back. You can no longer turn your GOtv decoder into a full-fledged free to air decoder. The best you can do is subscribe to the GOtv Lite package that gives you a couple of local channels and other interesting channels to keep your days filled up. You can take the:

  • GOtv Lite Monthly
  • GOtv Lite Quarterly
  • GOtv Lite Annual

I bought a GOtv decoder, about a year ago and I was impressed at what it had to offer at the time. I would say it is mostly because there was no competitor with fairer prices. Even if that was not the case, they used to air premier league matches on SuperSport Select 2, more than they do now.  A couple of months down the line, a lot has changed for the better, except Gotv.

I opted to turn my decoder into a free to air decoder, as they had given this option, instead of paying for what I did not need. At first I was told that I had only to pay administration fee, for my decoder to be converted before I can begin watching free to air channels. The thing is that, their staff is very reluctant to make the change, but I somehow managed to do it. However, if you are not aware, changing your GoTV decoder from pay TV to free to air does not mean that you will stop paying for it. It actually attracts a recurring fee very year, for purposes they can only describe as maintenance.

Nevertheless, I know many people are currently facing a problem that I faced some time back and I would quickly try to help them using a method that worked for me. In a few simple steps, you should have your GoTV  decoder showing free to air channels, in a few hours (Although most FTA channels are below par!). Apart from these, the only other GoTv channels that you will receive are Faith TV, Islam TV and GO Channel.

How to Convert your GOtv Decoder

First, you need to top up your account by making payment. Ensure that you have topped up the right amount into your account, or else  they will not convert your decoder. Afterwards, you can opt to use their self-care center by dialing *423# and following the voice prompts or you can opt for calling their customer care service. If you only pay and fail to use any of the two options above to contact their customer care, your decoder will not be converted.

Before you make the call, make sure that you have your IUC number, as it is essential to associate your account with the decoder. Converting your decoder should be easy unless you find a customer care agent who is not in a good mood to help. Within a short time, your decoder will be showing free to air channels.

I have heard of people who, after converting their decoders to free to air, got an error message (E016-0 – Service is currently scrambled). It is very simple to clear this message. Just send an SMS with the word ‘RESET’ followed by a single space and then your IUC number to 22688. For example, if your IUC number is 1234567, your SMS should look this way without the full stop: RESET 1234567.

I hope you have managed to convert your decoder. Share your experience with us.

How to change GOtv Package

Pay-TV has become an entertainment staple in most houses. Multichoice invested heavily in their lower-tier pay-TV GOtv to cater for the middle and low-income earners. Depending on your wallet, you can either upgrade or downscale to your current financial situation. So how does one change their GOtv package?

CCTV, Security Cameras, Access Control, Video Door Phones, Biometric Devices, Bio-metrics Attendance, Spy Gadgets, Automatic Gate, Electric Gate, Intercom, PABX, Burglary alarm systems, Fire Alarm Systems, Perimeter Intrusion Alarm, System, Electric Fence, Automobile/Car Tracker, DSTV, Free-To-Air, Satellite Systems
CCTV, Security Cameras, Access Control/Biometric System, Video Door Phones, Spy Gadgets, Automatic/Electric Gate, Intercom/PABX, Burglary/Fire Alarm Systems, Perimeter Intrusion Alarm System/Electric Fence, Automobile/Car Tracker, DSTV/Free-To-Air/Satellite Systems, etc.

Down or upgrading has its benefits, mostly downgrading is premised on cost-cutting measures while upgrading usually is driven by the need to watch specific channels not readily available to other packages.

Method #1: How to change GOtv package via SMS

This is considered a swift method of changing your bouquet.

  • Confirm your IUC number
  • Enter this number on a blank text in addition to the word UPGRADE
  • Send the text message to 22688

how to change gotv package

Method #2: Calling Customer Care Representatives

The old school talk never disappoints. Calling your representatives may take a shorter time but requires you have all the requisite information about your decoder. You can call them on any of their stipulated phone number.

  • Call the Customer care number
  • Inform the representative of your change of package request
  • Furnish the representative with details they need
  • Wait for your application to be affected

Method #3: Change GOtv Package Online Option

GOtv offers an easy online change of subscriptions by its Easy self-care service on their platform.

The service enables the customer to make changes in their packages without the hassles of making phone calls to customer care. If you were wondering how to change to your GOtv max this is how you go about it.

  • Log into your GOtv account (This includes your name, phone number, device IUC number)
  • Upon accessing your account select “Build your account” from the dashboard.
  • From the list, of packages select the one you wish to migrate to then click next
  • Pick the payment option from the play button this offers the various payment options you can use for the transaction
  • Enter the additional required details on the fields, after complete payment your new package activated in few minutes between and 10 minutes.
How to fix DStv signal problems

DStv signal problems can be caused by faulty connections, dish alignment, and bad weather. To fix DStv signal problems then you need to make sure the cables are connected properly and the dish is correctly aligned.

CCTV, Security Cameras, Access Control, Video Door Phones, Biometric Devices, Bio-metrics Attendance, Spy Gadgets, Automatic Gate, Electric Gate, Intercom, PABX, Burglary alarm systems, Fire Alarm Systems, Perimeter Intrusion Alarm, System, Electric Fence, Automobile/Car Tracker, DSTV, Free-To-Air, Satellite Systems
CCTV, Security Cameras, Access Control/Biometric System, Video Door Phones, Spy Gadgets, Automatic/Electric Gate, Intercom/PABX, Burglary/Fire Alarm Systems, Perimeter Intrusion Alarm System/Electric Fence, Automobile/Car Tracker, DSTV/Free-To-Air/Satellite Systems, etc.

If your television displays errors like DStv no signal foundDStv signal strength 0DStv error- no signal due to bad weather, and any other errors. Then, you need to follow the following fix solutions below.

Fix faulty connections

Poor connection of the cables from the dish to the decoder can interrupt the transfer of waves from the dish to the decoder. This will result in poor signal strength or no signal errors. To fix this.

  1. Check for any loose DStv cables and make sure they are firmly connected.
  2. Make sure the F-type connectors are correctly connected to the LNB.
  3. Ensure the F-type connectors are correctly and firmly connected to the decoder ports.
  4. Make sure that the F-type connecters are correctly connected with the coaxial cables.
  5. Ensure the coaxial cables are in good condition.

Fix incorrect Alignment of the dish

Before disturbing the alignment of the dish, make sure that the LNB is in good condition. If the LNB is at fault it may lead to DStv no signal found error, which means you need to replace it first.

If the signal is not restored the follow the following steps.

  1. Make sure the arms are not broken or rusted. If broken or rusted, then replace the arms.
  2. Check all the bolts if they are loose. In case any bolt is loose, make them tight.
  3. Adjust your DStv satellite dish properly by adjusting the horizontal and elevation angle. This will need to be done using a signal detector.

How to fix DStv signal problems due to bad weather

Bad weather conditions may cause DStv error- no signal due to bad Weather. It may also cause the DStv signal problem on certain channels.

To fix this problem you can try the following tips.

  1. Make sure that your DStv signal strength is above 90% during normal weather conditions. This will increase immunity during bad weather conditions.
  2. Make sure the dish is installed closer to where you are going to place the decoder. Signals get lost with distance.
  3. Make sure there are no cuts on the cable that may allow rainwater. This may cause shocks and signal loss.
  4. Cover the LNB with plastic or a bottle to prevent water from entering the LNB components.
  5. Cover or insulate the F-type connectors connecting to the Low-Noise Block Downconverter (LNB).

How to fix DStv signal problems by rebooting

A quick reboot of your decoder may help fix multiple problems such as scrambled channels. Scrambled channels may also cause a DStv signal problem error. This is because DStv keeps searching for signals and other decoder errors which only require a restart to work perfectly.

To reboot your DStv decoder, continuously press the power button. Rebooting takes a while; this means you need to ensure a steady power supply and be ready to wait.

How to check DStv signal strength

Monitoring your DStv signal strength may help to identify any fault and fix it before the signal is fully lost. These are the steps to follow to check your DStv signal strength.

  1. Click the HELP button on your remote control.
  2. Choose the general information option.
  3. Then select the Tuner Status option.
  4. After that, your DStv signal strength and quality will be displayed on your television screen.

How to improve DStv signal strength

If you have a strong signal strength you may enjoy immunity during harsh weather conditions. And these are some of the things that may help improve or maintain your DStv signal strength.

  1. Cut down trees or prune trees that may cause obstruction of the signals.
  2. Do not install your DStv satellite dish between tall buildings.
  3. Reposition your DStv satellite dish in case a tall building is coming on its way.
  4. If you are using a polar mount for your dish, ensure the polar is upright.
  5. Ensure your DStv satellite dish is properly aligned and tightened to the host.
  6. Align your LNB correctly at a skewed angle in relation to the polarity of the signal, your local position, and the selected satellite.
  7. Ensure proper connection of the F-type connector on the LNB and the decoder.
  8. Replace any fault LNB, F-type connector, and cables.
  9. If you are using more than one television, you may need to buy a DStv signal booster or amplifier.
  10. Always monitor your DStv signal strength settings to know when it starts losing strength.

Conclusion

If you have tried all the above fix solutions and you still have a problem with your signal, then you must call an accredited DStv installer to come and fix the problem.

The installer will perform advanced diagnostics to identify the problem. You can also call the installer if you do not want to perform the above fix but doing it yourself is preferable since it helps cut the cost.

How to Clear E16 Error on GoTV

Chances are your GOTV is displaying e16 error on your screen. Perhaps your subscription expired without your knowledge and you are wondering what this means. Well, it simply means your GOTV needs a recharge. However, there are special instances that despite paying the error message still displays. Maybe you have done everything right, (ensured your decoder is on, and made necessary payments) but still get the message, we got you covered.

CCTV, Security Cameras, Access Control, Video Door Phones, Biometric Devices, Bio-metrics Attendance, Spy Gadgets, Automatic Gate, Electric Gate, Intercom, PABX, Burglary alarm systems, Fire Alarm Systems, Perimeter Intrusion Alarm, System, Electric Fence, Automobile/Car Tracker, DSTV, Free-To-Air, Satellite Systems
CCTV, Security Cameras, Access Control/Biometric System, Video Door Phones, Spy Gadgets, Automatic/Electric Gate, Intercom/PABX, Burglary/Fire Alarm Systems, Perimeter Intrusion Alarm System/Electric Fence, Automobile/Car Tracker, DSTV/Free-To-Air/Satellite Systems, etc.

How to Clear e16 Error

The first step is the elimination of the possible causes of the error. If you haven’t paid yet ensure you do

While at it ensure your decoder is powered on. This should do the trick. However, if the problem persists there are other ways to go about this.

How to Clear E16 Error on GoTV Online

  • If the error persists go online to https://eazy.gotvafrica.com/en/ke/clear-error-code
  • The home page has an easy self-service section on the dashboard
  • Click the section
  • You will be prompted by a dialogue box attached to the section
  • Fill in your decoder IUC number (This can be accessed on the body of the decoder) usually below in a red sticker.
  • Fill the next dialogue box usually has two error options GOTVE16 Or GOTV30 (you will get this option if you scroll down; just select the former)
  • Enter the Captcha text that is provided by the prompt
  • Click the green “FIX ERROR” button below and wait.

Ensure when doing this your decoder is powered on. The error should clear after a few minutes.

Calling Customer Care and Support

Not everyone can access the internet or have smartphones. Don’t worry getting your error is still simple. You can call the customer care.

They will either remotely solve your problem or at times lead you to step by step in clearing the error.

You can also contact them through their handles in social media platforms like Twitter, Facebook or use USSD *423#

Using Your Remote Control

  • Go to menu
  • Navigate to go easy self-service
  • There will be a display indicating an option of “clear error codes”
  • Click on it
  • Type your IUC number using your remote
  • Enter this and press ok to clear the codes
How to Reactivate DsTV After Payment

It is logical to expect that your decoder starts showing the channels after you have paid the subscription fees. At times, you are forced to reset your decoder to continue enjoying your channels.

CCTV, Security Cameras, Access Control, Video Door Phones, Biometric Devices, Bio-metrics Attendance, Spy Gadgets, Automatic Gate, Electric Gate, Intercom, PABX, Burglary alarm systems, Fire Alarm Systems, Perimeter Intrusion Alarm, System, Electric Fence, Automobile/Car Tracker, DSTV, Free-To-Air, Satellite Systems
CCTV, Security Cameras, Access Control/Biometric System, Video Door Phones, Spy Gadgets, Automatic/Electric Gate, Intercom/PABX, Burglary/Fire Alarm Systems, Perimeter Intrusion Alarm System/Electric Fence, Automobile/Car Tracker, DSTV/Free-To-Air/Satellite Systems, etc.

Here is how to reactivate DSTV after subscription

Using your DSTV remote

  • Using your remote control
  • Forget the complex processes; you can simply reset your decoder by pressing the right buttons after payment.
  • Go to your remote and press “Reset” and “Standby” buttons simultaneously.
  • The letter DL will appear on your screen
  • Press P+ then P-
  • This should reset your decoder.

However, this method at times fails to work. There are other viable alternatives of resetting  DSTV after payment in Kenya

Contact support

While the idea may not seem genius, it is actually more reliable and at times even swift.

  • You can contact DSTV customer care. Report the problem and follow the support agent’s instructions.
  • Another option is contacting DSTV customer support via social media sites like Twitter and Facebook.

Ensure your personal details and smart card number and issues are addressed to the support.

Write down the problem (In this case resetting your decoder) you wish to be rectified. You will be furnished with a DSTV reset number that will assist you in resetting your decoder.

The customer support should be able to reset your decoder (The response time is usually swift).

As you can see, how to reset your DStv decoder after making payments isn’t that hard.

List of GOtv problems and solutions – complete guide

GOtv is one of the leading companies when it comes to entertainment in Africa. Most of the subscribers face various issues from connectivity to being unable to watch GOtv after paying.

CCTV, Security Cameras, Access Control, Video Door Phones, Biometric Devices, Bio-metrics Attendance, Spy Gadgets, Automatic Gate, Electric Gate, Intercom, PABX, Burglary alarm systems, Fire Alarm Systems, Perimeter Intrusion Alarm, System, Electric Fence, Automobile/Car Tracker, DSTV, Free-To-Air, Satellite Systems
CCTV, Security Cameras, Access Control/Biometric System, Video Door Phones, Spy Gadgets, Automatic/Electric Gate, Intercom/PABX, Burglary/Fire Alarm Systems, Perimeter Intrusion Alarm System/Electric Fence, Automobile/Car Tracker, DSTV/Free-To-Air/Satellite Systems, etc.

This guide will help you get through most of the common problems.

Missing channels

This is one of the most common problems GOtv users experience. It usually occurs when upgrading the decoder’s software. To fix this, follow these steps:

  1. Press MENU on your decoder’s remote.
  2. Press the i button and then press 7.
  3. The decoder will automatically reboot and launch the FTI page.
  4. Select the language as English, the country to where you reside and set the antenna power OFF.
  5. The decoder will re-scan itself for available channels.

You can also use these steps if the ones above don’t recover the missing channel(s):

  1. Press MENU on your decoder’s remote.
  2. Select Advanced Options.
  3. Scroll down the list and select Installation and then select Tuning.
  4. Choose the Automatic Scan option and press the OK button in each stage.
  5. The number of channels for the normal GOtv package should be 27. GOtv Plus has 37 channels whereas GOtv Max has 57 channels.
  6. The scan should show how many channels are available.
  7. Press EXIT when the scan is done.

Error messages

If you are encountering any of these errors on GOtv, here is a detailed guide for fixing each of them:

E017-0 and E48-32

These error messages indicate that the decoder is not enabled for the specific channel you are trying to view. It’s usually caused when the software is not up to date.

  1. Press MENU on your decoder’s remote.
  2. Select Information Central to check whether you have the latest software.
  3. If there is an upgrade available, press MENU and select Advanced Options.
  4. Select Decoder Upgrade.
  5. A red button will appear below on your screen, press it to download the upgrade.

This error message can be prompted by other issues as well. You can still fix it by following these steps:

  1. Switch off the decoder and switch it back on.
  2. If the problem persists, send an SMS to 4688 with the following wordings; RESET IUC number.
  3. You can also visit their website at http://eazy.gotvafrica.com/ and search for the Clear Error Code section. Enter your IUC number and key in the error code then click on Clear Error.

E16

This error message comes about when you’ve paid for your subscription but the channels aren’t showing. This is because GOtv’s system failed to reactivate your account automatically.  To fix this, follow these steps:

  1. Send an SMS to 4688 with the following wordings; RESET IUC number.
  2. You can also visit their website at http://eazy.gotvafrica.com/ and search for the Clear Error Code section. Enter your IUC number and key in the error code then click on Clear Error.

Low signal

Whenever the signal is low, viewing any of your favorite shows becomes a problem. It is usually brought about by bad weather. To fix this, follow these steps:

  1. Press MENU on your decoder’s remote.
  2. Select Advanced Options.
  3. Scroll down the list and select Installation.
  4. Select Signal Information and then press OK.
  5. The signal bar should be higher than 50% while the signal quality bar should be higher than 40%.
  6. If both values are lower than that, move your antenna up or down and from side to side until the signal is at its highest.
  7. Once satisfied with your signal strength, secure the antenna tightly, and select EXIT.

Account suspension

Sometimes when you migrate from one package to another, you will be suspended. When something like this happens, simply contact GOtv Customer Care to verify your ownership and your account will be reactivated instantly. The following are some of their contact details depending on the country you reside in:

  1. Ghana: Phone No: +233 302 740 540. Email Address: customerservice@gh.multichoice.com. USSD: *759#
  2. Kenya: Phone No: +254 711 066 000. Email Address: kenya@gotv.co.za. USSD: *423#
  3. Malawi: Phone No: +265 1 895 777. USSD: *570#. Shortcode: 54688
  4. Uganda: Phone No: +256312245245. Email Address: uganda@gotv.co.za. USSD: *206#
  5. Zambia: Phone No: +260 211368343. Email Address: zambia@gotv.co.za. USSD: *668#

Account reconnection

Whenever you fail to pay your monthly subscription, you will be disconnected from GOtv until you are ready to pay. To be connected back, you will need to follow these steps:

  1. Visit eazy.gotvafrica.com
  2. Key in your IUC number.
  3. Select your country from the drop-down list.
  4. Enter the captcha and then click ‘Verify’.
  5. This will take you to the online payment page.
  6. Once you settle your balance, click on ‘Reconnect’ to have your account back on track.

GOtv remote not working

Many subscribers have had an issue with the decoder not responding to the remote. This may be caused by a couple of issues.

Batteries

If the batteries are working the LED lights on the decoder will flicker whenever you press the remote. When the remote is not responding accordingly, remove and put back the batteries into the remote. You can also replace the existing batteries with new ones.

Technical issue

If the remote has a technical issue, you can fix it by pressing both ‘P+’ and ‘P’ at the same time on your decoder. A pop-up screen will show up on your TV indicating the channel’s name. When you press the direction buttons or any button on your remote, it will start working as before.

Clogged up from the inside

If the remote has been exposed to dust or food particles, it may malfunction. To fix this, you will need to clean the remote from the inside. Follow these steps:

  1. Open the remote using a flat metal such as a knife.
  2. Once it is open, clean the green board with a slightly wet cloth.
  3. If there is too much dirt, dip a toothbrush in methylated spirit and clean the green board with it.
  4. Clean the rubber part and leave it to dry as well.
  5. Once the parts are dry, put them back together and test the remote. It should be working by now.

Reset the decoder

Most of the problems listed above can also be fixed by resetting the decoder. This should be the final solution when nothing else is working. To do so, follow the steps below:

  1. Unplug the device from the power source.
  2. Press and hold the P+ button on the decoder.
  3. Plug the device back to the power source.
  4. You should see a green LED light flashing on the decoder.
  5. Quickly after the light stops flashing, release the P+ button.
  6. You should then press P+ and P- buttons at the same time.
  7. This will reset the decoder.

Conclusion

If any of the problems listed above persist, you should contact Zuku’s Customer Care. I hope this article was helpful. If you have any questions surrounding this topic, let us know in the comments belo

Top Mobile Phone Problems and Solutions
For better or worse, we are all glued to our smartphones. A phone that’s not working correctly can be a major inconvenience, especially if you need it for work or school. Read on for solutions to four of the most common smartphone problems.

Your Phone’s Slower Than 90’s Internet

If your phone has gotten slower over time, chances are that it’s bogged down with apps and files. To solve this problem, start by taking a look at your files and deleting things you don’t need. Consider moving media files like photos to an external hard drive or a cloud service. If you have apps, you aren’t using anymore uninstall them.

Next, check to see which apps are running in the background. Anything that sends you push notifications is suspect. Do you really need twenty news updates a day? If not, go into the app’s settings and turn off push alerts.

Your Battery Dies Before Noon

Short battery life is one of the most common cell phone problems. Batteries do wear out over time, and if your phone is more than two years old, you should consider getting it replaced. If your phone is newer or you aren’t ready to take that step yet, there are some things you can try first.

Many smartphones will tell you which apps are sucking the life out of your battery. Go to settings and find the “battery” section. This will be labeled slightly differently depending on your device. Once you’ve found it, look to see which apps are using the most battery. If you see apps listed that you haven’t used recently, it means they are running in the background. Again, push notifications are a common culprit, so consider navigating to those apps and turning push alerts off.

If you don’t see any obvious problems with apps, you can try changing some other settings. Turning your “location” function off and lowering your screen’s brightness can help save power. You can also shorten your phone’s screen timeout setting so it will fall asleep sooner when not in use. If none of these changes help, it’s probably time to take your device to a phone repair shop and get a new battery.

Your Screen Keeps Freezing

This is another problem that is usually caused by an overloaded device. Start by clearing your phone’s cache and getting rid of unneeded files and apps. If your phone’s storage space is still almost full after doing that, move some things to outside storage, like your PC or a cloud service. Screen freezing is sometimes caused by a malware infection, so after taking the steps above install an antivirus program and run a scan.

Your Whole Phone Shuts Off or Freezes

You’re in the middle of checking your email, and your phone goes black and won’t wake up. Don’t panic! You should be able to restart it. On most devices holding the power button and the home button down at the same time for several seconds will force a restart on a crashed or frozen phone. If that doesn’t work, it means something serious has gone wrong, and you’ll need to get the professionals involved. If the phone restarts, you may be able to fix the problem yourself.

Crashing phones can be caused by several things. Start by checking to see if your phone is overloaded with apps and files ( yes there is a reoccuring theme here). After you’ve removed stuff you don’t need and cleared your cache, run a virus scan. Ideally, you will do this with an app that can both find and remove viruses.

If your phone is squeaky clean, then software might be to blame. It’s pretty common for operating system updates to cause problems, so if you’ve recently updated something, you might need to reset the phone to factory settings. If you have tried all the above steps and your phone is still crashing, don’t hesitate to take it into a repair shop.

Mobile Cell Phone Earpiece / Ear Speaker Problem and Solution

Learn to Solve / Fix if Speaker of Android Smartphone or iPhone is Not Working During Call.

This chapter explains Mobile Phone Earpiece or Speaker Problem and Solution – How to Solve Earpiece or Speaker Fault in any Mobile Cell Phone. These problem and solution apply to all brands and make of mobile phones including Nokia, Samsung, iPhone, China Mobile Phones, Motorola, HTC, Sony, Blackberry, Alcatel, Apple, AudioVox, Benefone, Danger, FIC, Hagenuk, Palm, Kyocera, LG, Panasonic, Huawei, ZTE, Spice, Lava, Sony Ericsson, Micromax etc.

What is Earpiece or Speaker in a Mobile Cell Phone?


Earpiece or Speaker in a mobile cell phone is an electronic component or part that helps to listen to sound during phone call. It is also called Speaker or Ear Speaker. Earpiece is controlled by Audio IC or Power IC (UEM).

Types of Faults or Mobile Phone Earpiece Problem Problems

  • No sound during phone call.
  • Less sound during phone call.
  • Sound with interruption.

How to Solve and Fix Earpiece or Speaker Fault in Android Smartphone and iPhone

  1. Check Speaker Volume during Phone Call.If speaker volume is OK the Check Earpiece / Speaker using a Multimeter.
  2. Keep the Multimeter in Buzzer Mode. Value must be 25~35 Ohms. If the Value is NOT between 25~35 Ohms then change the Earpiece / Speaker.
  3. If the problem is not solved then Check Circuit Track of Earpiece Section. Do Jumper Wherever required.
  4. If the problem is not solved then Heat, Reball or Change the UEM / Audio IC.
  5. If the problem is still not solved then Heat, Reball or Change the CPU.

Note:

  • If there is less sound or sound is not clear during phone call then change the speaker.

Mobile Phone Ringer / Loud Speaker Problem and Solution
Mobile Phone Ringer Problem and Solution – How to Fix Loud Speaker Not Working

Here we will learn different Mobile Phone Ringer Problem and Solution – How to Solve Ringer / Loud Speaker Not Working Fault in any Mobile Cell Phone or Smartphone. These problem and solution apply to fix No Sound from Ringer / Loud Speaker of all brands and make of mobile phones including Nokia, Samsung, iPhone, China Mobile Phones, Motorola, HTC, Sony, Blackberry, Alcatel, Apple, AudioVox, Benefone, Danger, FIC, Hagenuk, Palm, Kyocera, LG, Panasonic, Huawei, ZTE, Spice, Lava, Sony Ericsson, Micromax etc.

What is Ringer in a Mobile Cell Phone?

Ringer is a type of card level part of a mobile phone or smartphone that rings or plays loud sound. It is also called by several other names like – I.H.F Speaker, Buzzer, Loud Speaker, and Melody etc.

Types of Faults or Problems in Mobile Phone Ringer

There can be several types of faults or problems in the ringer of a mobile cell phone:

  • Ringer / Loud Speaker not working
  • Less sound from the Ringer
  • Sound coming from Ringer but with interruption
  • Sound not clear
  • Cannot Play Music or No Sound from Video
  • Android Phone Not Ringing
  • Android Smartphone or Apple iPhone Vibrate but won’t ring

Mobile Phone Ringer Problem and Solution – How to Solve Ringer / Loud Speaker Not Working Fault in any Mobile Cell Phone

  1. Check ringer settings in mobile phone. Check Ringer Volume and Silent Mode. Adjust or change volume and / or mode if required.
  2. If the problem is not solved then disassemble the mobile phone and clean point and connector of the ringer / loud speaker.
  3. If the problem is not solved then check ringer using a multimeter. Keep the multimeter in buzzer mode. Value must be 8~10 Ohms. If the Value is not between 8~10 Ohms then change the Ringer.
  4. If the problem is not solved then check track of ringer section. Do jumper wherever required.
  5. If the problem is not solved then check Ringer IC. Give Heat using Hot Air Blower or change the IC if required.
  6. If the problem is not solved then heat, reball (BGA) or change UEM / Logic IC.
  7. If the problem is still not solved then heat, reball or change the CPU.

NOTES

  • If there is less sound from the Ringer then change the Ringer directly.
  • If the problem is not solved then heat or change the Ringer IC.
Top 5 ways on How to Turn off Roaming on Android

Top 5 ways on How to Turn off Roaming on Android

You need to keep in touch with your coworkers or family even if you’re out of town. What do you do if you don’t even have a mobile plan for that other location? Obviously, turn on roaming facilities on your phone if your phone service provider offers them. But, when you get back and you still can’t figure out how to turn off roaming on Android or turn off roaming on iPhone.  Then there’s an issue that needs to be troubleshot and fixed. Roaming can be really expensive and using it when it’s not required will 100% burn a hole in your pocket.

To tackle the issue of “why is my phone still stuck on roaming”, we have some quick solutions that’s hardly going to take a few minutes to activate.

Sync Mobile Data and Data Roaming

Before we dive into how to turn off roaming on Android. We need to address how data functions on roaming and what is data roaming Android? When you use data internationally, you’re under a roaming service for data. To use that facility, you need to make sure that your mobile data settings are in line with the roaming setting. Even if one of them is turned off, you may not be able to use data.

How to turn on roaming?

  • Settings
  • Connections
  • Mobile networks
  • Switch on the toggle for roaming

How to turn on mobile data? (Through settings)

  • Settings
  • Wireless & Networks option
  • Cellular data- switch it on.

If both are on, you can continue to use data on roaming freely.

Turn on and off.

Turning on and off data roaming to determine if there was only a tiny glitch with the settings is one of the simplest fixes we can provide for this problem. You’re good to go if it’s fixed. To do so, simply follow the instructions above, to work with roaming, then switch the toggle on and off.

Reboot

Another classic yet crucial step if you can’t figure how to turn off roaming on Android is restarting or rebooting your device. Here’s how you can restart it:

  • Press and hold the power button and click on the restart button if it flashes on the screen to directly restart.
  • Press and hold the power button until your phone completely turns off and repeat the same process to turn on. That would be a manual restart.
  • Then comes, press and hold the power button along with the volume/home buttons, simultaneously to force restart.

This should most probably fix the issue, if not, check out the next step.

Software update

But why is my phone roaming all of a sudden? Even after you’ve turned it off and you haven’t activated the roaming service in a really long time, how does it still get activated? When our phones are not up to date, they start acting up in ways we won’t even realize. This is why data roaming randomly turning on and off is an indication that your software needs a little nudge.

How to update your software?

  • Make sure your phone is charged or is connected to a power source
  • Tap on settings
  • About phone
  • Click on “Check for an update”
  • If there’s one, then update it.

It will reboot and install it automatically and your issue should be resolved in no time.

Factory Reset

In a lender of last resort circumstance, a factory reset is used. Always save this option for last, when you’ve exhausted all other possibilities. We have a strong backup in place because our phones automatically sync with Google. If you don’t want to use auto-sync, you may always use manual synchronizing. As a result, a factory reset isn’t necessarily a bad idea.

After you’ve taken up the right call, the following steps will enable you to factory reset your phone:

  • Pop open settings
  • Scroll down to system preferences
  • Click on advanced
  • Find the reset options
  • Hit “Reset all settings and Data”
  • Enter your phone passcode
  • And

You can then restore all your data through the backup you’ve taken while still having a clean new device internally.

Data Roaming Options for iOS

Now that we’ve covered everything that there was for Android, let’s shed some light on iPhones as well. Like, Android iPhone users also ponder about “Why is my phone roaming at home?”. You can replicate the same exact steps that have been mentioned above, to fix the issue on iPhones. Make sure you’re keeping the factory reset option as the last one, in this case too.

Hopefully, by the end of this, you all have been able to follow all the steps and have finally learned how to turn off roaming on Android and iOS.

Process System Isn’t Responding? Effective Fixes To Revive Your Device

Process System Isn’t Responding? Effective Fixes To Revive Your Device

Muhammad Akmal

If you’re also facing the “process system isn’t responding” error on your Android device, it’s probably infuriating you right now. However, it’s a common problem on many older Android devices, and there are various ways to fix it.

Even though your Android phone is probably won’t say “process system isn’t responding” in 2021, you can’t tell the same for all Android devices, especially the entry-level devices with low memory and basic hardware. If by any means you woke up to the “process system isn’t responding” error on your Android device, the solutions in this article will help you out.

We’ve arranged this article in different parts, so you can navigate to what part concerns you, according to your Android device:

Table of Contents:

Why does my Android device say “process system isn’t responding”?

Part 1: 7 ways to fix “process system isn’t responding” on Android phones

  1. Force your phone to restart
  2. Free up your phone storage and RAM
  3. Enter Safe Mode to uninstall suspicious apps
  4. Update your apps from the Play Store
  5. Install System Updates
  6. Wipe the cache partition of your phone

Part 2: How to fix process system isn’t responding on Chromebook

Part 3: How to fix process system isn’t responding in Honda Odyssey

Part 4: How to fix process system isn’t responding on Oculus Quest

Why does my Android device say “process system isn’t responding”?

There are various reasons you may experience this problem on any of your Android devices. Despite that, many users reported the problem showed up after upgrading their Android software, installing apps from an unknown source, tampering with the system files (via rooting), and more.

Below are some reasons you might experience “process system isn’t responding” on your device.

  • Insufficient phone storage.
  • Software glitches & bugs.
  • Installing malicious apps outside the Play Store.
  • Altered or missing system files/apps.
  • Rooting and more.

Part 1: 7 ways to fix “process system isn’t responding” on Android phones

1. Force your phone to restart

First things first: we recommend you restart your device whenever the problem occurs. Doing so will wipe all ongoing system processes, refresh the memory, and probably fix the issue.

There are various ways to restart your device:

  • Press and hold the Power button for 10 seconds or more.
  • Alternatively, you can do it manually: long-press the Power Button, then select Restart (or Reboot) from the options.
  • And, if your phone’s battery is removable, you can remove it, then reinsert and reboot it instead.

2. Free up your phone storage and RAM

One of the more prominent reasons Android users face the “process system isn’t responding” issue is because of low storage. Your apps and the Android OS need some free storage space to store and maintain temporary files. If your phone storage is filled to the brim, your phone will misbehave.

If that’s the case, a simpler approach to solve the problem is to free up your phone’s internal memory. Just delete unnecessary files, large photos, videos, unused apps, and other redundant files on your phone. Or better still, you can move extensive files to an SD card if your device supports it.

But first, you need to check what’s eating into your storage before clearing things out. Follow these steps to do that.

  • Fire up the Settings app on your device.
  • Scroll down a bit and hit Storage!
  • Open Internal Storage to see your storage usage overview.
  • If the Available storage is less than 500MB, that’s a sign you need to do some cleaning in there. Of course, we recommend up to 1GB of free internal memory on your device, to ensure it’s always running at its best.

3. Enter Safe Mode to uninstall suspicions apps

Equally important, you should try uninstalling creepy apps on your phone if the “process system isn’t responding” keeps reappearing after cleaning up your storage. If an app you installed recently is conflicting with the system, you’re likely going to experience such a problem.

Nevertheless, you need to confirm if the problem was caused by an app or not. That’s where Safe Mode comes in. This mode lets you boot up your device without loading all third-party apps. Consequently, you may use Safe Mode to diagnose and fix various software issues, including the one currently disturbing your device.

Follow these steps to boot into Safe Mode:

  • Long-press the Power button.
  • Tap and hold Restart/Reboot in the power menu until you see a “Reboot to Safe Mode” pop-up message.
  • Finally, tap OK to reboot your device.

Note: the steps might be different on your device. However, you can always do a Google search for how to boot your device into Safe Mode. E.g., “How to boot TECNO CAMON CX into Safe Mode”

Immediately after your device enters Safe Mode, navigate the phone as usual for a few minutes. If the problem doesn’t occur, that means you’ve found the culprit. Now, you need to start uninstalling the creepy apps on your phone until the problem is solved. Start from the ones you installed recently.

4. Update your apps from the Play Store

If the problem persists after uninstalling suspicious apps on your phone, you should try updating your apps. In fact, many Android users claimed the problem was no more after updating their apps. So, you should do the same:

  • Launch the Play Store
  • Tap your Profile icon at the upper-right corner.
  • Hit My apps & games, then wait for a few moments to fetch available updates.
  • Tap Update all to update all you’re apps. Otherwise, you can update them manually from there.

5. Install System Updates

As well as updating your apps, it’s essential to keep your phone software up-to-date to fix process system isn’t responding error.

System Updates are not only for new features, they help keep your phone free from bugs, address critical issues, and protect you from hijackers. If you’re not sure you have the latest System Updates, follow these steps to check:

  • Launch the Settings app
  • Scroll to System and tap it.
  • Select System Update.
  • Tap Check for updates.

If an update is available, you’ll find it there. Simply download and install it as soon as possible. It may take a while before your device reboot while installing the updates. Just chill around.

However, if you still get the error after updating your device, try other solutions below.

6. Wipe the cache partition of your phone

Another method to fix “process system isn’t responding” on Android devices is to wipe the cache partition. This partition contains some temporary files created by the system to enhance performance. On the flip side, they can be problematic when corrupted or too much. Hence, clearing it may solve the problem you’re currently facing.

To do that, you need to boot into the Android Recovery Mode first:

  • Power off your device and wait for a few moments.
  • Next, press and of the combination of Power + Volume up button.
  • Release the Power button when the Android logo is shown.
  • Now, you’ll see a fallen Android Robot on the screen. Press the Power + Volume up buttons again to get into recovery mode proper.
  • Use the Volume down button to highlight “Wipe cache partition”, then select it with the Power button.
  • Confirm the action, and finally, reboot your device after that

Note: if you’re unable to boot into Recovery Mode, do a Google search for how to boot your device into recovery mode. For instance, “How to boot Infinix Hot 2 into recovery mode”.

Part 2: How to fix process system isn’t responding on Chromebook

If your Chromebook says “process system isn’t responding” trying most of the fixes mention in Part 1 should be able to fix it.

But first, restart your Chromebook. Press and hold the Power button for about 30 seconds to shut down the computer. After that, power it on normally

If that didn’t do the trick, try the methods below to fix the process system isn’t responding on Chromebook:

  • Free up your Chromebook storage and RAM
  • Update your apps
  • Install all pending system updates

Part 3: How to fix process system isn’t responding in Honda Odyssey

Many users of the Honda Odyssey vehicle also reported this same issue. If this happened to you as well, there are two things you can try restart the vehicle or report the problem to the manufacturer.

Follow these steps to fix the Honda Odyssey process system isn’t responding.

  • Power off the vehicle and leave it for 15-20 minutes.
  • After that, start the vehicle normally. The problem should be fixed by now.
  • If not, you can report the problem to Honda, and hopefully, they’ll help you fix it.

Part 4: How to fix process system isn’t responding on Oculus Quest

Like others, the Oculus Quest device isn’t left out in this problem. And if your Oculus Quest Device says “process system isn’t responding” or “Oculus app runtime isn’t responding”, there’s a way to fix it.

Many users who experienced this problem said it stopped showing after the device runs down. So, the solution is simple.

  • Turn on Oculus Quest and leave it for a few hours or days to let the battery run down.
  • Next, recharge the battery fully.
  • And finally, turn on your Oculus Quest device. Hopefully, it doesn’t show the problem anymore.

On the whole, your Android device saying process system isn’t responding can be frustrating. Nonetheless, following the guides in this article should see you through the problem. If non of the solutions worked for you, kindly seek help from an expert. And if you started experiencing this problem after rooting your device, the safest way out is to flash your phone with its custom ROM.

How To Find Hidden Apps On Android Devices

How To Find Hidden Apps On Android Devices

We all know many Android users want a clean app list on their device apps drawer and homepages. You might also hope the apps you frequently use can be well sorted out first on your homepages and app drawer list. This is possibly done by hiding these few unused apps either when using your Android launcher. Let us guide you through how to find hidden apps on Android.

HOW DO I FIND HIDDEN APPS ON MY ANDROID PHONE?

You may find it hard, or have no clue on how to find hidden apps on your Android device even as an existing user. Fortunately, we can guide you through where and how to find these apps with these simple steps.

Apps Drawer

As stated earlier, your app drawer houses the various apps downloaded and installed on your Android devices with the system apps designed to perform specific actions on the device. Most Android devices’ hidden apps can be searched and found on the App drawer page. However, the app drawer page varies on different Android launchers.

Though various launchers have customized app pages with different icons and steps for hidden apps searches, the steps below will be centered for Android launchers such as Smart Launcher, and Nova Launcher.

Nova Launcher

This launcher is a third-party developed app that lets you customize and overhaul your home screen with amazing features and themes. As a user, you can locate your apps hidden from your home screen on Nova Launcher with these few steps:

  • Long press your screen on the Homepage
  • Click on Settings
  • Locate and tap on the App Drawer
  • Select Hide Apps
  • Remove Hidden Apps

Smart Launcher

Smart Launcher is another efficient third-party-developed launcher that provides Android users with a customized experience different from your default launcher. Your hidden apps can be located easily on the launcher by:

  • Swipe and Open the Smart Launcher app drawer page
  • Click on the three dots located at the top corner of the page
  • Select Show Hidden apps

For most Android devices, your hidden apps cannot be found on your App Drawer. The other ways to find them are explained further in this thread

General Settings

The general settings of your device are where you can check and alter your overall device settings. Your full app list downloaded and installed alongside your system apps can be found here in the Settings app. You can easily access your enabled and disabled apps with the few steps below

  • Open your App Drawer
  • Click on Settings
  • Locate and Tap on Apps & notifications.
  • Tap See all apps.
  • From there, you’ll find all the apps installed on your phone.

Homepages

Your homepage can have other pages aside from the main page where your app drawer is located when you have a full homepage with various apps. The other page is created and hides other apps from your glance. Newly installed and received apps are mostly situated on the other page and remain unseen unless the page is revised. These hidden apps can simply be found by swiping left or right on your homepage.

Folders

Another way on how to find hidden apps on Android is to unbox your folders. Google developed apps like Google Photos, Google Drive, and Google Mails are hidden in folders created automatically for Google apps, although these apps might be noticeably present on the App Drawer page. But, you may not easily find them alphabetically arranged on the App Drawer page.

These apps can be found handily in the folder.

Third-Party common hidden Apps

Third-party apps are developed by independent developers for Android devices to perform specific functions. An intruder can install a third-party app on your device and hide your apps to hinder you from using them. Sadly, you may find it hard to find them because most of these apps covers are mostly different from their features.

Below is a list of common hidden apps that are perhaps used to hide apps on  Android phones. You might find them useful as well.

  • Calculator Vault: This app is designed as a calculator but helps to hide apps with a password.
  • App Hider: App Hider is another common app that hides apps by importing the app to its app.
  • Hide App: Hide App is a third party application that hides apps from a user with a secured pin lock
  • Phone Master: Phone Master is quite different from other apps as it is a system app designed to monitor data usage, file transfer, smart charge, and freezing unused apps. You can also check the freezer to check if you have no hidden app there.

HOW TO UNHIDE APPS

To enable a lasting solution after finding your apps on your Android, you can apply these methods to avert a reoccurrence.

  1. Uninstall Third-Party Apps
  2. Always Enable Disabled Apps
  3. Unfreeze Apps

This article should ultimately guide you on how to find your hidden apps and how to get rid of spy apps on your device. It’s assured to work at an optimum rate.

How To Repair Dead Android Phone

How To Repair Dead Android Phone

By Muhammad Akmal

HOW TO REPAIR A DEAD ANDROID PHONE: TRY THESE FIXES IF YOUR PHONE WON’T TURN ON

From fixing a dead phone that won’t turn or charge to flashing a new ROM, here’s your all-in-one guide on how to repair a dead Android phone.

An Android phone that won’t turn on or charge can be the most infuriating experience you’ll ever experience using a smartphone. While you can easily trace a faulty part of your phone to a certain component, it’s clearly uncertain to point out why you have a dead Android phone in the first place. This article will guide you through various tips and tricks on how to repair a dead Android phone.

There can be various reasons why your Android phone died and won’t turn on. However, it can be grouped into two categories: hardware damage, and software malfunctions. Inconsiderate of why your Android phone is dead, the fixes below will help you revive it. For most software issues, you can fix them on your own. But hardware problems may require technical assistance from a certified repairer.How To Repair Dead Android Phone That Won’t Turn on

Part 1: How to fix a dead phone that won’t turn on.

My phone died and won’t turn on or charge: try the fixes below to troubleshoot your dead Android phone.

1)    Fix the charging problem

If your phone died and won’t turn on or charge, the first thing to do is to troubleshoot the charging problem: your charger, USB cable, the charging port, and the power outlet.

At a non-technical level, you need to ensure your charger is delivering power to the phone. If not, your dead phone won’t turn on or charge. If you have any other working Android phone around you, try charging it with the original charger you’re using to charge your dead phone. If it doesn’t charge it, then the charger is faulty: you need to troubleshoot it first. Make sure you’re using the original charger that came with your phone or its equivalent, then try the fixes below to fix your charger

  • First, ensure the USB cable is firmly connected to the charging brick (charger), and to your phone.
  • Look into your phone’s charging port and ensure there’s no lint or dust inside it. If the port is dirty, try cleaning it first.
  • If it’s still not charging, try plugging the charger into another (working) wall outlet. If you’re not sure the power outlet (wall socket) is working, try plugging in another appliance, such as a lamp or tester, into it.

The steps above should fix your phone’s charging problem. If not, you can try using another original charger and USB cable marked with your phone. You can also try charging from the USB port on your computer.

2)    Keep charging the dead phone

After clarifying that your charger is working, the next solution on how to repair a dead Android phone is to charge your phone for a while. One of the common reasons why many users’ phones died and won’t turn on or charge is because the battery is drained to zero.

In that case, we recommend you plug in your phone with the working charger and let it charge for 30 minutes or up to 2 hours before try another solution. Doing so ensures your phone has enough battery juice to power it on.

If your phone has a charging indicator, make sure it’s working when your plug in the charger. And if you’re lucky, the screen may turn on when the battery is charging. Meanwhile, leave it to charge for at least 30 minutes or up to 2 hours before turning it on.

3)    Try to force restart your dead phone

If your dead android phone still won’t turn on or charge after plugging it to a working charger for 30 minutes, you should force it to restart. Doing so will close all the active sessions on your phone and restart it. Try any of these methods to force your dead Android phone to restart.

  • Press and hold the Power button for 8 – 10 seconds. OR,
  • Press the Power + Volume down (or up) button for 8 – 10 seconds.

4)     Is your screen Faulty?

Simply do a quick check-up before we move to some advanced troubleshooting to fix a dead phone that won’t turn on. If your phone normally vibrates or makes sounds when it’s powered on, you can use it to diagnose whether your screen is malfunctioning.

  • Long-press the Power button for 10 – 30 seconds (trying to force your phone to restart)
  • Wait for a few seconds to hear if your phone vibrates or make the boot-up sound.
  • Otherwise, wait for like 5 minutes, then ask someone to call you. If your phone rings, your screen is probably the problem.

If you find out your screen is at fault, you may need to visit a repair center to fix it first. More so, if none of the fixes above worked, you may need to visit the service center for battery replacement or further checkup. OR, try the advanced troubleshooting methods below on how to repair a dead Android phone.

Part 2: Check your dead phone with Multimeter

If you have a multimeter at home, you can use it to diagnose and know how to repair a dead Android phone. Meanwhile, this will require you to open the phone and check various components on the motherboard with a multimeter. So, if you’re not a professional repairer, its better you stay off that area. Just visit a repair center straight.

If you’re a professional mobile repairer, then you should know how to check dead mobile with a multimeter. The thing is, the reason why your phone is dead might not be totally power issues, but a minor hardware problem. But by checking the phone hardware with a multimeter, you can know where to fix the problem.

Part 3: Flash your dead Android phone

Why many people think about how to fix a dead Android phone only by troubleshooting the hardware, it’s not the only thing to do. As far as it’s concerned, your dead Android phone could be as a result of corrupted firmware or flashing of incompatible custom firmware. If that’s the problem, what you need to do is to re-flash your phone with the stock firmware.

Now, that could be an arduous task or risky task based on your past experience with flashing phones. Risky in the sense that: flashing your dead Android phone with the wrong firmware can brick your phone. Meaning it’ll render your phone useless forever.

Meanwhile, if you’re scared, it’s best to visit a professional technician to help you look into it. If you can do it yourself, all you need is a PC, original USB cable, the ROM (firmware) you want to flash, and the flash tool compatible with your phone.

How to flash a dead Android phone

Depending on who made your phone, ways of flashing Android phones differ. For example, how to fix dead boot MediaTek phones is different from flashing a dead Samsung phone. So, the best thing to do is search for how to flash your phone mode on Google. Here’s how:

  • Search for how to flash your phone on Google using this format: how to flash “brand name” + “phone model”.

For example, you can search for “how to flash TECNO CAMON 15”

  • Click on any of the results from a trusted website.
  • Download the required flash files (ROM, flash tool, and driver) on your computer.
  • Follow the flash guide strictly.

Part 4: Visit the official service center

Relax, you’ve tried enough. But unfortunately, if flashing a new ROM and trying all the fixes above cannot power on your dead Android phone, the last resort is to visit the official service provider for your brand.

Most times, the official service provider may help you repair your dead Android phone for free if the problem wasn’t caused artificially or through mishandling.

If you use a TECNO, Infinix, or itel smartphone, Carlcare is your best bet to repair a dead Android phone. They’re the official service provider for these brands, and they have professional engineers who can help you diagnose and repair your dead Android device. Visit any of their service centers near you for high-quality mobile repair service.

Why your phone isn’t charging and how to fix it

Have you ever come home after a long day to plug in your phone, only to find that it won’t charge? It’s a more common phone issue than you might think. The good news is that, in many cases, there’s a simple reason why this is happening and an easy solution to fix it.

Maybe your phone fails to start charging when you plug it into the wall, or it says it’s charging without adding to the battery bar. Whatever is happening when you try to charge your device, we’ll offer a few tips below that can help you find the right solution.

Why Does My Phone Not Charge?

If you’re wondering why your phone says it’s charging but it’s not responding to the cord and adapter, there are a few possibilities to explore. You may be able to address the issue on your own without having to replace the whole device.

For example, your charging issue could be as simple as a software glitch in your phone’s system. Perhaps dust, moisture or debris have started to build up in your charging port. In some cases, it may even be the fault of the charger or adapter rather than the phone itself.

There are several potential culprits that could be hindering your phone’s ability to charge. Once you know what they are, it’s often easy to troubleshoot and fix them.

How to Fix a Phone That’s Not Charging

If something is preventing your cell phone from charging and you suspect any of the above issues, consider using some of these quick fixes. You can try:

  • Turning it off and back on: The most obvious step is often one of the most effective. Before trying anything else, reboot your phone and see if that helps. If it’s a bug or glitch in the system, a reboot can return your device’s performance to normal.
  • Updating your device: You can also fix small software bugs by making sure your device is up-to-date. Updates are often designed to patch glitches that can cause performance issues.
  • Using a different charging cable: Charging cords wear out over time, and sometimes they can stop working altogether. Consider buying a different charger or using a spare to find out if that’s the root cause you’re looking for.
  • Cleaning out the charging port: If you suspect that your phone’s charging port has become clogged with dust or other particles, power down the device and look inside. Gently blowing on the port can loosen any particles that are in the way.
  • Making sure your phone is dry: Water or moisture can cause all types of performance issues with your phone. If moisture is the culprit, you may be able to dry the device by placing it in a bowl of rice overnight.

What Are Your Other Options?

What if you try all these tricks and your phone continues to resist a charge? It could be an issue with the device’s battery or hardware. Depending on the device, you may be able to buy a brand-new battery to maximize the life of your phone. If it’s another hardware issue, you may need to take it in for repairs or replacements.

Once you know what’s causing your phone’s charging issue, it’s up to you to decide how to handle it.

Common Mobile Phone Problems and How to Fix Them

Common Mobile Phone Problems and How to Fix Them
By Abraham Miller

Even now that smartphone technology seems to be near the climax, it’s not always perfect. And at some times, we wish not to face the common mobile phone problems like poor battery life, low storage space, low stamina, and others again. But thank goodness, you can fix common mobile phone problems in minutes, even consulting no one. And in this guide, we’ll run through various familiar smartphone issues, and we’ll recommend the quickest ways to fix them.

Ready? Get on the bus and let’s take you on a journey!

common mobile phone problems and how to fix

10 common mobile phone problems and how to fix them!
We’ve picked these 10 problems out of the lot since they’re the ones you likely may face while in entanglement with your tiny pocket machine.

  • Storage space running out
  • Poor battery life
  • A phone running sluggishly
  • Overheating
  • Connection problems
  • App or phone crashing
  • Blurry camera
  • An unresponsive phone
  • A phone that won’t turn on or charge
  • Hardware defects
  • Now, shall we delve into them and their possible fixes?

1. Storage space running out
One of the common mobile phone problems people still face to date is low storage space. It doesn’t matter if you’ve got a phone with 128GB of storage or more; your phone would certainly run out of capacity after storing a whole lot of things on it.

Well, the solution is that you almost don’t have to store anything on your phone, talk less of filling up the storage, in today’s era. Even if all you have is 32GB of storage or less, you can live happily without worrying about the messy “Storage space running out” notifications.

First, we’d recommend you scan your device with the Files by Google app from the Play Store. The app tells you everything taking up your phone storage and help you get rid of them comfortably.

Additionally, you should delete every app, video, and other files you don’t need on your device.

Continue by backing up your photos (and videos) to the cloud with Google Photos. Doing so allows you to delete the heavy local files to reduce storage usage. Not just that, your photos (and videos) remains in the cloud forever and syncs across all your devices that have your Google account signed into.

Finally, you may consider transferring your stuff to the SD card to reduce the stress on your phone storage. Of course, many phones in 2021 still offers expandable storage.

2. Poor battery life
We can’t but emphasize how beautiful it is to go all day without feeling frustrated to see the low battery warning.

And while your battery spec has more to say about having great battery life, it all boils down to how you use your phone – specifically the screen and other activities that may follow.

Start by lowering the screen’s brightness. You should see the brightness slider in the Quick Settings by swiping down twice from the top of your phone screen. The brighter your phone screen is, the faster it burns your battery.

And if you don’t want to keep adjusting the brightness in every lighting condition, you can enable Adaptive Brightness. That adjust your screen brightness automatically based on the lighting condition of your current environment. You can find the Adaptive Brightness (A) beside the brightness slider or via Setting > Display > Adaptive Brightness. Right there, also reduce your screen timeout to ensure your display is not using an extra battery when you’re not using it.

Additionally, if your phone has an AMOLED display – like the TECNO PHANTOM X – and it runs on Android 10 and above, turning on Dark Theme is another reliable way to reduce how much battery your screen uses.

And finally, if your battery is still dying fast, be sure to check these extra 15 tips to make your phone battery last longer. Or better still, you may check whether your phone’s battery is due for replacement.

3. A phone running sluggishly
For most of us, a slow-running phone is somewhat equivalent to having a bad day. But that shouldn’t be the case since you’re here.

And in most cases, fixing a slow-running phone is practising most of the tips we’ve said earlier and the later ones in this article. These include freeing up your phone storage, deleting apps you don’t need, reducing background tasks and apps, etc.

That’s not all; all the tips covered in our “how to fix a phone running slow” guide should help you out. But there’s one more thing: adjusting your phone’s animation duration can speed up your phone heavily.

You can’t find where to reduce your phone’s animation duration straight in the device settings app – you’ll need to delve into the developer options to see the little trick. Here’s how.

First, enable Developer option:

Open the Settings
Navigate to My Phone (or System → About Phone, depending on your OEM’s choice)
From there, find the tab labelled Build number and tap it 7 times.
You’ll receive a prompt to confirm your screen lock. Confirm it and wait to test your new trick.
Now, it’s time to reduce the animation speed:

Go back to the main Settings and select
Tap the Developers option from there.
Keep scrolling down till you get to the “Drawing”
Under it, you should see “Window animation scale,” Animator duration scale,” and “Transition animation.”
Tap them one after the other and change their parameters to “Animation 0.5x”
Your device should feel snappier now. You may also set the animation scale to “Animation off,” but that’d remove animations for your phone entirely.
Meanwhile, do not tinker with the developer settings if you don’t know what you’re doing. Playing with the wrong options may affect your user experience.

4. Overheating
While it’s acceptable for your smartphone to get warm while using it, that doesn’t mean it should feel like it has been in the oven for a while. Do you get it?

If your phone overheats while charging, try not to use it during that time. And, ensure you keep it under room temperature while charging.

Next, you want to ensure you don’t run apps that need high CPU and GPU for long hours. If you’re a game addict, ensure to take breaks between games sessions to allow your phone to cool off. Similarly, make sure you don’t have many heavy tasks running in the background.

After all, the takeaway is to allow your phone to rest once it’s getting hot. Using a hot phone continuously may cause more harm than good. And if the issue persists, however, you may need to see a technician.

5. Connection problems
Unlike most of these common mobile phone problems, the pain of having connection issues is nothing to write home about. But’s it’s what you can fix in under 2 minutes.

Whether you’re having a problem connecting to your mobile data, a Wi-Fi network, or a Bluetooth gadget, turning on Airplane mode for a least one minute is a reliable solution. Here’s how.

Locate the Airplane toggle in your Quick Settings panel.
Turn it on for at least 1 minute
Turn it off again, then try reconnecting to the network.
If that didn’t do the trick, we recommend you to restart your device or contact your network provider.

And of course, you can get more tips in our guide on “how to fix internet connection problem on your device”

6. App or phone crashing
App and phone crashing seem like that problem you can’t but come across on mobile phones, even if you’re using the most expensive phone out there. The reason is developers make changes, and sometimes it breaks things.

Even so, your phone caches some app data on your phone to use later. However, they cause apps to crash when corrupted. In that case, you need to clear the cache data for the specific app. Here’s how:

Locate the problematic app from your app drawer. Example:
Long press on its icon, then select “App info” (on some devices, they may represent the button with
From there, tap Storage & cache
Hit Clear cache.
Go back in one step and tap the Force Stop button to close the app. Then, try using the app to see if it misbehaves again. If yes, then you may need to tap the Clear data button as well.
Additionally, updating your apps and phone software, freeing up your phone storage, deleting unused apps, and all the tips mentioned in our “How to fix app crashing on Android” guide will help you get rid of the issue.

7. Blurry camera
It’s undeniable that smartphones have replaced Digital Cameras for many people. But it’s quite frustrating to see your phone taking mediocre pictures unexpected.

When such a thing happens, your phone’s camera lens (glass) might be dirty. All you need is to grab a piece of a soft cloth and wipe the camera glass.

If cleaning the lens is not the problem, however, it’s time to visit the technician.

8. A frozen/unresponsive phone
Imagine having your phone freeze up in the middle of an important task… I’ve been there, and it’s just one of the most frustrating common mobile phone problems out there.

And when your phone becomes unresponsive, there’s nothing you can do other than restarting it. But how do you restart your phone when the screen is completely frozen? We have a trick.

For most Android devices, long-pressing the power button for about 10 seconds or more will trigger it to restart. And when your device restarts, it fixes the hanging issue.

After your phone’s sense is restored via the hard restart, you should learn how to fix a frozen phone by yourself, so you won’t face the problem next time.

9. A phone that won’t turn on or charge
Another worst-case scenario of a smartphone issue is a phone that won’t turn on or charge. No matter how hard you try, the phone remains in its dumb state, feeling useless like a piece of brick.

When you face such a problem, though, you don’t have to panic. There are two things you need to troubleshoot – the charger/charging port and the phone itself.

Start by learning how to clean the charging port. Basically, you need to get a toothpick to remove the debris inside the charging port. Your phone may not charge when the charging port is faulty. But cleaning it gently could fix the problem.

After that, you’ll want to confirm your charger is working, then leave your phone to charge for a while. If the battery ran all the way to zero earlier, it might take a time to recharge. So, let it charge while you do other things.

If that didn’t fix the issue, check our complete guide on how to fix a dead Android phone that won’t charge or turn on.

10. Hardware defects
The last common smartphone problems we’ll mention here are hardware defects. These range from faults like poor battery life, broken screen, hardware sound problems, broken camera lenses, and many more.

As you presumably know, these are not the issues you can fix on your own. With that, you need to find the official repair centre for your brand to resolve the issues.


error

Enjoy KADIS.com.ng? Please spread the word